Showing posts with label crafting isle of wight. Show all posts

Monday, 18 April 2016

Bohemian Designer Series Paper Envelope Swaps from Stampin' Up! UK Demonstrator Sarah Poulton

Happy Monday lovelies. How was your weekend? Would you believe we were snowed on in Telford my Stampin' Up! weekend? We woke up Saturday morning to a settled layer of snow over everything. I definitely hadn't packed for snow. Luckily it all melted pretty quick and was replaced with lovely sunshine.

Today's crafty share is my choccie envelope swap I made for my teamies on Friday afternoon. My upline Michelle hosted a lovely crafty afternoon with a fab cream tea. We had games and a raffle (I was lucky enough to win a gorgeous SU handbag). We made a super lovely notecard set which I will share with you later in the week.

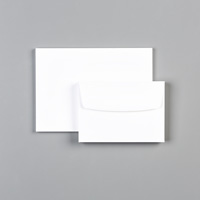
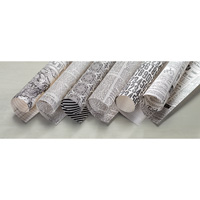
I created my teamie swap with the Bohemian Designer Series Paper cut in to 5" squares. I then created the smallest envelope (2" x 3") on the Envelope Punch Board. To create the pocket I simply didnt seal the top flap down.


I added the stamped heart and flower detail and wrapped my envelopes with Baker's Twine.


Thank you for popping by today. Please let me know if you have any questions about Stampin' Up!, or any of our products. I would love to help. All items can be purchased online via my shop or get in touch directly and I can order them for you to be delivered direct to your door. I'd also love to Demo for you and your friends at a crafty party. As the hostess you earn lots of lovely freebies and you all get to make a fun crafty project too (no crafting experience necessary!).

-XXX-

Monday, 10 August 2015

An Awesomely Artistic Scrapbook Page from Stampin' Up! UK Demonstrator Sarah Poulton

Good morning crafters.

Welcome to a new crafty week here at Stampin' Sarah HQ. It has been another busy weekend here on the Isle of Wight. I've been working hard getting the final projects prepped for next week's Christmas Craft Days as well as taking a break from cutting and sticking and sneaking off to Cowes yesterday for a few hours of Cowes Week boating fun (we indulged in a CBeebies show and an ice cream!).

I thought I would kick off a week of scrapbooking today. I have a whole series of Stampin' Up! inspired pages that I have been saving to share with you all.

Today's project is a great page to use with any size of photo. I know we all have oversized pictures lurking in our crafting stash. Whether it is professional pics from events or school pictures or just those oddly sized pictures we don't quite know what to do with. This sort of page is perfect as you can adapt the stamped frame to any size. Just stick your picture first and stamp second.


For this page I used a Very Vanilla card base. I layered my photo with Brushed Gold and Cherry Cobbler cardstock and glued this centrally.

I then used the Awesomely Artistic stamp set with Garden Green, Cherry Cobber, Crumb Cake and Encore Gold ink. I created these corner frames by layering the images over one another. I love the ink splat stamp as when I try to create actual splats I always get in a mess.

To finish I stamped flowers from the Petite Petals stamp set and punched with the matching punch. I stamped a gold dragonfly on to Vellum and embellished with Basic Pearls. I then added a bit of glitz and sparkle with Brights Sequins and Basic Pearls.


I have loved getting my scrapbooking head back on. I forget how much I enjoy traditional 12"x12" scrapping. Pop back on Wednesday for another scrappy share.

Thank you for popping by today. Please let me know if you have any questions about Stampin' Up! or our products. I would love to help. All items can be purchased online via my shop or get in touch directly and I can order them for you to be delivered direct to your door. I'd also love to Demo for you and your friends at a crafty party. As the hostess you earn lots of lovely freebies and you all get to make a fun crafty project too (no crafting experience necessary!)

 -XXX-
Built for Free Using: My Stampin Blog

Monday, 22 June 2015

A Watercolor Wings Swinging Card from Stampin' Up! UK Demonstrator Sarah Poulton

A very happy new week crafty friends. How was your weekend? I had a full house for my class on Saturday. We had a lovely time and my home baked Slimming World Orange and Raspberry Sponge went down well too.

I've got one of our crafty projects from the class to share this evening. I've seen a lot of these pop up swing cards around the blogosphere. I decided to showcase our beautiful new In Colors and create my own version.


For the measurements I used and the inspiration I used this blog post from a fellow Demo in Australia.


I created my card frame using Watermelon Wonder, Cucumber Crush and Whisper White.

I stamped the Watercolor Wings butterfly using Delightful Dijon, Cucumber Crush, Watermelon Wonder and Memento Black ink. I love how easy this is to line up using our fabulous photopolymer stamps.

For the inside of the card I created a frame using the squiggles from the Sweet Stack stamp set. I added the smaller butterflies and flowers from Butterfly Basics to cover the joins in the squiggles. The sentiment is from another new stamp set called Cottage Greetings.


I finished the card with an In Color Blossom. I love these little embellishments. Beautifully textured and coordinated.

Please let me know if you have any questions about Stampin' Up! or our products. I would love to help. All items can be purchased online via my shop or get in touch directly and I can order them for you to be delivered direct to your door. I'd also love to Demo for you and your friends at a crafty party. As the hostess you earn lots of lovely freebies and you all get to make a fun crafty project too (no crafting experience necessary!)

 -XXX-
Built for Free Using: My Stampin Blog

Tuesday, 3 March 2015

Birthday Bash Lined Berry Basket from Stampin' Up! UK Demonstrator Sarah Poulton

Good morning crafters. 

How was your weekend? I had a lovely crafty day out on Friday with Mum. We popped to the Make It show in Farnborough. So much lovely inspiration and crafts to have a go at. Mum and I tried our hands at block printing to create a tea towel. I love trying new things although I really don't have extra hours in the day for new crafts *lol* 

And did you see the new Sale-A-Bration products? What a great way to start the crafty week!


Today's crafty share is a little basket I created for my Monthly Card Class ladies. I used a base of Bermuda Bay cardstock with the Berry Basket Bigz Die. I then cut a second basket with Birthday Bash Designer Series Paper to line the inside of my basket.

To accessorise the basket I punched a bow using my Gift Bow Punch in coordinating Birthday Bash papers. 


Thank you for popping by today. You can find out more about the new Spring Summer Catalogue and Sale-A-Bration promotion by clicking here or by using the navigation menu on the left. This really is the most exciting time of the year to shop. New products and fantastic freebie rewards too. 

Please let me know if you have any questions about Stampin' Up! or our products. I would love to help. All items can be purchased online via my shop (click on the links below to find out more about specific products) or get in touch directly and I  can order them for you to be delivered direct to your door. 

-X-
Built for Free Using: My Stampin Blog

Wednesday, 25 February 2015

Painted Petals Birthday Card from Stampin' Up! UK Demonstrator Sarah Poulton


Good morning lovelies.

And how are you all this fine morning? I am up and ready early again today as I had to get the girls ready before work. No better time to enjoy a cuppa and a bit of blogging (and I'm catching up with Call the Midwife on tv too).

This card was inspired by a beautiful creation I saw on Sarah-Jane's blog. I love this double stamping shadow effect. You stamp your images first with White Craft Ink and leave to dry thoroughly (or in the case of my class ladies we heat blasted it with a heat tool to speed along the process). You then slightly offset the image and stamp again in your chosen colour. I used Elegant Eggplant and Old Olive.

Stamping over the top of the white ink is made easier with photopolymer. By being able to see through the stamp you are able to get a good idea of where you are stamping before putting ink to your cardstock.


The greeting is taken from the free Sale-A-Bration set, Big Day (still one month to take advantage of Sale-A-Bration- receive a chosen freebie with a £45+ spend). I stamped the sentiment in Elegant Eggplant and coloured the inside of the letters with my White Chalk Marker.

Thank you for popping by today. You can find out more about the new Spring Summer Catalogue and Sale-A-Bration promotion by clicking here or by using the navigation menu on the left. This really is the most exciting time of the year to shop. New products and fantastic freebie rewards too. 

Please let me know if you have any questions about Stampin' Up! or our products. I would love to help. All items can be purchased online via my shop (click on the links below to find out more about specific products) or get in touch directly and I  can order them for you to be delivered direct to your door. 

-X-

Built for Free Using: My Stampin Blog

Monday, 16 February 2015

A Big Sketched Birthday Bash Scrapbook Page from Stampin' Up! UK Demonstrator Sarah Poulton


Good morning and a very Happy Monday to yoiu. What a beautiful weekend we had here on the Isle of Wight. I took the girls for a walk yesterday in the beautiful sunshine. With a smattering of bulbs pushing through the soggy ground and sun blazing down it feels like Spring is just around the corner.

I have another scrapbook page to share with you today. I wanted to create a simple birthday layout with the gorgeous gold foiled Birthday Bash Speciality Designer Series Papers in the Spring Summer catalogue. I knew they would be a perfect match with the Sketched Birthday stamp set. 

I used a Whisper White 12"x12" base and then created a Daffodil Delight strip (12"x4") which I stamped with the images from Sketched Birthday. I used the colours from the DSP as my theme: Bermuda Bay, Calypso Coral, Crushed Curry and Tangelo Twist.


I then created my banner using the Banner Framelit Dies and offcuts of the Birthday Bash DSP. I arranged my photos first (layered over a 4.25"x6.25" piece of DSP) then positioned my banners before glueing. I added small embellishments to my banners including Brights Buttons, glimmer paper stars punched with my Itty Bitty Accents Star Punch and Candy Dots.

To finish I added my title. I cut the 'Happy' using my Hello You Thinlits and the 'Birthday' was cut from Gold Foil card using my Little Letters Thinlits.


I hope you enjoyed my crafty make today. The pictures are from Summer's 2nd birthday last year. She loves balloons of all shapes and sizes so I knew the lovely gold foiled Speciality Papers with the ballooon design would be a perfect accent for my scrapbook page. Birthday season is nearly upon my again. I am in the process of starting my planning for Sylvie next month and Summer in May. Where does the time go?

Thank you for popping by today. You can find out more about the new Spring Summer Catalogue and Sale-A-Bration promotion by clicking here or by using the navigation menu on the left. This really is the most exciting time of the year to shop. New products and fantastic freebie rewards too. 

Please let me know if you have any questions about Stampin' Up! or our products. I would love to help. All items can be purchased online via my shop (or click on the links above to find out more about specific products) or get in touch directly and I  can order them for you to be delivered direct to your door. 

-XXX-

Friday, 13 February 2015

An All Abloom Scrapbook Page from Stampin' Up! UK Demonstrator Sarah Poulton


Happy Friday Crafters.


Today's project proved impossible to photograph. So please be assured this scrapbook page was squared and centred. But in photographing and cropping the layout went a bit awry.


I had seen a page on Pinterest that was laid out in a similar manner and knew it would be perfect for using up little scraps of the gorgeous All Abloom Designer Series Paper Stack from Stampin' Up!.


I chose my two pictures and decided to create a smaller 10"x 8" rectangle within my 12"x12" Very Vanilla base. I trimmed my pictures to the size I wanted (4"x6" and 3.75" x 4") and then created my squares and rectangles from varying floral patterned papers in measurements to create my 10" x 8" rectangle.


I then doodled my dashed line around the edge of my DSP rectangle using a Strawberry Slush marker and a ruler. I then went through my stash and added floral focal points on each of my DSP pieces. Now sadly a lot of these are either retired Stampin' Up! or generic floral embellishment from my scrapping stash. However, the embellishments in the above picture are taken from the gorgeous Spring Summer Catalogue Artisan Embellishment Kit. I used the pink tinted floral trim and the gorgeous deeper pink Crochet Trim too. This is such a gorgeous kit for creating beautiful vintage cards and scrapbook pages.

Thank you for popping by today. You can find out more about the new Spring Summer Catalogue and Sale-A-Bration promotion by clicking here or by using the navigation menu on the left. This really is the most exciting time of the year to shop. New products and fantastic freebie rewards too. 

Please let me know if you have any questions about Stampin' Up! or our products. I would love to help. All items can be purchased online via my shop (or click on the links above to find out more about specific products) or get in touch directly and I  can order them for you to be delivered direct to your door. 

-XXX-

Wednesday, 28 January 2015

Painted Blooms Mini Treat Bag from Stampin' Up! UK Demonstrator Sarah Poulton


Hello crafters.

Welcome to Wednesday. Be sure to pop on over to my Online Store and check out this week's Weekly Deals. My favourite of this weeks offers is definitely the Envelope Liner Framelits. Perfect for adding that touch of luxury to any handmade card.

Today's crafty share is a project we made at this month's Stampin' Up! Isle of Wight card class using the brand new Mini Treat Bag Thinlits Die and Painted Blooms Designer Series Paper.

I absolutely adore this DSP and the die shows off the bold floral designs perfectly. The Thinlits set comes with the main bag and then extra die cut words and embellishments too. It is a perfect little set for creating table settings or little birthday gifts. The possibilities are endless as to how you can personalise this gift bag.


I punched the little tag using the Note Tag punch and then embellished with the For You and little bow die cut using the Mini Treat Bag Thinlits Die.

The ribbon is from the super lovely Sale-A-Bration Best Year Ever Accessory Pack. Which could be yours for free if you spend £45 (so if you purchase the Thinlits Die [£35.95] and the Painted Bloom DSP [£9.95] you could choose the ribbons for free!).

You can find out more about the new Spring Summer Catalogue and Sale-A-Bration promotion by clicking here or by using the navigation menu on the left. This really is the most exciting time of the year to shop. New products and fantastic freebie rewards too. 

Please let me know if you have any questions about Stampin' Up! or our products. I would love to help. All items can be purchased online via my shop (or click on the links above to find out more about specific products) or get in touch directly and I  can order them for you to be delivered direct to your door. You can get in touch on poulton_sarah@yahoo.co.uk or 01983 609249.

-XXX-

Tuesday, 16 December 2014

A quartet of button bauble cards from Stampin' Up! UK Demonstrator Sarah Poulton


Good morning and a very happy December 16th to you lovely crafty friends.

I had a moment of panic this morning when I realised how many festive projects I still have to share with you in just over a week. I want all my festive projects posted before Christmas so that from Boxing Day onwards I can start giving you lots of lovely sneak peeks of all the loveliness to come in the Spring Summer catalogue and Sale-A-Bration (both kicking off January 6th!).

So this week pop back every day for lots of lovely Christmas-y projects. Remember both the Autumn Winter Catalogue and Supplement are only available to order from until January 5th. So while it may be a little late for your Christmas crafting this year, if there is that must have stamp or accessory, order now and tuck away for next years crafty preparations. All items can be ordered via my online store:


Just click Shop in the top right corner.


So today's festive projects are these quick and simple button bauble cards. I am a total button-aholic. I adore using brightly coloured buttons in all my crafting. So when I saw a similar card on Pinterest using just buttons and a pen for doodling the string I had to give it a go.

I used a pot of Brights Designer Series Buttons secured with Glue Dots to create the baubles at different heights. I tried all sorts of colour combinations including multi-coloured and single tone. I loved them all. I needed to make a quick batch of 10 for all the lovely ladies in my Hostess Club (click on the Virtual Club tab above to find out more. I have a new club starting in January and I would love to welcome you to the Club! Drop me a line on poulton_sarah@yahoo.co.uk to book a spot now and make the most of Sale-A-Bration!).


I doodled the ribbon using my Basic Black Stampin' Write Marker. The greeting is from the Good Greetings stamp set which is currently available to purchase through the Online Clearance Rack for the bargain price of £8.99!

I also tried making a couple with the gorgeous Nordic Designer Buttons from the Autumn Winter catalogue.


Such an effective but quick card to make. We all have buttons lying around our stash. And to make life even simpler I used the Stampin' Up! prescored notecards (with envelopes) to speed up the process.

If you have any questions about today's project or the products I have used, please get in touch on poulton_sarah@yahoo.co.uk or 01983 609249. You can order online direct through my store by clicking the product links below. I also have availability in the next few months for your very own crafty party so drop me a line to find out more and get your date in the diary.

Happy Crafting
-X-

Monday, 8 December 2014

A quick Candy Cane December Wonder Tag Swap from Stampin' Up! UK Demonstrator Sarah Poulton

 Good morning from a sunny and crisp Isle of Wight. How was your crafty weekend?

We've returned from a lovely festive weekend away enjoying the Christmas festivities (such as the gorgeous Winchester Christmas Market) and meeting with old and new friends. And of course, the Sale-A-Bration sneak peek event on Thursday. I had a fab time chatting to fellow Demonstrators and looking at the inspiring projects on display. And I was lucky enough to win a prize patrol (a lovely Sale-A-Bration stamp set which you can exclusively add to your orders for free in January, February and March). Add to that the excitement of the Demonstrator pre-order sneak peek of the new Spring Summer catalogue and you have a perfectly crafty and super exciting Stampin' Up! weekend.


Today I wanted to share with you the swaps I made to share with my fellow Stampin' Up! Demonstrators. Swapping is one of the best parts of Stampin' Up! events. I love the inspiration that can be gained from swapping as you see products used in new and exciting ways. I wanted to create something fun and festive so came up with these candy cane tags.


I used my Scallop Tag Topper Punch to create the basic tag (2" wide x length of your candy cane) from Crumb Cake cardstock. I then cut two slots (2cm between the two slits) to slip the Candy Cane through. To embellish I stamped the 'Hello December' from the December Wonder stamp set in Cherry Cobbler ink. I stamped the tree from the same set and doodled stitching with my Cherry Cobbler Stampin' Write marker around the edge.


To finish I tied the Candy Cane to the tag with 1/8" Real Red Taffeta Ribbon. Oh and I added a Champagne Glimmer Paper star to the top of the tree (any sparkly star embellishment or coloured glitter glue would look fab).

And now to share a few of my favourite swaps I received in return (apologies to my fellow Demonstrators as I don't have the swaps with me as I type so cannot give credit. Credit to follow).

I loved this neat little Merry Christmas wall hanging. Complete with curled wire to hang it up with:


I love the colours of this Wondrous Wreath swap:


And I was a bit conflicted by the Visions of Santa stamp set when I first saw it and it is not one I own. But I absolutely loved receiving this swap using the set.


Thanks for stopping by today and for sharing in my December crafty festivities.

Be sure not to miss the Year End Closeout bargains on the Clearance Rack. Some fantastic bargains to be had. But stock only available while supplies last so get your order in quick so as not to miss out! Click the image below to link straight through to the products available at great prices.


If you have any questions about today's project or the products I have used, please get in touch on poulton_sarah@yahoo.co.uk or 01983 609249. You can order online direct through my store by clicking the product links above or the pictures below. I also have availability in the next few months for your very own crafty party so drop me a line to find out more and get your date in the diary.

Happy Crafting
-X-

Friday, 5 December 2014

A Wondrous Wreath Thank You from Stampin' Up! UK Demonstrator Sarah Poulton


Good morning a very Happy December 5th to you.

I recently made a large batch of these thank you cards for my November customers as a big thank you for their Christmas crafting custom.

I love the versatility of the Wondrous Wreath stamp set. It doesn't just have to be your traditional red and green Christmas wreath. I stamped this in Soft Sky, Island Indigo and Encore Silver ink and then embellished with Basic Rhinestones.


The 'Thanks' stamp is from the Another Thank You Photopolymer stamp set (stamped here in Island Indigo).

I hope you have a lovely festive weekend planned wherever you are. I am hoping to be catching up on my December Journal to share my pages with you next week. I will certainly have lots of lovely things to journal after our lovely trip away and of course sharing creativity with my fellow Demo's yesterday at our regional event in Basingstoke.

 If you have any questions about today's project or the products I have used, please get in touch on poulton_sarah@yahoo.co.uk or 01983 609249. You can order online direct through my store by clicking the product links above. I also have availability in the next few months for your very own crafty party so drop me a line to find out more and get your date in the diary.

Happy Crafting
-X-

Monday, 1 December 2014

Virtual Hostess Club Mini Easel Gift from Stampin' Up! UK Demonstrator Sarah Poulton


Good morning and very warm welcome from the Isle of Wight on this fine and mild December 1st morning. Today signals the official start to the festive countdown. Already today I have hung my 12 Days of Christmas cross stitch and both the girls are in the first of several (many!) Christmas outfits. I'm also going to be starting my Project Life December album today (pictures to come- woohoo!)

I have a special project to share with you today. This was a bit of a labour of love as I made 10 of these little mini easels for my virtal hostess club ladies to go with their November orders. I wanted a little decorative gift (this was my inspiration). Something a bit different to contribute to their festive preparations. I picked up the mini easels from my local The Works store.

Then came the fun bit, decorating and designing. I used the Typeset Designer Series Speciality Paper as my base. I gave it this antique aged effect with Soft Suede ink and a Stamping Sponge. 


I then stamped the flourishes and leaves (both from retired Christmas stamp sets). 

To create my Punch Art Poinsettia I punched lots of Cherry Cobbler wings from the Bird Punch and glued together in a circle layering on top of one another using Glue Dots (I also lightly daubered the edges with Cherry Cobbler ink). I then punched a Cherry Cobbler flower using the Petite Petals Punch which I curved with my Bone Folder for the top layer. For the flower centre I used three tiny Basic Pearls which I coloured with my Daffodil Delight Blendabilities Markers.


The final detail was the 'Joy' which I punched in Cherry Cobbler on to Old Olive cardstock using my Epic Alphabet stamp set. I then cut this and glued to my canvas. I finished with a bit of doodling with my Basic Black Stampin' Write marker and a mini star punched from Champagne Glimmer Paper.

I sprayed the whole canvas with Smooch Spritz to give it a sparkly festive sheen. However, this has not come out in the photographs. You'll just have to take my word for it that these canvases are lovely and sparkly.

I hope you've enjoyed my festive share today. I am so excited to start my December album with you more in the week. Keep your fingers crossed I can get the girls to sleep early enough to crack on with Day 1.

If you have any questions about today's project or the products I have used, please get in touch on poulton_sarah@yahoo.co.uk or 01983 609249. You can order online direct through my store by clicking the product links above or the pictures below. I also have availability in the next few months for your very own crafty party so drop me a line to find out more and get your date in the diary.

Happy Crafting
-X-