Showing posts with label isle of wight card classes. Show all posts

Friday, 29 May 2015

Painted Petals Tealight Gift Box Thank You from Stampin' Up! UK Demonstrator Sarah Poulton


Painted Petals has been by far my favourite of all the Spring Summer catalogue products and I will be sad to see it go on June 2nd. I love the effect  of the two step stamping (and how much easier it is now you can line up the photopolymer stamps through your acrylic block).

This project is inspired by the amazing Bronwyn Eastley. I absolutely loved the simplicity of this little tealight gift box. A perfect little thank you for a teacher or loved one. 

The inside of the gift box with the little scented tealight:


I do enjoy a bit of fussy cutting from time to time. I loved raising this little rose to add dimension to the front of the gift box.


Thank you for popping by today. Don't forget to check out this week's Weekly DealsPlease let me know if you have any questions about Stampin' Up! or our products. I would love to help. All items can be purchased online via my shop or get in touch directly and I can order them for you to be delivered direct to your door. I'd also love to Demo for you and your friends at a crafty party. As the hostess you earn lots of lovely freebies and you all get to make a fun crafty project too (no crafting experience necessary!)

 -XXX-
Built for Free Using: My Stampin Blog

Monday, 18 May 2015

Crazy About You Typeset Papercut Birthday Card from Stampin' Up! UK Demonstrator Sarah Poulton

Happy Monday crafters.

What a weekend. I spent Friday and Saturday with my fantastic Stampin' Up! team and friends. It is one of my favourite things about being a Demonstrator. Sharing inspiration and ideas with lots of other fellow Demos from around the country. At our Telford Regional there are lots of opportunities to win prizes (I was very lucky and won a prize patrol from the new catalogue!) as well as sample display boards, lovely lunch and swaps with friends.


I wanted to share another birthday project with you today. I made this for my sister earlier in the month. I have become a little obsessed with a new hobby- papercutting (a long process but very therapeutic and fun). I used a template to cut the quill which I mounted on to Rich Razzleberry.

I used a Typeset Speciality Designer Series Paper layer over a Champagne Glimmer Paper layer (unfortunately this is now sold out so could be substituted for Gold Glimmer).


For the greeting I used my Crazy About You Bundle. I cut the 'Happy' with the Hello You Thinlits and then matched this with the 'Birthday' from the Crazy About You stamp set.


My sister loves to read and to write stories.  So I matched her quill card with a folded book (another of my FAB new hobbies). I used a template created by Anna Marie Book Art on Etsy.


And here is the framed paper cut I also made for my sister. Template by the amazing Paper Panda.


Pop back later in the week and I'll share some of the amazing swaps I received at Telford as well as share a few little sneak peeks too.

Thank you for popping by today. Please let me know if you have any questions about Stampin' Up! or our products. I would love to help. All items can be purchased online via my shop or get in touch directly and I can order them for you to be delivered direct to your door. I'd also love to Demo for you and your friends at a crafty party. As the hostess you earn lots of lovely freebies and you all get to make a fun crafty project too (no crafting experience necessary!)

 -XXX-
Built for Free Using: My Stampin Blog

Wednesday, 25 February 2015

Painted Petals Birthday Card from Stampin' Up! UK Demonstrator Sarah Poulton


Good morning lovelies.

And how are you all this fine morning? I am up and ready early again today as I had to get the girls ready before work. No better time to enjoy a cuppa and a bit of blogging (and I'm catching up with Call the Midwife on tv too).

This card was inspired by a beautiful creation I saw on Sarah-Jane's blog. I love this double stamping shadow effect. You stamp your images first with White Craft Ink and leave to dry thoroughly (or in the case of my class ladies we heat blasted it with a heat tool to speed along the process). You then slightly offset the image and stamp again in your chosen colour. I used Elegant Eggplant and Old Olive.

Stamping over the top of the white ink is made easier with photopolymer. By being able to see through the stamp you are able to get a good idea of where you are stamping before putting ink to your cardstock.


The greeting is taken from the free Sale-A-Bration set, Big Day (still one month to take advantage of Sale-A-Bration- receive a chosen freebie with a £45+ spend). I stamped the sentiment in Elegant Eggplant and coloured the inside of the letters with my White Chalk Marker.

Thank you for popping by today. You can find out more about the new Spring Summer Catalogue and Sale-A-Bration promotion by clicking here or by using the navigation menu on the left. This really is the most exciting time of the year to shop. New products and fantastic freebie rewards too. 

Please let me know if you have any questions about Stampin' Up! or our products. I would love to help. All items can be purchased online via my shop (click on the links below to find out more about specific products) or get in touch directly and I  can order them for you to be delivered direct to your door. 

-X-

Built for Free Using: My Stampin Blog

Wednesday, 28 January 2015

Painted Blooms Mini Treat Bag from Stampin' Up! UK Demonstrator Sarah Poulton


Hello crafters.

Welcome to Wednesday. Be sure to pop on over to my Online Store and check out this week's Weekly Deals. My favourite of this weeks offers is definitely the Envelope Liner Framelits. Perfect for adding that touch of luxury to any handmade card.

Today's crafty share is a project we made at this month's Stampin' Up! Isle of Wight card class using the brand new Mini Treat Bag Thinlits Die and Painted Blooms Designer Series Paper.

I absolutely adore this DSP and the die shows off the bold floral designs perfectly. The Thinlits set comes with the main bag and then extra die cut words and embellishments too. It is a perfect little set for creating table settings or little birthday gifts. The possibilities are endless as to how you can personalise this gift bag.


I punched the little tag using the Note Tag punch and then embellished with the For You and little bow die cut using the Mini Treat Bag Thinlits Die.

The ribbon is from the super lovely Sale-A-Bration Best Year Ever Accessory Pack. Which could be yours for free if you spend £45 (so if you purchase the Thinlits Die [£35.95] and the Painted Bloom DSP [£9.95] you could choose the ribbons for free!).

You can find out more about the new Spring Summer Catalogue and Sale-A-Bration promotion by clicking here or by using the navigation menu on the left. This really is the most exciting time of the year to shop. New products and fantastic freebie rewards too. 

Please let me know if you have any questions about Stampin' Up! or our products. I would love to help. All items can be purchased online via my shop (or click on the links above to find out more about specific products) or get in touch directly and I  can order them for you to be delivered direct to your door. You can get in touch on poulton_sarah@yahoo.co.uk or 01983 609249.

-XXX-

Friday, 19 December 2014

All is Calm Paper Mug for Christmas from Stampin' Up! UK Demonstrator Sarah Poulton


Hello crafty friends. Can you believe it is only 6 days until Christmas? Are you ready? I have all my gifts but haven't even thought about wrapping anything yet (I always leave this to the last possible moment as I am not the world's most accomplished wrapper of gifts!) I also have a couple of pressies to finish off that I am making. Time has really run away with me this year!!

I thought I would share a quick little gift idea that we made at Saturday's card class. I found a tutorial on Youtube for this fab little paper mug made by a Demo friend of mine, Traci. We made the base mug using Naturals White cardstock which we then covered with lovely festive papers from the All is Calm Speciality Designer Series Paper set.


We filled it with a KitKat and a sachet of gingerbread cappucino to celebrate this season of hot drinks on cold nights.

Thank you for popping by today. I'll have another festive creation for you tomorrow. If you have any questions about today's project or the products I have used, please get in touch on poulton_sarah@yahoo.co.uk or 01983 609249. You can order online direct through my store by clicking the product links below. I also have availability in the next few months for your very own crafty party so drop me a line to find out more and get your date in the diary.

Happy Crafting
-X-

Friday, 28 November 2014

A very Happy Wonderful Christmas Card from Stampin' Up! UK Demonstrator Sarah Poulton


Good morning crafters!

Hope you are having a lovely crafty week. I had a rare day of craftiness yesterday as my Mum and Dad took Summer to visit my grandparents on the mainland. I managed to make 40 swaps for a Stampin' Up! Sale-A-Bration event next week and a retirement card for my lovely chiropractor (both projects I will share next week). So all in all a very productive day.

Today's card share is the project we made at my November craft parties. I combined the Festival of Trees stamp set with a strip of Trim the Tree Designer Series Paper. The sentiment is stamped in Cherry Cobbler ink and is taken from the Wondrous Wreath stamp set.

I love the two step stamping effect (made so much easier with the new photopolymer stamps) of the tree with baubles. I added an extra dimension by first stamping the baubles in Gold Encore then stamping over the top in Cherry Cobbler ink (slightly off setting the baubles).

To finish I punched a star using my Itty Bitty Accents star punch from Champagne Glimmer Paper.

This is a great card to reproduce quickly and easily. Perfect for all those cards for family, friends and colleagues. 

Don't forget to check out this weeks fab Weekly Deals by clicking the image below.

Thank you for popping by today. I hope you enjoyed today's crafty festive project. I'll have another project to share tomorrow so please come back to see what else I've been creating.

If you have any questions about today's project or the products I have used, please get in touch on poulton_sarah@yahoo.co.uk or 01983 609249. You can order online direct through my store by clicking the product links above or the pictures below. I also have availability in the next few months for your very own crafty party so drop me a line to find out more and get your date in the diary.

Happy Crafting
-X-
Wednesday, 26 November 2014

Stars, Sleighs and Christmas Cheer Card from Stampin' Up! UK Demonstrator Sarah Poulton


I was hopping around Pinterest last week (as you do) and came across this amazing card by the very talented Teneale Williams (her blog is a must for some very inspiring ideas and techniques for using SU products). I had to give a Stampin' Sarah spin (I didn't have all the products required for a direct CASE).

I just loved the simplicity and the tone on tone Cherry Cobbler. When it comes to Christmas crafting, you can never have too much Cherry Cobbler I say. It is my number 1 must have for cards and festive creations. So matching my Cherry Cobbler cardstock base with the gorgeous Under the Tree Speciality Paper was a prefect combination (Under the Tree is actually a very thick and sturdy card perfect for Christmas box making!).

I daubered the edges of the Cherry Cobbler layer and then layered my Under the Tree piece with Brushed Gold cardstock. I created the edging with my Scallop Edge Punch from Champagne Glimmer Paper. 

For the main image I cut a star using my Stars Framelits Dies from Crumb Cake cardstock. I stamped the sleigh image from the Holiday Home stamp set in Basic Black and doodled the stitching around the star using my Cherry Cobbler Stampin' Write marker. The sentiment and frame is from the Project Life December Wonder stamp set (a perfect addition to any Christmas scrapbookers stamp collection),


The final touch was a little Cherry Cobbler star (punched using the Itty Bitty Accents punch) and some swirly Linen Thread.

I just absolutely love the original and I love my Stampin' Sarah'd version too. I have to say a big thank you to Teneale for the inspiration.

And just before I go, don't forget to check out this weeks fab Weekly Deals by clicking the image below.

Thank you for popping by today. I hope you enjoyed today's crafty festive project. I'll have another project to share tomorrow so please come back to see what else I've been creating.

If you have any questions about today's project or the products I have used, please get in touch on poulton_sarah@yahoo.co.uk or 01983 609249. You can order online direct through my store by clicking the product links above or the pictures below. I also have availability in the next few months for your very own crafty party so drop me a line to find out more and get your date in the diary.

Happy Crafting
-X-

Tuesday, 25 November 2014

Fun Sweety Elf Leg Hanger Decoration from Stampin' Up! UK Demonstrator Sarah Poulton


I love this quick and easy little Christmas make. The picture above makes me think of two cheeky elves leaning against a wall getting in to mischief.

I designed this project for our monthly card class this past Saturday and the ladies all enjoyed making these cheeky little chaps (or their legs at least).

This all came about when I was shopping in my local 99p shop and came across these sherbet and jelly sticks. I knew they would work perfectly as Elf Legs. I've placed the sweeties in to the Stampin' Up! 1"x8" Cello Bags (although these ready packaged sweets don't necessarily need them). So instead of these sticks you could use multicoloured choccies or jelly sweets.


To create the shorts I cut a Top Note from Old Olive and folded in half. I used my Chalk Marker to add the stitched detail. The shoes were cut from a Real Red Top Note shape. And to finish I added Gold Foil button details to the shorts and to the boots and Gold Ribbon around the ankles.

Today sees the launch of a fantastic recruiting promotion from Stampin' Up! You can join my team and get started with your Stampin' Up! business with a fantastic 25% off the £99 Starter Kit (for one week only!). What a great deal! I'd love to welcome you to my team of Inkin' Owls. You can find out more by clicking the 'Join my Team' tab above or get in touch with me directly for more information.

If you have any questions about today's project or the products I have used, please get in touch on poulton_sarah@yahoo.co.uk or 01983 609249. You can order online direct through my store by clicking the product links above or the pictures below. I also have availability in the next few months for your very own crafty party so drop me a line to find out more and get your date in the diary.

Happy Crafting
-X-

Wednesday, 20 August 2014

Isle of Wight Christmas Craft Day: Stampin' Up! Catalogue CASE Star Framelit Card

Good morning crafters and welcome to Wednesday.

Busy busy busy here. Seem to have a lot of crafty mojo floating around the Isle of Wight at the moment. I have been creating decorations for Sylvie's upcoming Christening using up lots of odds and ends of gorgeous Stampin' Up! ribbons (I'll share photos soon). I've also started working on Summer's handstitched Christmas stocking again (I actually took it in to hospital when I was pregnant with Summer! It has been nearly 3 years in the stitching). And today I am off for a big baking session with my Mum to freeze some bits ready for the Christening party. 

But back to paper craftiness. Here is a Stampin' Up! Star Framelit card we created at my Christmas Craft Days.


 I CASED this card design from the Annual Stampin' Up! Catalogue (Page 135). I loved this stand out 3D star and the glitziness of the added Glimmer Paper.


Here is the card in the catalogue:


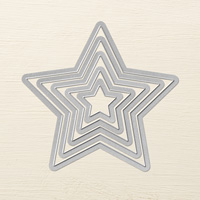
My version of the card uses an Early Espresso cardbase created using two of the largest Star Framelits and taped together at the top. I then cut a Brushed Gold Star with a smaller star cut from the centre (I used the Magnetic Platform. I scored each point and folded the star to stand up. By placing a Dimensional in each point it helps the star to stay 3D. I layered the Brushed Gold star over a smaller star cut from Champagne Glimmer Paper.

I cut the Banner using the Bitty Banners Framelits Die and stamped using the More Merry Messages stamp set in Gold Encore Ink.

I love the dimension of this card and such a simple design to use as a decoration, gift tag or greeting card. And by simply changing the colour scheme it can be used for any occasion.

Just a reminder, all carryover items from last years Autumn Winter catalogue are only available to order until August 27th. Click on this link to see the stamps, punches and accessories only available for one more week. 

Please let me know if you have any questions about this project. You can get in touch via email: poulton_sarah@yahoo.co.uk or 01983 609249. I'm more than happy to help. All Stampin' Up! products can be ordered through my online store by clicking the product links above or the pictures below. Or get in touch and I'll happily place an order for you.

Happy Crafting
-X-