Showing posts with label craft party. Show all posts

Monday, 22 February 2016

A Birthday Blooms Celebration with Stampin' Up! UK Demonstrator Sarah Poulton

A belated Happy Monday to my crafty friends.

Well what a weekend it has been. Spent the weekend in London with Sam. We had tickets to a Walking Dead convention at Olympia. We are huge fans of the show so spent the weekend geeking out at the panels and perusing the horror and sci fi stalls. We also indulged in some shopping and eating in central London with a trip to Bubba Gumps (Forrest Gump themed chain restaurant). 

Now that doesn't begin to explain my late posting today though. I lost most of today to a migraine!!! I had the project all lined up to share but spent most of today curled up in the dark. Thankfully I've slept off the worst of it and I am ready to share my craftiness for the day.

This is a project I made for a recent crafty Stampin' Up! party I demonstrated at. The project seemed to go down really well. This stamp set, Birthday Blooms, has proved super popular amongst my regular class attendees. I just love the swirly sentiments.

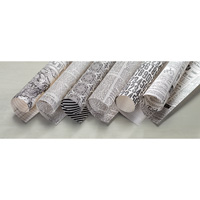
For this card I used a 10.5x21cm Whisper White card base (scored at 10.5cm). I used a strip of Rose Red cardstock layered with a piece of Love Blossoms Designer Series Paper (from the Spring Summer catalogue).


I positioned my paper strips and then stamped my line of hearts in Rose Red.

Once these layers were adhered I punched my 2" circles from Rose Red cardstock and then layered this with Botanical Gardens Vellum (a Sale-A-Bration freebie item). As you can see I struggled a bit with my glue dot positioning  and should have moved them to hide underneath my flower a bit better. A note to remember for next time.

To finish I stamped my sentiment and stamped the flower in Memento Black ink and used my Blender Pen to colour in Blushing Bride and Wild Wasabi.


Thank you for popping by today. Pop back on Wednesday when I'll be giving you a little sneak peek of this months card class projects. Please let me know if you have any questions about Stampin' Up!, Sale-A-Bration or any of our new products. I would love to help. All items can be purchased online via my shop or get in touch directly and I can order them for you to be delivered direct to your door. I'd also love to Demo for you and your friends at a crafty party. As the hostess you earn lots of lovely freebies and you all get to make a fun crafty project too (no crafting experience necessary!).

-XXX-

Product List

Friday, 2 October 2015

Reason for the Season meets Thankful Forest Friends from Stampin' Up! UK Demonstrator Sarah Poulton

Happy Friday crafters.

What will your weekend have in store? I am hoping to put my feet up with a cuppa and get some stitching done. I have a few Christmas cards to finish stitching as well as a couple of practice embroidery kits I got at the Kirsty Alsop show a couple of weeks back. Fingers crossed I get a few minutes to have a go.

Today I have a Thank You card I made by combining Thankful Forest Friends and Reason for the Season stamp sets.

I created the background by layering the outline and leaf/petal stamps in a random pattern over my Whisper White layer. I used a 21cm x 14.9cm card base (scored at 10.5cm). I then created a WW layer 10cm x 14.4cm.


For my sentiment layer I cut the Cherry Cobbler layer at 7cm x 4cm. The Whisper White layer which I punched in the corners with the new Trio Corner Punch was 6.5cm x 3.5cm.

I wanted a simple Thank You sentiment to accompany a Hostess Gift so I used my Stampin' Write markers for some creative colouring. I changed the Thankful Forest Friends 'Thankful for You' stamp in to Thank You simply by selectively colouring my stamp. I used the same direct stamp colouring for the multicoloured finished image (leaves and flourish).

I finished with Regals Candy Dots and mounted my sentiment layer on to Dimensionals.


Thank you for popping by today. Please let me know if you have any questions about Stampin' Up! or our products. I would love to help. All items can be purchased online via my shop or get in touch directly and I can order them for you to be delivered direct to your door. I'd also love to Demo for you and your friends at your own crafty party. As the hostess you earn lots of lovely freebies and you all get to make a fun crafty project like this one too (no crafting experience necessary!)

 -XXX-
Built for Free Using: My Stampin Blog

Wednesday, 5 August 2015

More fun with Layered Letters from Stampin' Up! UK Demonstrator Sarah Poulton

Happy Wednesday. How has your week been so far? I've got the week off work so have been enjoying family fun. Yesterday we went to a new farm that has opened locally with a fantastic playbarn with a huge bounce pillow. It was exhausting. But I slept well after all that trampolining and chasing Summer about.  

I've been having fun creating with the Layered Letters stamp set. I created these for a recent crafty party for the ladies to have a go at. I gave them the examples and left them to create their own greetings.

I chose  the ink pad colours to match the Cherry On Top Designer Washi Tape: Cucumber Crush, Delightful Dijon and Watermelon Wonder.


I used the Whisper White notecards with matching envelopes for my card base. Once I had decided on my word/greeting I then stamped and matched with matching sentiments from the Endless Birthday wishes stamp set.


Today's new Weekly Deals are live so hop on over to see what lovelies you can pick up for bargain prices. I especially love the gold ribbon which is perfect for the upcoming festive season.

Thank you for popping by today. Please let me know if you have any questions about Stampin' Up! or our products. I would love to help. All items can be purchased online via my shop or get in touch directly and I can order them for you to be delivered direct to your door. I'd also love to Demo for you and your friends at a crafty party. As the hostess you earn lots of lovely freebies and you all get to make a fun crafty project too (no crafting experience necessary!)

 -XXX-

Built for Free Using: My Stampin Blog

Monday, 13 July 2015

Garden In Bloom Candle Gift Set from Stampin' Up! UK Demonstrator Sarah Poulton

It is a new crafty week at Stampin' Sarah HQ and a fun week of craftiness ahead with classes and crafty get togethers. I had a lovely weekend catching up with some Stampin' Up! friends and sharing the new catalogue and all the goodies contained within with them.


Now the party is over I can share with you the candle I made as my Hostess thank you gift. I have gotten a bit carried away with the Garden In Bloom stamp set recently. Everything I have been stamping seems to feature this lovely triple stamping set.


I created these two candles using the tissue paper technique. I stamped the floral images on to white tissue paper and then wrapped the tissue around my candle and held in place with tightly wrapped greaseproof baking paper. I then used my heat tool to melt the wax a little and soak the tissue paper in to the candle. Such a simple technique but perfect for all occasions.

For the blue tone floral candle I used Memento Black, Pool Party, Marina Mist, Old Olive and Daffodil Delight ink to stamp my flowers and leaves.


I was really pleased with the way the candles turned out. My second attempt was a little more detailed and I forgot that the ink was still wet on my craft table so it all got a bit smudged. But Summer absolutely loved it and has adopted the bumble bee and butterfly candle as her own.

If you pop back on Wednesday I will share the matching thank you card and packaging for this card. I had so much fun designing the cute little set for my hostess at the weekend. Half the fun of prepping for a Stampin' Up! party is coming up with the gift set for my hostess.

Thank you for popping by today. Please let me know if you have any questions about Stampin' Up! or our products. I would love to help. All items can be purchased online via my shop or get in touch directly and I can order them for you to be delivered direct to your door. I'd also love to Demo for you and your friends at a crafty party. As the hostess you earn lots of lovely freebies and you all get to make a fun crafty project too (no crafting experience necessary!)

 -XXX-

Built for Free Using: My Stampin Blog

Friday, 20 February 2015

From The Herd Yo Yo Spinner Card from Stampin' Up! UK Demonstrator Sarah Poulton


Good morning and welcome to the weekend. As I only work part time my weekend with the girls starts on a Thursday evening. And to celebrate I got 5 minutes in my craft room last night to have a go at creating one of these fab 3d Yo Yo Spinner Cards using the From The Herd stamp set in the Spring Summer catalogue.

I absolutely adore these little farm animals and they are perfect for practising your Blendabilities colouring with.  I deliberately went for a scribbly feel to my colouring with this card. I felt it added to the fun childlike quality. And also scribbly fur for the bison/cow gives a bit of texture too.

I won't go in to the minute details of how to recreate the yo yo spinner as I found this fantastic tutorial over on Splitcoast Stampers that gives you detailed instructions.


All you have to do is pull the thread on the card to make your 3d element (in this case the pigs head) spin around. It is a fun little extra on your card perfect for children or loved ones. The possibilities are endless as to which elements you could make spin from flower heads to sunshine to absolutely anything.


I thought I would include a close up of the colours of the animals. I used a mix of Skin Tone, Melon Mambo, Crumb Cake, Smoky Slate, Daffodil Deligh, Wild Wasabi and Night of Navy Blendabilities Markers to create my card. It took a little time to colour but I love the childlike scribbly effect. And don't forget if you spend £45 during Sale-A-Bration (ending March 31st) you can pick a set of Blendabilities pens for free!

I hope you have a lovely weekend planned. It  is my monthly card class tomorrow and I am looking forward to seeing all my lovely ladies again for another fun afternoon session of crafting.

Thank you for popping by today. You can find out more about the new Spring Summer Catalogue and Sale-A-Bration promotion by clicking here or by using the navigation menu on the left. This really is the most exciting time of the year to shop. New products and fantastic freebie rewards too. 


Please let me know if you have any questions about Stampin' Up! or our products. I would love to help. All items can be purchased online via my shop (or click on the links above to find out more about specific products) or get in touch directly and I  can order them for you to be delivered direct to your door. 


Built for Free Using: My Stampin Blog

Monday, 2 February 2015

Another Thank You meets Work of Art from Stampin' Up! UK Demonstrator Sarah Poulton


Good morning and a Happy New Crafty Week to you!


How was your weekend? It was so cold here on the Isle of Wight. A lot of my plans with the girls were scuppered by the cold so instead we just stayed in the warm and did a bit of crafting instead. I got my new wood burning tool out of the box (a Christmas pressie) and had a practice at burning some scraps of wood. It wasn't perfect but very enjoyable.

So today's quick crafty make is a Thank You card I made for one of my party hostesses this month. Jan absolutely loves all things purple. So I designed her thank you note with that in mind.

The colour scheme is Wisteria Wonder and Elegant Eggplant. I combined the Another Thank You stamp set with the paint splash from Work of Art. The butterfly embellishments are from the fantastically versatile Perpetual Birthday Calendar stamp set. And it was all finished with 3 of the largest Basic Jewels.


Thank you for popping by today. You can find out more about the new Spring Summer Catalogue and Sale-A-Bration promotion by clicking here or by using the navigation menu on the left. This really is the most exciting time of the year to shop. New products and fantastic freebie rewards too. 

Please let me know if you have any questions about Stampin' Up! or our products. I would love to help. All items can be purchased online via my shop (or click on the links above to find out more about specific products) or get in touch directly and I  can order them for you to be delivered direct to your door. 

-XXX-

Saturday, 31 January 2015

Painted Blooms Notebook from Stampin' Up! UK Demonstrator Sarah Poulton


Good morning crafty friends and a very Happy Weekend to you!

I'm posting a day later than usual. I got a bit sidetracked yesterday morning placing the order for Thursdays's fab Sale-A-Bration party and I completely forgot to finish writing today's post. So I am having a bloggy catch up while watching Downton Abbey (how did I miss watching this before? I am totally hooked!).

So here is today's crafty share a bit later than anticipated. This is the gift I made as a thank you for my January party hostesses (personalised for each hostess). I always like to make a handmade thank you on top of the amazing benefits offered by Stampin' Up! 

I made this notebook by covering an A4 journal with some gorgeous (but sadly retired) patterned Kraft cardstock (you can still purchase plain Kraft in the catalogue and stamp a design yourself). I then cut floral designs from the gorgeous (and hugely popular amongst my customers this month) Painted Blooms Designer Series Paper and layered over an Elegant Eggplant label cut using the Apothecary Accents Framelits.


I personalised the label with letters cut from Silver Glimmer Paper using my Little Letters Thinlits Dies.

If you would like to book your own crafty party for you and your friends and family and receive a special handmade gift from me as well as fantastic Sale-A-Bration and Hostess freebies from Stampin' Up! then please get in touch on poulton_sarah@yahoo.co.uk or 01983 609249. I have dates available through February and March  and would love to come and show you Stampin' Up!'s fantastic range of craft supplies.

You can find out more about the new Spring Summer Catalogue and Sale-A-Bration promotion by clicking here or by using the navigation menu on the left. This really is the most exciting time of the year to shop. New products and fantastic freebie rewards too. 

Please let me know if you have any questions about Stampin' Up! or our products. I would love to help. All items can be purchased online via my shop (or click on the links above to find out more about specific products) or get in touch directly and I  can order them for you to be delivered direct to your door. 

-XXX-

Thursday, 18 December 2014

Festival of Trees Christmas Card Fun from Stampin' Up! UK Demonstrator Sarah Poulton


Good morning lovelies.

Here is the card I tried to share with you last week but somehow got lost in the publishing ether when I tried to schedule it.

This is a gorgeous card inspired by the very talented (and very lovely) Vicky over at Crafting Clare. I loved her clean and simple use of the Festival of Trees stamp set combined with the Typeset Speciality Papers and wanted to give it my own Stampin' Sarah spin.

I used Naturals Ivory card stock layered over a Very Vanilla cardbase. I used my acrylic block to stamp a rectangular background in Whisper White Craft Ink (I loved this naturals layering tone on tone).


For the tree I stamped the Festival of Trees image on to a scrap of Typeset DSP in Mossy Meadow Ink. I then hand cut as the paper is too thin and lovely to be used with the coordinating punch. I then glued to my card and embellished with Brights Candy Dots (I love how these look like bright twinkly tree lights). I then finished by stamping the tree pot in Daffodil Delight and the greeting in Real Red (which I coloured with my Stampin' Write marker so as to only use a section of the sentiment).

Thank you for popping by today. I'll have another festive creation for you tomorrow. If you have any questions about today's project or the products I have used, please get in touch on poulton_sarah@yahoo.co.uk or 01983 609249. You can order online direct through my store by clicking the product links below. I also have availability in the next few months for your very own crafty party so drop me a line to find out more and get your date in the diary.

Happy Crafting
-X-

Wednesday, 17 December 2014

Glitter Napkin Robin Card from Stampin' Up! UK Demonstrator Sarah Poulton


Good morning crafters ;0) And a very happy Wednesday to you (you know what that means? New Weekly Deals over on my website!). Nearly the weekend. And this time next week it'll be Christmas Eve *hooray*

Today's crafty share is a project we created at this month's final Christmas card class. I always get a bit sad packing away my festive stamp sets. But with the new Spring Summer products just around the corner I won't have time to miss Christmas for long.

So this card uses the tissue paper technique that I have seen all over the blogs and internet recently. It is perfect for using those favourite festive napkins to make in to beautiful cards.

I found these robin napkins in a local garden centre and knew my crafty ladies would love them. So I set about designing this card.


To create this card I first cut my card layers (I layered Brushed Gold over a Cherry Cobbler base). I then cut my top layer to layer the napkin on to. I covered the whole piece of cardstock with glue using the Stampin' Up! Transfer Adhesive Sheets. I then carefully pressed the napkin on to the adhesive making sure to position the image to get the whole robin on to the card. I pressed the tissue down to ensure it was completely adhered all over.

Once you have your napkin layer I pressed my Versamark inkpad all over the napkin layer and covered with Iridescent Ice Stampin' Emboss Powder and heat embossed to give the glitter sheen over the whole image. Once the embossing is set, you have your finished card and can embellish as desired. We created the little banner and stamped with the greeting from the Wondrous Wreath stamp set.

Thank you for popping by today. I'll have another festive creation for you tomorrow. If you have any questions about today's project or the products I have used, please get in touch on poulton_sarah@yahoo.co.uk or 01983 609249. You can order online direct through my store by clicking the product links below. I also have availability in the next few months for your very own crafty party so drop me a line to find out more and get your date in the diary.

Happy Crafting
-X-

Friday, 5 December 2014

A Wondrous Wreath Thank You from Stampin' Up! UK Demonstrator Sarah Poulton


Good morning a very Happy December 5th to you.

I recently made a large batch of these thank you cards for my November customers as a big thank you for their Christmas crafting custom.

I love the versatility of the Wondrous Wreath stamp set. It doesn't just have to be your traditional red and green Christmas wreath. I stamped this in Soft Sky, Island Indigo and Encore Silver ink and then embellished with Basic Rhinestones.


The 'Thanks' stamp is from the Another Thank You Photopolymer stamp set (stamped here in Island Indigo).

I hope you have a lovely festive weekend planned wherever you are. I am hoping to be catching up on my December Journal to share my pages with you next week. I will certainly have lots of lovely things to journal after our lovely trip away and of course sharing creativity with my fellow Demo's yesterday at our regional event in Basingstoke.

 If you have any questions about today's project or the products I have used, please get in touch on poulton_sarah@yahoo.co.uk or 01983 609249. You can order online direct through my store by clicking the product links above. I also have availability in the next few months for your very own crafty party so drop me a line to find out more and get your date in the diary.

Happy Crafting
-X-

Wednesday, 26 November 2014

Stars, Sleighs and Christmas Cheer Card from Stampin' Up! UK Demonstrator Sarah Poulton


I was hopping around Pinterest last week (as you do) and came across this amazing card by the very talented Teneale Williams (her blog is a must for some very inspiring ideas and techniques for using SU products). I had to give a Stampin' Sarah spin (I didn't have all the products required for a direct CASE).

I just loved the simplicity and the tone on tone Cherry Cobbler. When it comes to Christmas crafting, you can never have too much Cherry Cobbler I say. It is my number 1 must have for cards and festive creations. So matching my Cherry Cobbler cardstock base with the gorgeous Under the Tree Speciality Paper was a prefect combination (Under the Tree is actually a very thick and sturdy card perfect for Christmas box making!).

I daubered the edges of the Cherry Cobbler layer and then layered my Under the Tree piece with Brushed Gold cardstock. I created the edging with my Scallop Edge Punch from Champagne Glimmer Paper. 

For the main image I cut a star using my Stars Framelits Dies from Crumb Cake cardstock. I stamped the sleigh image from the Holiday Home stamp set in Basic Black and doodled the stitching around the star using my Cherry Cobbler Stampin' Write marker. The sentiment and frame is from the Project Life December Wonder stamp set (a perfect addition to any Christmas scrapbookers stamp collection),


The final touch was a little Cherry Cobbler star (punched using the Itty Bitty Accents punch) and some swirly Linen Thread.

I just absolutely love the original and I love my Stampin' Sarah'd version too. I have to say a big thank you to Teneale for the inspiration.

And just before I go, don't forget to check out this weeks fab Weekly Deals by clicking the image below.

Thank you for popping by today. I hope you enjoyed today's crafty festive project. I'll have another project to share tomorrow so please come back to see what else I've been creating.

If you have any questions about today's project or the products I have used, please get in touch on poulton_sarah@yahoo.co.uk or 01983 609249. You can order online direct through my store by clicking the product links above or the pictures below. I also have availability in the next few months for your very own crafty party so drop me a line to find out more and get your date in the diary.

Happy Crafting
-X-