Thursday 28 August 2014

New Autumn Winter Catalogue, Exciting News and a little bit of Partridge & Pears Festive Crafting from Stampin' Up!

 Good morning and too many exciting things to share with you this morning:

1) The new Autumn Winter Catalogue is now LIVE! You order direct through my online store by clicking here or by dropping me an email on poulton_sarah@yahoo.co.uk. View the full catalogue by clicking on the image below.


2) With the launch of the fantastic new seasonal catalogue comes the launch of a fantastic new hostess promotion. Host a party anytime between now and October 31st and receive the Good Greetings stamp set for free (with sales of £200+). That is in addition to the usual hostess benefits.


So for a £200 sales party you will receive a handmade gift from me for hosting, £30 to spend on any products you like from the catalogue and the Good Greetings stamp set too! All this and a fun evening of craft and creating with your friends. There really hasn't been a better time to host a Stampin' Up! party. I have availability through September and October, so get in touch today to book your date: poulton_sarah@yahoo.co.uk or 01983 609249.

If you do not live locally to me (on the Isle of Wight) I would be happy to set up a Facebook online crafty party. If you pop an email over to me we can have a chat about how to get started with hosting an online social.

3) For 3 more days you can order the Big Shot Bundles or order your Big Shot and receive a bundle for free. Click my Promotions tab above for more information.


And to celebrate the launch of the new Autumn Winter catalogue I wanted to share this fun Block Stepper Card I created for my August Card Class. 


As you've probably realised I am completely addicted to my Blendabilities and colouring my stamped images. I'm by no means an expert when it comes to colouring but I enjoy experimenting with the colours to see what effects I can come up with. So when I opened my copy of the new catalogue you can imagine my delight when I came across the Partridge & Pears stamp set. I love colouring all the elements of this image.


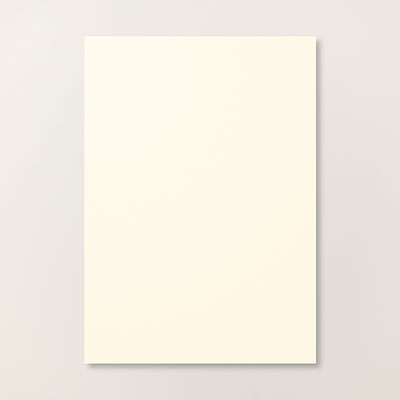
This card was made using a Cherry Cobbler card base measuring 12" x 4-1/2" (scored at 1-1/2" intervals in both directions). I followed these instructions created by the lovely Eveline as to how to cut and fold the card base.

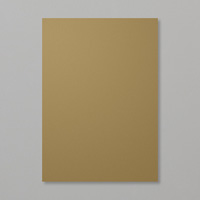
I then decorated with 1-1/4" squares of Champagne Glimmer Paper and 1-1/8" squares of Trim the Tree Designer Series Paper (a fantastic little paper stack with 48 sheets of 11.4 x 16.5cm Christmas paper for the bargain price of £6.25).

The image was then stamped in Memento Black ink and coloured with my Daffodil Delight, Old Olive, Crumb Cake, Cherry Cobbler and Smokey Slate Blendabilities.

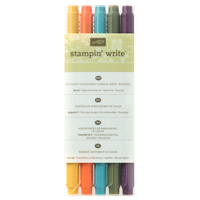
The Merry Christmas is stamped using the fab Good Greetings stamp set (receive free for hosting a party don't forget!)


Please let me know if you have any questions about this project. You can get in touch via email:poulton_sarah@yahoo.co.uk or 01983 609249. I'm more than happy to help. All Stampin' Up! products can be ordered through my online store by clicking the product links above or the pictures below. Or get in touch direct and I'll happily place an order for you.

Happy Crafting
-X-

Wednesday 27 August 2014

Magic Christmas Slider Card using Stampin' Up!'s Joyful Christmas: IOW Christmas Craft Day


I was going through all my photos this morning deciding which new project to share with you today. I decided I had better share this fab Magic Slider Card as it uses the gorgeous Joyful Christmas stamp set which is only available to purchase until 10pm tonight. All items from the Autumn Winter 2013-2014 catalogue carryover list are only available till this evening and then are retired for good. This was my favourite stamp set for making Christmas cards last year and I could never part with this beautiful poinsettia. 

This Magic Slider Card was one of the showstopper projects at my Christmas Craft Day earlier in the month.


We used a Cherry Cobbler cardstock base measuring 5" x 6-1/4" (scored along the long side at 3" and 6"). We punched a hole in the front using the 1-3/4" Circle Punch. We created a pocket inside using a piece of Whisper White cardstock measuring 3"x4" (you only glue down the sides to create a pocket over which you can layer your sliding element (the coloured tag goes behind and the Window Sheet tag goes in front). 


I create two identical sized tags measuring 2"x 5-1/2" using the Scallop Tag Topper Punch. One tag was created using Whisper White and the other using part of a Window Sheet. I stamped the Whisper White cardstock with the Poinsettia image using my Tuxedo Black Memento Ink Pad. I then positioned my Window Sheet tag over the top and secured with a post-it note. Using my Stamp-A-Ma-Jig (perfect positioning tool!) I positioned the Poinsettia image exactly over the Whisper White stamped image and stamped on to the Window Sheet using Black Staz-On.

It is important to remember that the Staz-On dries on the Window Sheet and won't smudge and the Memento Ink is especially formulated for colouring with Blendabilities.

We coloured the Whisper White tag with my Cherry Cobbler and Daffodil Delight Blendabilities to give the magic effect when the two tags are pulled up (the key is to make sure the coloured tag sits behind the Whisper White pocket and the Window Sheet in front). The two tags were secured together with a length of Gold Satin Ribbon.


We decorated the outside sleeve with a Cherry Cobbler stamped Poinsettia and the Joyful Christmas Wishes stamped with Encore Gold ink. We coloured three large Basic Rhinestones with a Cherry Cobbler Blendabilities Marker for the final embellishment.


Don't forget, all orders from the Autumn Winter Catalogue 2013-2014 Carryover List must be completed today as tomorrow we welcome a whole new season of exciting new festive products.

Today also sees 7 new Weekly Deals launched over on my online store. Don't miss these great discounted products. Now is a perfect time to stock up on Gold Foil Sheets ready for all things Christmas-y.


Please let me know if you have any questions about this project. You can get in touch via email: poulton_sarah@yahoo.co.uk or 01983 609249. I'm more than happy to help. All Stampin' Up! products can be ordered through my online store by clicking the product links above or the pictures below. Or get in touch direct and I'll happily place an order for you.

Happy Crafting
-X-


Monday 25 August 2014

Shades of Blue Celebration Cards using Stampin' Up! Bravo and Zoo Babies

Good morning and welcome to a very British soggy Bank Holiday Monday. I had grand plans for walking and car-booting today. Sadly I think the rain has put those plans on hold. Might have to craft instead. What a shame ;0)

What have you been up to this weekend? I have been busy with family and craftiness (it was my monthly card class this weekend- projects to be shared later in the week! I'll give you a little clue, more festive sneak peeks!). But I did also manage to grab a few minutes for a couple of quick celebration cards.

My first celebration was a Congratulations card for a member of my jewellery team who promoted last week. I wanted to send her a little note in the post to say a huge well done as she only joined my team on Monday!


I love the oversized sentiments in the Bravo Photopolymer stamp set from Stampin' Up! and knew they would make a perfect congratulations card. I used an Island Indigo cardstock base layered with Coastal Cabana and Whisper White. I coloured the stamp using my Tempting Turquoise, Island Indigo, Lost Lagoon, Pool Party and Bermuda Bay Stampin' Write Markers.

To create the layered stars I punched using my Itty Bitty Accents Punch Pack star punch and Dazzling Diamonds Glimmer Paper. I layered the sparkly star over Coastal Cabana and Island Indigo stars.


 And while I had my blues out on my craft desk I also created a new baby card for a friend who recently celebrated the arrival of her son. I stamped the animal images from the Zoo Babies stamp set. I masked each animal with a post it note to make sure I layered the animals carefully on top of one another.

My colour scheme for this card was Island Indigo, Tempting Turquoise, Lost Lagoon and Marina Mist.

I created the bunting using the Banner Punch layered with circles stamped with the Simply Serif Mini Alphabet and punched with the 1/2" Circle Punch.


So all in all I had a very shades of blue crafty weekend. I will be back on Wednesday with more Christmas craftiness. I have all the lovely projects from this months card class to share as well as the remaining projects from my Christmas Craft Days too.

Please let me know if you have any questions about this project. You can get in touch via email: poulton_sarah@yahoo.co.uk or 01983 609249. I'm more than happy to help. All Stampin' Up! products can be ordered through my online store by clicking the product links above or the pictures below. Or get in touch and I'll happily place an order for you.

Happy Crafting
-X-


Friday 22 August 2014

Isle of Wight Christmas Craft Day: Stampin' Up! Vintage Sparkle Top Note Gift Box

 Good morning and a very Happy Friday to you! What are your weekend plans? It is looking a little murky and grey here today but we are still planning on a walk when the littlest one wakes up. I will then be finishing off all my prep for tomorrow's monthly card class. Christmas is well and truly in full flow here at Stampin' Sarah HQ. All of our card class projects are featuring exclusive sneak peak products from the new Autumn Winter catalogue. I cannot wait to share some of the new products with you and get you in the festive swing. In the mean time, if you would like your own copy of the upcoming seasonal catalogue, please drop me a line on poulton_sarah@yahoo.co.uk.


So here is today's crafty share. This is a gift box we made at this years Christmas Craft Kick Off days. I had seen this video tutorial over on Dawn Griffiths blog and knew it could be modified to create a beautiful gift box for jewellery, cash or gift cards. It went down a storm with my crafty ladies who all had their own plans to go home and recreate this box for gifts they already had in their stash for Christmas.

This box uses a simple fold out box template for the inside and it is then accessorised with two Top Notes shapes cut from Very Vanilla (the edges trimmed off one side).

I created the front cover using the gold striped design papers from the Gold Soiree Speciality Designer Series Paper pack. I ran a strip of the paper through the Big Shot making sure to line the strip up with the points of the Top Note Die. I then punched a strip of Champagne Glimmer Paper using the Dotted Scallop Ribbon Border Punch which I attached underneath the striped paper layer.


I used a length of crochet trim to secure the box shut (I used a little tape under the trim to keep it attached to the box). I used a retired trim for this box but the Venetian Crochet Trim would work perfectly. I created the central embellishment using Soft Suede, Very Vanilla and Brushed Gold Cardstock and the 1 3/4" Scallop Circle Punch with the 1 1/4" Circle and 1 3/8" Circle. The Star was cut using the smallest Star Framelits Die.

The Happy Christmas was stamped using Gold Encore ink using a stamp from the More Merry Messages stamp set. The final flourish I added were small stars punched from Glimmer Paper with the Itty Bitty Accents punch (and embellished with Basic Pearls and Rhinestones).

And here is a little reminder that each Wednesday Stampin' Up! launch a new set of Weeky Deals via my Online Store. This week's bargain products are pictured below. To purchase click on the photo below to be linked through to my store to make your purchase.


Please let me know if you have any questions about this project. You can get in touch via email: poulton_sarah@yahoo.co.uk or 01983 609249. I'm more than happy to help. All Stampin' Up! products can be ordered through my online store by clicking the product links above or the pictures below. Or get in touch and I'll happily place an order for you.

Happy Crafting
-X-