Showing posts with label Joyful Christmas. Show all posts

Wednesday, 27 August 2014

Magic Christmas Slider Card using Stampin' Up!'s Joyful Christmas: IOW Christmas Craft Day


I was going through all my photos this morning deciding which new project to share with you today. I decided I had better share this fab Magic Slider Card as it uses the gorgeous Joyful Christmas stamp set which is only available to purchase until 10pm tonight. All items from the Autumn Winter 2013-2014 catalogue carryover list are only available till this evening and then are retired for good. This was my favourite stamp set for making Christmas cards last year and I could never part with this beautiful poinsettia. 

This Magic Slider Card was one of the showstopper projects at my Christmas Craft Day earlier in the month.


We used a Cherry Cobbler cardstock base measuring 5" x 6-1/4" (scored along the long side at 3" and 6"). We punched a hole in the front using the 1-3/4" Circle Punch. We created a pocket inside using a piece of Whisper White cardstock measuring 3"x4" (you only glue down the sides to create a pocket over which you can layer your sliding element (the coloured tag goes behind and the Window Sheet tag goes in front). 


I create two identical sized tags measuring 2"x 5-1/2" using the Scallop Tag Topper Punch. One tag was created using Whisper White and the other using part of a Window Sheet. I stamped the Whisper White cardstock with the Poinsettia image using my Tuxedo Black Memento Ink Pad. I then positioned my Window Sheet tag over the top and secured with a post-it note. Using my Stamp-A-Ma-Jig (perfect positioning tool!) I positioned the Poinsettia image exactly over the Whisper White stamped image and stamped on to the Window Sheet using Black Staz-On.

It is important to remember that the Staz-On dries on the Window Sheet and won't smudge and the Memento Ink is especially formulated for colouring with Blendabilities.

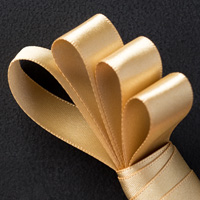
We coloured the Whisper White tag with my Cherry Cobbler and Daffodil Delight Blendabilities to give the magic effect when the two tags are pulled up (the key is to make sure the coloured tag sits behind the Whisper White pocket and the Window Sheet in front). The two tags were secured together with a length of Gold Satin Ribbon.


We decorated the outside sleeve with a Cherry Cobbler stamped Poinsettia and the Joyful Christmas Wishes stamped with Encore Gold ink. We coloured three large Basic Rhinestones with a Cherry Cobbler Blendabilities Marker for the final embellishment.


Don't forget, all orders from the Autumn Winter Catalogue 2013-2014 Carryover List must be completed today as tomorrow we welcome a whole new season of exciting new festive products.

Today also sees 7 new Weekly Deals launched over on my online store. Don't miss these great discounted products. Now is a perfect time to stock up on Gold Foil Sheets ready for all things Christmas-y.


Please let me know if you have any questions about this project. You can get in touch via email: poulton_sarah@yahoo.co.uk or 01983 609249. I'm more than happy to help. All Stampin' Up! products can be ordered through my online store by clicking the product links above or the pictures below. Or get in touch direct and I'll happily place an order for you.

Happy Crafting
-X-


Thursday, 19 December 2013

Stampin' Up! UK Gold Glittery Joyful Christmas


Good morning all.

Today's crafty make is a card inspired by one I saw on the Convention inspiration boards, I just loved the Gold Stampin' Glitter, a product I had previously overlooked in the Autumn Winter catalogue. It is super sparkly (and so is my craft room and living room after the class).

I loved creating the layers for this card using Brushed Gold cardstock, Whisper White and Vellum. The Whisper White layer is stamped with Crumb Cake using the En Francais background stamp (a firm favourite in my household). The flowers from the Joyful Christmas stamp set were first stamped with Versamark (after thoroughly brushing the Vellum with my Embossing Buddy) and then covered with Heat and Stick Powder. I then blasted the powder with my heat tool and then poured the lovely sparkly glitter over the sticky outlines. I then gave a quick final blast to heat set the glitter. 

With a new seasonal catalogue just around the corner and Christmas less than a week away I might have to pack away my beloved Joyful Christmas stamp set. This must be one of my all time favourite stamp sets and I'm actually missing crafting with it already. But I am sure once I get my hands on the new seasonal products, festive crafting will be long forgotten ;0)

And look what just arrived through my post box. My beautiful cross stitched card from my partner in the Isle of Wight cross stitched card exchange. I shared my card here, U was delighted when this arrived. I loved that the cross stitch element can be detached and hung from the tree and kept as a keepsake (I love collecting Christmas tree decorations with a story and a bit of history).


And one last thing, look who is enjoying the festivities so far. Here is my (very grown up) little girl enjoying a day out at my grandparents house on the mainland. She definitely mastered the art of Christmas Crackers (and she is also a big fan of mince pie eating too- well the mincemeat at least!).


Please get in touch if you have any questions or queries about Stampin' Up!, I'd be only too happy to help: poulton_sarah@yahoo.co.uk or 01983 609249.

Happy Festive Crafting ;0)
-X-

Tuesday, 3 December 2013

Stampin' Up! UK Envelope Punch Board Christmas Creations


Hello and welcome to another Christmas crafty day here at Stampin' Sarah ;0)

I thought I would welcome you with a picture of the 2, 3 and 4 tins from Summer's handmade Advent Calendar. She is loving discovering her chocolates each day. And the lucky little thing also has a whole other calendar with treats at Nana's (as well as a Christmas tree decorated in Love Hearts! I notice the sweetie treats are being moved further and further up the tree each time I visit. Clearly Summer is becoming more inventive in the ways she tries to get at the treats!).

Today''s crafty makes are from a party I planned for the weekend just gone for my lovely friend Wendy. Would you believe I got struck down with a nasty 24 hour bug on Thursday and wasn't able to Demo for the ladies?! But I sent the projects round for them to create themselves (which I am very thankful for as I didn't like having to let them down at late notice!) and from what I hear they did a stirling job of creating these Punch Board creations.


Both the tag and cracker are created using the fabulous Envelope Punch Board. I found this brilliant video on Youtube that gave lots of fabulous ideas on making tags with the Board. My ladies at parties have all been impressed that all parts of the tag can be made with the Punch Board alone. 

Here is the tag and little holder to keep it in:


The tag was stamped using the Joyful Christmas stamp set and embellished with the Frosted Finishes Embellishments.

Here is a close up of the cracker. This again was a Youtube video tutorial that inspired this make. I had seen so many of these Punch Board crackers at Convention and wanted to have a go. They really are incredibly simple to make and come together so quickly.  


For more information on my favourite Stampin' Up! tool, the Envelope Punch Board, click on the picture below to be linked to my online store to read all about this incredible little board of creativity.


Thanks for popping by today. Please say hello and leave a comment. I have set myself a target to find new blogs to read throughout December, so leave me a comment and I'd love to stop by and say hello.

And if you'd like to find out more about any of the Stampin' Up! products used for today's creations please drop me a line on poulton_sarah@yahoo.co.uk or 01983 609249. Or alternatively pop by my online store which you can find here:


Happy Crafting ;0)
-X-

Friday, 15 November 2013

Stampin' Up! UK Joyful Christmas Gift Set


Good morning all. How has your crafty week been? I'm busy prepping today for the Cowes Christmas Fair tomorrow kicking off at 10.30am. I have two lovely make and take projects for you to complete. One design for children to have a go at and another for adults. Would be lovely to see you and I would love to say a festive hello.


My creative make for today uses the Merry Little Christmas Simply Created Card Kit from the Autumn Winter catalogue. I had received a sample as part of a Demonstrator sample swap of all the items in the new catalogue and when I came across this card blank in my stash I wanted to give it a go. I love the colour palette of this kit and all the elements that make up these lovely cards. The kit contains all the elements to make 8 cards. And the beauty is that you can use any of your festive stamps to create a lovely festive greeting card. Within the catalogue there is a matching Merry Little Christmas stamp which fits the die cuts perfectly. 


I used the Joyful Christmas stamp set to complete my card. I stamped the image twice, once on the die cut and once on a piece of scrap Season of Style Desginer Series Paper. I cut the smaller floral image from the patterned paper and layered this over the main image.

I used the same technique to create this party door prize gift bag full of stamping and crafty goodies for a recent crafty party I demo'd for. This time I stamped the image on patterned DSP and a scrap of Cherry Cobbler cardstock. If you'd like to book your own party to receive a crafty handmade gift from me, Stampin' Up! freebie goodies and the chance to win a crafty door prize, I have dates available in December and January and in to the best time of the Stampin' Up! year, Sale-A-Bration. To find out more, drop me a line on 01983 609249 or poulton_sarah@yahoo.co.uk.


I have included links to the products used for today's project either by clicking on the photos or the direct links above. If you place an online order for any Stampin' Up! products through my online store remember to add the code below and I will add your name to the draw to win the hostess benefits for the month's combined orders (with a minimum of £25 in hostess freebies):

V99TUSS2

Please get in touch if you have any questions about today's project or about placing an order or about Stampin' Up! in general. You can contact me on poulton_sarah@yahoo.co.uk or 01983 609249.

Happy Crafting

-X-

Wednesday, 6 November 2013

Stampin' Up! UK Joyful Christmas Gift


Good morning and welcome to a crafty Wednesday here at Stampin' Sarah! Hope you all had a lovely Bonfire Night. As the weather was a bit changeable, Summer and I opted for a night in with indoor fireworks at Mum and Dads. She was fascinated by the sparklers so it was a big success (and the drive home got her to sleep which is always a big plus!).

Today I thought I would share a hostess thank you gift I made for my friend Hayley who hosted a Stampin' Up! party at her house in Southampton on Saturday. I had seen lots of variations of this idea across Blogland and Pinterest. I loved the idea of making seasonal coasters for upcoming festivities. I searched online for cork coasters and also purchased two shades of Stazon ink to colour the image with (I could have used a spray sealant with Stampin' Up! inkpads but as I wished to demo the technique it wouldn't have left enough time to dry the coasters).


I began by stamping the Poinsettia image from the Joyful Christmas stamp set using Black Stazon on to the 4 cork coasters. I then used a sponge dauber to ink the red on to the image.  I finished by stamping the leaves in green and then added a touch of sparkle to the centre of the flowers.

I was really pleased with the result and thought these would make perfect little gifts for a neighbour or friend. And if you package them up using the current Stampin' Up! packaging promotion they will fit easily in the post of through a letter box with a lovely handmade touch. Please click here for more information on the fantastic packaging bundles featuring Stampin' Up! gift boxes, ribbon and gift tags. Or to order the bundles directly through my store, please click on the photo below.


The last image is a close up the packaging for the coasters which uses:


If you place an online order for any Stampin' Up! products through my online store remember to add the code below and I will add your name to the draw to win the hostess benefits for the month's combined orders (with a minimum of £25 in hostess freebies):

V99TUSS2

Please get in touch if you have any questions about todays project or My Digital Studio, about placing an order or about Stampin' Up! in general. You can contact me on poulton_sarah@yahoo.co.uk or 01983 609249.

Happy Crafting

-X-

Thursday, 17 October 2013

Stampin' Up! UK Joyful Christmas Tidings

Evening all!

A bit of a late one today. Its been a week of disturbed sleep and 6am starts so blogging has been a little challenging. Sam is off giving Summer a bath so I thought I would sneak 5 minutes to share a couple of crafty projects with you.

The card below was inspired by this Pinterest beauty. I absolutely adore the white embossing on vellum contrasted with Crumb Cake. And I just love stamping this poinsettia image from Stampin' Up!'s Joyful Christmas stamp set.

And I know the card isn't perfectly stamped. I decided to share it with you today as a reminder to always check the edges of your stamps before stamping (or alternatively don't press too hard  with your stamp like i did!). Unfortunately this card was blighted by the Versamark edge marks. But I love it all the same.


There is still plenty of time to order your Christmas crafting goodies in order to create your own gifts, cards and wrapping. You can order direct with me or through my online store direct to your door.


 And don't forget to add the hostess code below for your chance to win the combined hostess freebies for the month:

ZACT2S6B

My second crafty share I wanted to show you is a collection of Hostess Club thank yous I created to put in with the club orders last month.

I am usually a more colourful crafter leaning heavily towards the brights family. But I decided to use a Whisper White envelope and my Basic Black ink pad only to create this monochrome Flower Shop stamp set inspired collection.. It was finished with a flower punched with the Blossom punch from Modern Medley Designer Series Paper and the Thank You is from A Round Array. Inside I cut some Modern Medley paper samples and Basic Pearls for all my lovely hostesses. I will be starting a new virtual Hostess Club very soon so if you would like to join please get in touch to find out more on poulton_sarah@yahoo.co.uk.


And one last thing, there are only 4 more days to join my Stampin' Up! team for the bargain price of £25. I would love to welcome you to the Island Inkers and I have a fresh batch of notebooks and paper samplers waiting to welcome you on board to the Stampin' Up! family. Please see this post for more info on joining up, or get in touch directly and I'd be only too happy to chat you through what is involved.

Thank you for popping by today. I really appreciate you visiting my blog and love sharing my crafty projects with you.

Happy Crafting
-x-

Tuesday, 20 August 2013

Christmas comes (very) early to the Isle of Wight


Good morning and welcome to a Christmas-y crafty week here at Stampin' Sarah.

This weekend saw the first of my Christmas Craft Days (the second starts today at 10.30am). I had a lovely group of crafty ladies come along on Saturday and we spent the day making a whole series of festive items from a Christmas planner to a stamped candle holder along with cards and gift wrapping too. I took the picture above to show the projects we'd be making over on my Facebook page (www.facebook.com/stampinupiow). It gives a little sneak peak of the projects and techniques I will be sharing with you over the next week. Its never too early to get thinking about Christmas crafting ;0)

The first project I am sharing with you is this foil cardstock embossed poinsettia card which uses lots of fab new product from the Autumn Winter catalogue launching on August 29th.

The silver layer is the fab new Foil Sheets (Gold and Silver - Page 28 of the Autumn Winter Catalogue- £3.75) embossed with the new Pretty Print Textured Impressions Embossing Folder (Page 24 A/W Catalogue).

We then stamped the Poinsettia image from the new Joyful Christmas stamp set (Page 27 A/W Catalogue) on to Bermuda Bay cardstock using the new Silver Metallic Encore Pad (Page 28- gives a beautiful shiny stamped result and is quicker than heat embossing). We cut the centre leaves from one image and layered these with dimensionals on to the other. We then finished with a fabulous Frosted Finishes Embellishment (Page 28 A/W Catalogue- I have already used an entire pack of these in my Christmas crafting so far!! Lots more will be purchased in the next couple of months I am sure).

To finish this card we stamped the Joyful Christmas Wishes sentiment from the same stamp set on to the cardbase.

I love the colour scheme of this card. Not traditionally festive but Christmas-y feeling all the same. This was inspired by a lovely card I had seen on a US Demonstrators blog as part of a Christmas-y blog hop. As soon as I saw all the lovely layers to the card I knew I'd have to give it a go.

If you'd like me to send you a copy of the new Autumn Winter catalogue please drop me a line on poulton_sarah@yahoo.co.uk and I'll happily pop one in the post to you. So many lovely ideas launching with this new catalogue on August 29th. I am counting down the days to the catalogue release so I can start using all the new products in my upcoming crafty parties. Please get in touch if you'd like to find out more about booking a crafty party in your home. I'd love to help you get your hands on lots of lovely hostess freebie products to say thank you for hosting.

To find out more or to have a Stampin' Up! chat please get in touch on poulton_sarah@yahoo.co.uk or 01983 609249.

I'll be back tomorrow to share another Christmasy project with you.

Happy Crafting
-X-