Showing posts with label virtual hostess club. Show all posts

Monday, 15 June 2015

Paper Stack Sampler Hostess Club Gifts from Stampin' Up! UK Demonstrator Sarah Poulton

Good morning crafters. Happy Monday to you all.

How was your weekend? It flew by here. The Isle of Wight has been host to the annual music festival so it has been fun listening to the music from the garden and seeing all the revellers enjoying themselves. It all goes back to normal today as everyone will be heading home.

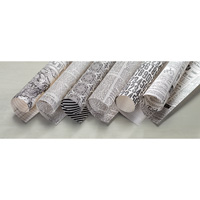
Today I have a quick crafty project to share with you. For my hostess club ladies this month I wanted to make a little product sampler of lovely new catalogue products. During the Demonstrator preorder I had purchased the Neutral Designer Series Paper Stack and thought it would make a perfect little 4"x6" sampler pack. 


I cut a selection of the paper designs down to 4"x6" (the papers are 12"x12") and packaged with Neutrals Candy Dots and Basic Pearls.

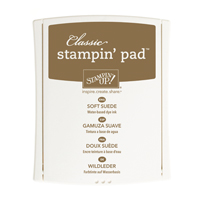
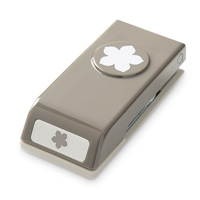
I created a little label using my 2-3/8" Scallop Circle Punch and 2" Circle Punch. I punched the scallop circle from Soft Suede and then the smaller circle from Whisper White. I used Smoky Slate ink to stamp the Work of Art paint swoosh and then Chocolate Chip for the greeting. I added the Chevrons in Crumb Cake.


And here are all the designs and packages all ready to be added to my Hostess Club ladies orders.


If you would like more information on joining one of my Clubs you can click on the Virtual Club tab at the top of the page. I welcome new members at any time through the  year. So as well as the Stampin' Up! hostess benefits and any monthly promotions you will also benefit from a handmade gift or sampler from me with your order each month. Please drop me a line on poulton_sarah@yahoo.co.uk if you would like more information or if you would like to join.

Thank you for popping by today. Please let me know if you have any questions about Stampin' Up! or our products. I would love to help. All items can be purchased online via my shop or get in touch directly and I can order them for you to be delivered direct to your door. I'd also love to Demo for you and your friends at a crafty party. As the hostess you earn lots of lovely freebies and you all get to make a fun crafty project too (no crafting experience necessary!)

 -XXX-
Built for Free Using: My Stampin Blog

Monday, 6 April 2015

Petite Cafe Gift Bag Hostess Gift for March from Stampin' Up! UK Demonstrator Sarah Poulton

Good morning and a very Happy Easter Monday to you all.

I hope your day is as sunny and bright as it is here on the Isle of Wight. Has your long weekend been fun? Ours has been jam packed with family, food, Easter Egg Hunts and chocolate (but not much crafting!).

I have a project to share with you today that I created with the gorgeous Stampin' Up! Petite Cafe Gift Bags and the Work of Art stamp set.

I had bought a whole series of Artisan Embellishment Kits for my virtual Hostess club ladies to go with their March orders. I needed to create something lovely to put the gift in. This is what I came up with.


I used the 2014-2015 In Colors as my inspiration. The stamping on the tag (punched with the Scalloped Tag Topper Punch) is done with Lost Lagoon, Hello Honey and Blackberry Bliss. I then added Rich Razzleberry Ribbon and an In Color Clothespin to finish.


I love the Work of Art stamp set. It has so much potential and so many different uses. It works really well with the stamping off technique which I used above. To get the layers of colour I initially stamped the paintbrush effect stamps off on a scrap piece of paper. I then stamped over in fully inked chevrons and sentiment. This gives different tones from one ink pad.

Thank you for popping by today. Please let me know if you have any questions about Stampin' Up! or our products. I would love to help. All items can be purchased online via my shop (or click on the links below to find out more about specific products) or get in touch directly and I  can order them for you to be delivered direct to your door. 

-XXX-

Built for Free Using: My Stampin Blog

Friday, 13 March 2015

Hostess Club Adventure Awaits Notebooks from Stampin' Up! Demonstrator Sarah Poulton


Good morning crafters.

Its nearly the weekend. Hope you have lots of craftiness planned. I am hoping for a big Project Life catch up. Going to spend some time this evening printing pictures ready for adding to my album.

My crafty share today is a project I made for my hostess club members to accompany their February orders. I absolutely adore the Adventure Bound Paper Stack and Adventure Awaits Stamp Set (also available together as a bundle) and wanted to put them together to make these pocket sized notebooks.

This one is my favourite of my creations. I find any stamp against this brick design looks like fancy graffiti. I just love the effect.


I also had some issues with a very juicy White Craft Pad which gave this large design a more watery effect than I had intended. But I felt it matched the wave papers in the background.


I accessorised each of the 10 notebooks I created with complimentary coloured Candy Dots.

Thank you for popping by today. You can find out more about the new Spring Summer Catalogue and Sale-A-Bration promotion by clicking here or by using the navigation menu on the left. This really is the most exciting time of the year to shop. New products and fantastic freebie rewards too. 

Please let me know if you have any questions about Stampin' Up! or our products. I would love to help. All items can be purchased online via my shop (click on the links below to find out more about specific products) or get in touch directly and I  can order them for you to be delivered direct to your door. 

-X-


Built for Free Using: My Stampin Blog

Friday, 20 February 2015

From The Herd Yo Yo Spinner Card from Stampin' Up! UK Demonstrator Sarah Poulton


Good morning and welcome to the weekend. As I only work part time my weekend with the girls starts on a Thursday evening. And to celebrate I got 5 minutes in my craft room last night to have a go at creating one of these fab 3d Yo Yo Spinner Cards using the From The Herd stamp set in the Spring Summer catalogue.

I absolutely adore these little farm animals and they are perfect for practising your Blendabilities colouring with.  I deliberately went for a scribbly feel to my colouring with this card. I felt it added to the fun childlike quality. And also scribbly fur for the bison/cow gives a bit of texture too.

I won't go in to the minute details of how to recreate the yo yo spinner as I found this fantastic tutorial over on Splitcoast Stampers that gives you detailed instructions.


All you have to do is pull the thread on the card to make your 3d element (in this case the pigs head) spin around. It is a fun little extra on your card perfect for children or loved ones. The possibilities are endless as to which elements you could make spin from flower heads to sunshine to absolutely anything.


I thought I would include a close up of the colours of the animals. I used a mix of Skin Tone, Melon Mambo, Crumb Cake, Smoky Slate, Daffodil Deligh, Wild Wasabi and Night of Navy Blendabilities Markers to create my card. It took a little time to colour but I love the childlike scribbly effect. And don't forget if you spend £45 during Sale-A-Bration (ending March 31st) you can pick a set of Blendabilities pens for free!

I hope you have a lovely weekend planned. It  is my monthly card class tomorrow and I am looking forward to seeing all my lovely ladies again for another fun afternoon session of crafting.

Thank you for popping by today. You can find out more about the new Spring Summer Catalogue and Sale-A-Bration promotion by clicking here or by using the navigation menu on the left. This really is the most exciting time of the year to shop. New products and fantastic freebie rewards too. 


Please let me know if you have any questions about Stampin' Up! or our products. I would love to help. All items can be purchased online via my shop (or click on the links above to find out more about specific products) or get in touch directly and I  can order them for you to be delivered direct to your door. 


Built for Free Using: My Stampin Blog

Monday, 1 December 2014

Virtual Hostess Club Mini Easel Gift from Stampin' Up! UK Demonstrator Sarah Poulton


Good morning and very warm welcome from the Isle of Wight on this fine and mild December 1st morning. Today signals the official start to the festive countdown. Already today I have hung my 12 Days of Christmas cross stitch and both the girls are in the first of several (many!) Christmas outfits. I'm also going to be starting my Project Life December album today (pictures to come- woohoo!)

I have a special project to share with you today. This was a bit of a labour of love as I made 10 of these little mini easels for my virtal hostess club ladies to go with their November orders. I wanted a little decorative gift (this was my inspiration). Something a bit different to contribute to their festive preparations. I picked up the mini easels from my local The Works store.

Then came the fun bit, decorating and designing. I used the Typeset Designer Series Speciality Paper as my base. I gave it this antique aged effect with Soft Suede ink and a Stamping Sponge. 


I then stamped the flourishes and leaves (both from retired Christmas stamp sets). 

To create my Punch Art Poinsettia I punched lots of Cherry Cobbler wings from the Bird Punch and glued together in a circle layering on top of one another using Glue Dots (I also lightly daubered the edges with Cherry Cobbler ink). I then punched a Cherry Cobbler flower using the Petite Petals Punch which I curved with my Bone Folder for the top layer. For the flower centre I used three tiny Basic Pearls which I coloured with my Daffodil Delight Blendabilities Markers.


The final detail was the 'Joy' which I punched in Cherry Cobbler on to Old Olive cardstock using my Epic Alphabet stamp set. I then cut this and glued to my canvas. I finished with a bit of doodling with my Basic Black Stampin' Write marker and a mini star punched from Champagne Glimmer Paper.

I sprayed the whole canvas with Smooch Spritz to give it a sparkly festive sheen. However, this has not come out in the photographs. You'll just have to take my word for it that these canvases are lovely and sparkly.

I hope you've enjoyed my festive share today. I am so excited to start my December album with you more in the week. Keep your fingers crossed I can get the girls to sleep early enough to crack on with Day 1.

If you have any questions about today's project or the products I have used, please get in touch on poulton_sarah@yahoo.co.uk or 01983 609249. You can order online direct through my store by clicking the product links above or the pictures below. I also have availability in the next few months for your very own crafty party so drop me a line to find out more and get your date in the diary.

Happy Crafting
-X-

Friday, 7 November 2014

Flower Pot Diaries for my Hostess Club from Stampin' Up! UK Independent Demonstrator Sarah Poulton


Good morning all and a very Happy Friday to you. What are your weekend plans? I had hoped to get lots of crafting done but I have a craft related injury involving a glue gun and both thumbs which is making all things crafty quite challenging. Hoping my burn blisters heal quickly as I have a few things to prep for next weekend's Gifts for Girls Christmas Fayre in Cowes (stop on by between 10.30am and 4.30pm on Saturday 15th November at Cowes Yacht Haven).

Today's share is last month's Hostess Club gift. I made covered diaries for my ladies last year and they went down a treat. So I had another go. I purchased the little diaries in Tesco and then used a pack of Flower Pot Designer Series Paper to create the covers. I was able to get two covers from a sheet of 12"x12" (with some excess spare for smaller projects). 


For the '2015' I used my Skinny Mini Photopolymer Alphabet stamped in Night of Navy and then punched with my Curly Label Punch. The final embellished touch was a matching flower punched with my Itty Bitty Accents flower punch.


The final touch was this stamp inside. This isn't strictly Stampin' Up! as it is a stamp set I have had in my stash for quite a while. But the stamp is very true for all my Hostess Club ladies. If you would like to find out more about joining one of my Virtual Clubs and earning hostess freebies (as well as receiving a handmade gift from me each month) please drop me a line on poulton_sarah@yahoo.co.uk or click on the Virtual Club tab above.


Thanks for stopping by today. If you have any questions about today's project or the products I have used, please get in touch on poulton_sarah@yahoo.co.uk or 01983 609249. You can order online direct through my store by clicking the product links above or the pictures below. I also have availability in the next few months for your very own crafty party so drop me a line to find out more and get your date in the diary.

Happy Crafting
-X-

Monday, 8 September 2014

Hostess Club Thank You Gifts for September: Stampin' Up! For All Things Shopping Notepads

Good morning and welcome to a new crafty week.

How was your weekend? We celebrated Sylvie's Christening yesterday and had a lovely day with friends and family celebrating her special day. I will share pics of her in her lovely little gown once I get time to have a look through the stacks of pics taken.


Today's crafty share is my hostess club thank you gift for September. I was doing my usual weekly supermarket shop when I came across some plain shopping list notepads in the stationery aisle. I thought they would be perfect for giving a Stampin' Up! Autumnal makeover to. So I purchased a stack and covered them with the beautiful Color Me Autumn Designer Series Paper

I just love the color scheme of these papers especially Blackberry Bliss and Cajun Craze together. I used Crushed Curry and Cajun Craze  with the For All Things stamp set to create the little layered labels. I cut the labels using my Chalk Talk Framelits and inked the edges with a dauber and Cajun Craze.

To finish I tied a length of Gold Baker's Twine to one of the gorgeous little Autumn Wooden Elements and glued with a dot to the stamped image.

I am really pleased with how these turned out and it would be so simple to change the decoration of make notecards for any season or occasion.


Thank you for joining me today. I have lots more lovely projects to share this week. I have been going a little box crazy with my new Gift Box Punch Board. So pop back on Wednesday to find out more. 

If you have any questions about today's project or the products I have used, please get in touch on poulton_sarah@yahoo.co.uk or 01983 609249. You can order online direct through my store by clicking the product links above or the pictures below. I also have availability in the next few months for your very own crafty party. Click on the Promotions tab above to see the exclusive hostess promotion running until October 31st.

Happy Crafting
-X-


Friday, 9 May 2014

Virtual Club Welcome Gifts


Happy Friday! Only a few hours till the weekend begins. I am celebrating the arrival of the weekend with a Stampin' Up! party this evening. I've been on a bit of a party break with Sylvie's arrival. So I am hugely looking forward to a bit of crafting and catching up with some of my customers.

Today's crafty make uses the Stampin' Up! Chevron Tag a Bag Gift Bags. I wanted to make a welcome gift for my new virtual club members and had seen Monica's project using these bags and thought they would be perfect filled with some welcome goodies (Designer Series Paper, Crumb Cake Envelopes and Dimensionals).

I changed the colour scheme for the welcome tag. This uses Designer Series Paper from the Quatrefancy Speciality Papers matched with pennants cut in Silver Glimmer Paper and Island Indigo Cardstock using the Banner Frameliets Dies. I matched these layers with Daffodil Delight Stitched Grosgrain Ribbon and the 'Welcome' stamped in Island Indigo using the Occasions Alphabet stamp set and punched with the Ticket Duo punch. I finished with a coat hanger clip from the Hung Up Cute Clips set.
 

Thank you for popping by today and I hope you have a lovely weekend planned. If you would like to find out more about any of the products used or joining one of my Virtual Hostess Clubs please get in touch on poulton_sarah@yahoo.co.uk or 01983 609249.

You can also check out products online through my online store. Please click below for our latest Weekly Deals bargains.


Happy Crafting 

-XX-

Friday, 11 April 2014

In Color Treat Bag


Morning crafty lovely crafty friends. I hope this Friday post finds you well and looking forward to the weekend. Its a beautiful bright day here on the Isle of Wight and I am looking forward to taking the girls to the park later to have a bit of a kick-a-bout.

Today's crafty share was inspired by this project I found on Pinterest by Jane at the Petite Fleur Paperie. I found in my stash a pack of these Tag a Bag Chevron Gift Bags (what a bargain at £3.75 for a pack of 10 - 131370) and thought Jane's project was a beautiful project to CASE to display how lovely these bags are. 


I made this little treat bag (filled with choccie coins) for my Mum as an Easter gift. To create the decoration I used my Scallop Edge Border Punch to punch the edging of the folded over section of the bag (a quick tip is to layer your bag with a sheet of scrap cardstock to stop the thinner paper from tearing when punching).  The pennant was created using a base of Crisp Cantaloupe  layered with a stamped Vellum matching pennant (I stamped the flower from the Flower Shop stamp set using Crisp Cantaloupe ink). The top pennant is cut from sheet of Pistachio Pudding DSP from the In Color 2013-2015 DSP Stack.

I sealed the bag with a length of Pistachio Pudding 3/8" Ruffle Stretch Trim and then folded a Tea Lace Paper Doily over the top and layered the greeting stamped from Teeny Tiny Wishes and two flowers stamped and punched using the Flower Shop bundle (stamp set and punch). I used an In Color Boutique Detail to finish.


  I absolutely love these little bags now and might be using them for a lot of upcoming gifts and treats for my Hostess Club members. I love how effective they look with a simple bit of embellishment.

You can order any products through my online store by clicking here or by clicking any of the product links above. I will also happily order any products for you. Just drop me a line on poulton_sarah@yahoo.co.uk or 01983 609249 and I'll happily assist.

And don't forget Stampin' Up!'s Weekly Deals. This weeks FAB die cutting product deals are only available until Tuesday. So grab a bargain now by clicking the picture below.


Happy Crafting
-x-


Friday, 4 April 2014

Creme Egg Flower Treats


Good morning all. How has your week been? A good one I hope. Time with a newborn just flies by. I cannot believe Sylvie is 3 and a half weeks already. And time is flying by and I don't seem to be getting anything massively productive done. But I don't mind as Sam goes back to work next week so we have just been enjoying family time and picnics in the campervan.

Today's crafty project is inspired by a fab project I saw on Sam Donald's blog. I love the simplicity of using the Daffodil Delight, Real Red and Elegant Eggplant cardstock and ribbon to compliment the colours of the Creme Egg wrapping. I created these little Creme Egg treats to include with my Hostess Club orders to wish my lovely ladies a very Happy Easter.

I love the use of the Spiral Flower Die to create this three layered flower base for a Cadbury's Creme Egg. I simply layered the three colours together and rolled the flower with all three spirals together at once. I secured the flower (leaving a wide enough centre space to glue dot the egg in place) with my hot glue gun to give a sturdy and solid base. I then placed each Creme Egg flower in to a Medium Cello Bag and tied with a length of Daffodil Delight 1/4" Stitched Grosgrain Ribbon (this Stitched Grosgrain is also available in Real Red. I didn't realise when I created this project that the red ribbon I had used is now retired!).


To finish I punched three miniature flower shapes using my Itty Bitty Punch Pack and embellished with a tiny Basic Pearl.

If you'd like to find out more about joining my Hostess Virtual Club please see the 'Virtual Club' tab at the top of the page. I have a new Club starting this month and I would love to welcome you with an extra special homemade welcome gift. If you'd like more info or to sign up, please get in touch on poulton_sarah@yahoo.co.uk or 01983 609249. 

Thanks for popping by today and hope you all have a lovely crafty weekend.

Happy Crafting
-X-

Monday, 10 March 2014

Blessed Easter Greetings


Good morning crafty friends. 

Thank you for joining me this fine March day. As you are reading this I will be dashing around like a madwoman trying to get all the last bits ready for our new arrival tomorrow. Wish me luck! ;0) 

I have been busy planning and crafting lots of lovely seasonal projects to share with you over the upcoming weeks and Easter has been the centre of all my craftiness. This little card was inspired by this card I'd seen on Pinterest. I love the bold colour combination (Daffodil Delight, Old Olive and Melon Mambo) and how it felt very Spring-like. So I set about giving it a go myself.


I used a Melon Mambo card base and a Quatrefancy Speciality Designer Series Paper layer.  I then coloured the Blessed Easter stamp (a steal at just £10.95. And it can also be separated like in this post so that the image and words are separate allowing use of the tulips all year round) using my Brights Stampin' Write markers. I always make sure to 'huff'' (don't know how else to describe this, I guess breath over my coloured stamp says the same thing) over my stamp before stamping when I colour like this just to ensure it is moistened enough to give a good stamped image. I finished with coordinating Brights Candy Dots just for an extra little embellishment.

I made a whole stack of these cards in preparation for this months Hostess Club orders. I have an Easter themed gift to include with the orders and wanted a card to match. Having a new baby has definitely made me plan and organise my time a bit better. That and having a lot of time on my hands due to my massively expanded belly and inability to move from the house for very long at a time.

Thanks for joining me today. Please pop back on Wednesday where I will be sharing a fab tutorial for making a crocodile gift box. Here is a little sneak peak.


I would love to welcome you in to one of my hostess clubs. I have spaces available in my upcoming Stampers 10 club starting in April. You would need to place an order of at least £15 per month for 10 months and receive the hostess benefits one month and any extra freebies/promotions that I can share between the club on a month by month basis, as well as a little extra handmade gift from me with your order each month (plus a copy of any new catalogue that goes live during your 10 months, which would include both the main Annual Catalogue and Autumn Winter Catalogue for this new April club).

For more information please pop by the 'Virtual Clubs' tab at the top of my blog. I would love you to join in and to welcome you with a little hello to the club gift. If  you think you'd be interested in signing up, please get in touch on poulton_sarah@yahoo.co.uk and I can provide a bit more information.

Please get in touch with any questions about Stampin' Up! or today's project. I'm always happy to chat craftiness.

Happy Crafting
-X-

Friday, 7 March 2014

Happy Watercolor Layered Card


Happy Friday Crafty Friends.

Here is a quick Happy Watercolor layered card I CASED from this one I found on Pinterest. I loved the layered stamped element (one of my favourite techniques- I'm always impressed with the simplicity of the technique but the 'Wow' impact of the stamping over the layers).

I used the floral stamp from the Happy Watercolor set stamped in Gold Encore Metallic Ink over the Crumb Cake and Very Vanilla layers. I then added the sentiment from the Simply Sketched Hostess stamp set  (stamped in Soft Suede) with a row of Basic Pearls to finish.

I love the simplicity of this card and the little but of glamour using the Gold ink pad. Quick and easy for a simple birthday greeting for a friend or loved one.

Thanks for popping by today. I really appreciate your visits. Things might be a little quieter on the blogging front over the next week or so. I have a couple of fab projects scheduled for you while I am in hospital next week. But please bear with me. Normal service will resume once I'm home and we've settled in to some kind of new routine (!!).

Happy Crafting ;0)

-X-