Showing posts with label 3d item. Show all posts

Friday, 5 February 2016

A Bohemian DSP Desk Calendar from Stampin' UP! UK Demonstrator Sarah Poulton

Happy Friday lovely crafty friends. What does your weekend have in store for you? I'm having a #FreeFoodFeb lunch with Mum today followed by an afternoon of baking. This is my favourite thing about Slimming World- learning to cook and experiment with all the lovely recipes. I'll hopefully get a little time for some craftiness too. 

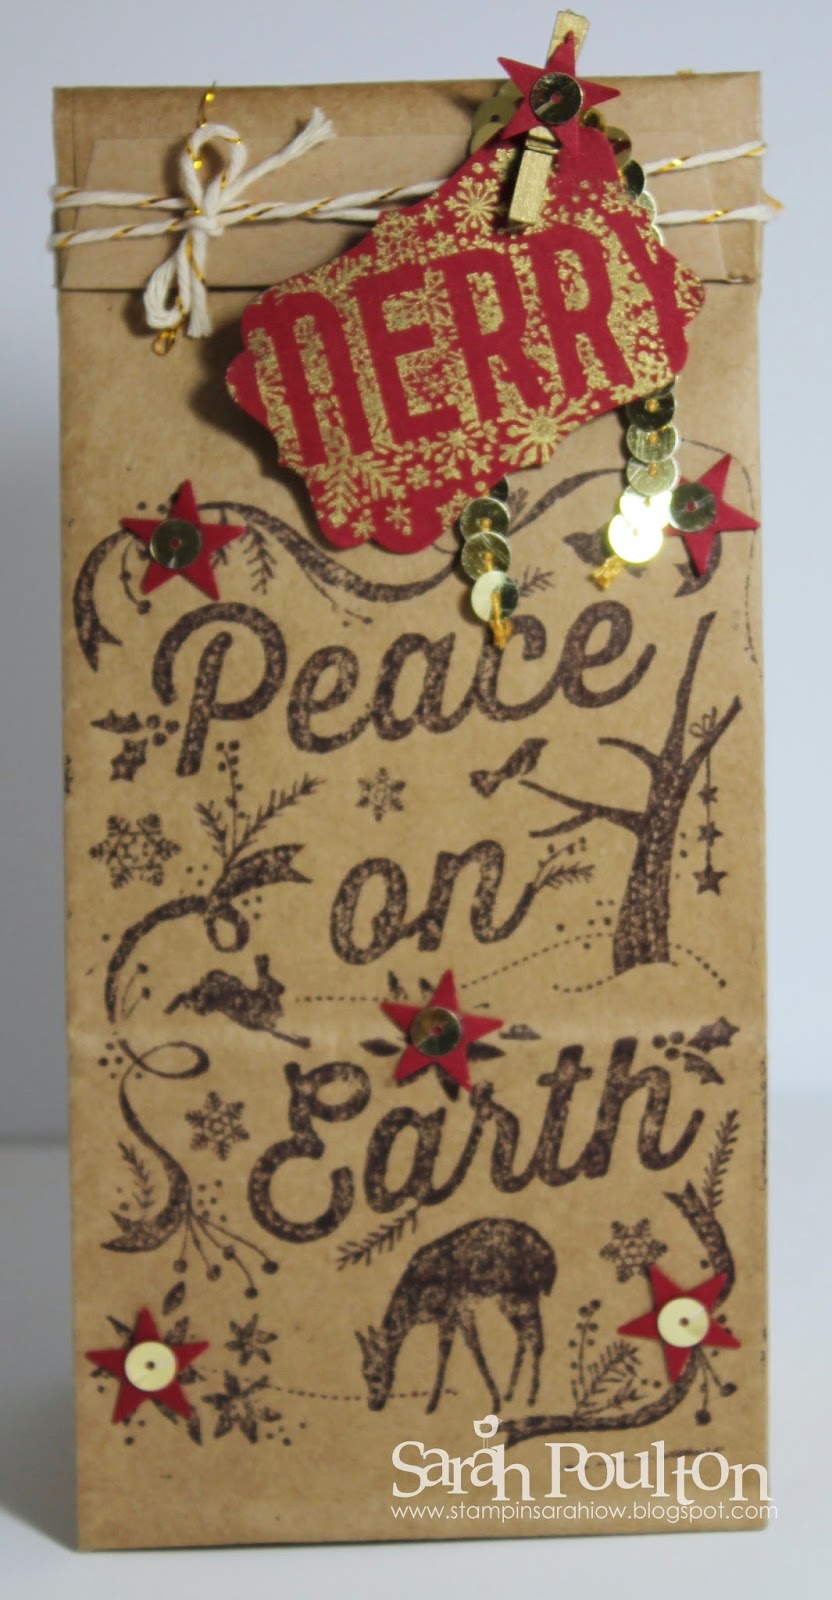
Today's crafty share is a desk calendar we made at my January Card Class. I adapted this project from several tutorials I had seen online. It is a stand up calendar with a space for note paper for all those shopping lists and to do notes.


I kept the design quite simple and simply used an Island Indigo base and Bohemian Designer Series Paper for embellishment. I purchased the little calendars from The Works.

This view shows the simple folds for creating a stand for the calendar.


If you'd like to have a go at this yourself I've included the measurements that I used below. 

The cardstock for the front pocket is 4.75" x 7.5" (score on the 4.5" side at 0.5" & 4.25", score the 7.5" side at 1.5", 4.25" & 4.75").


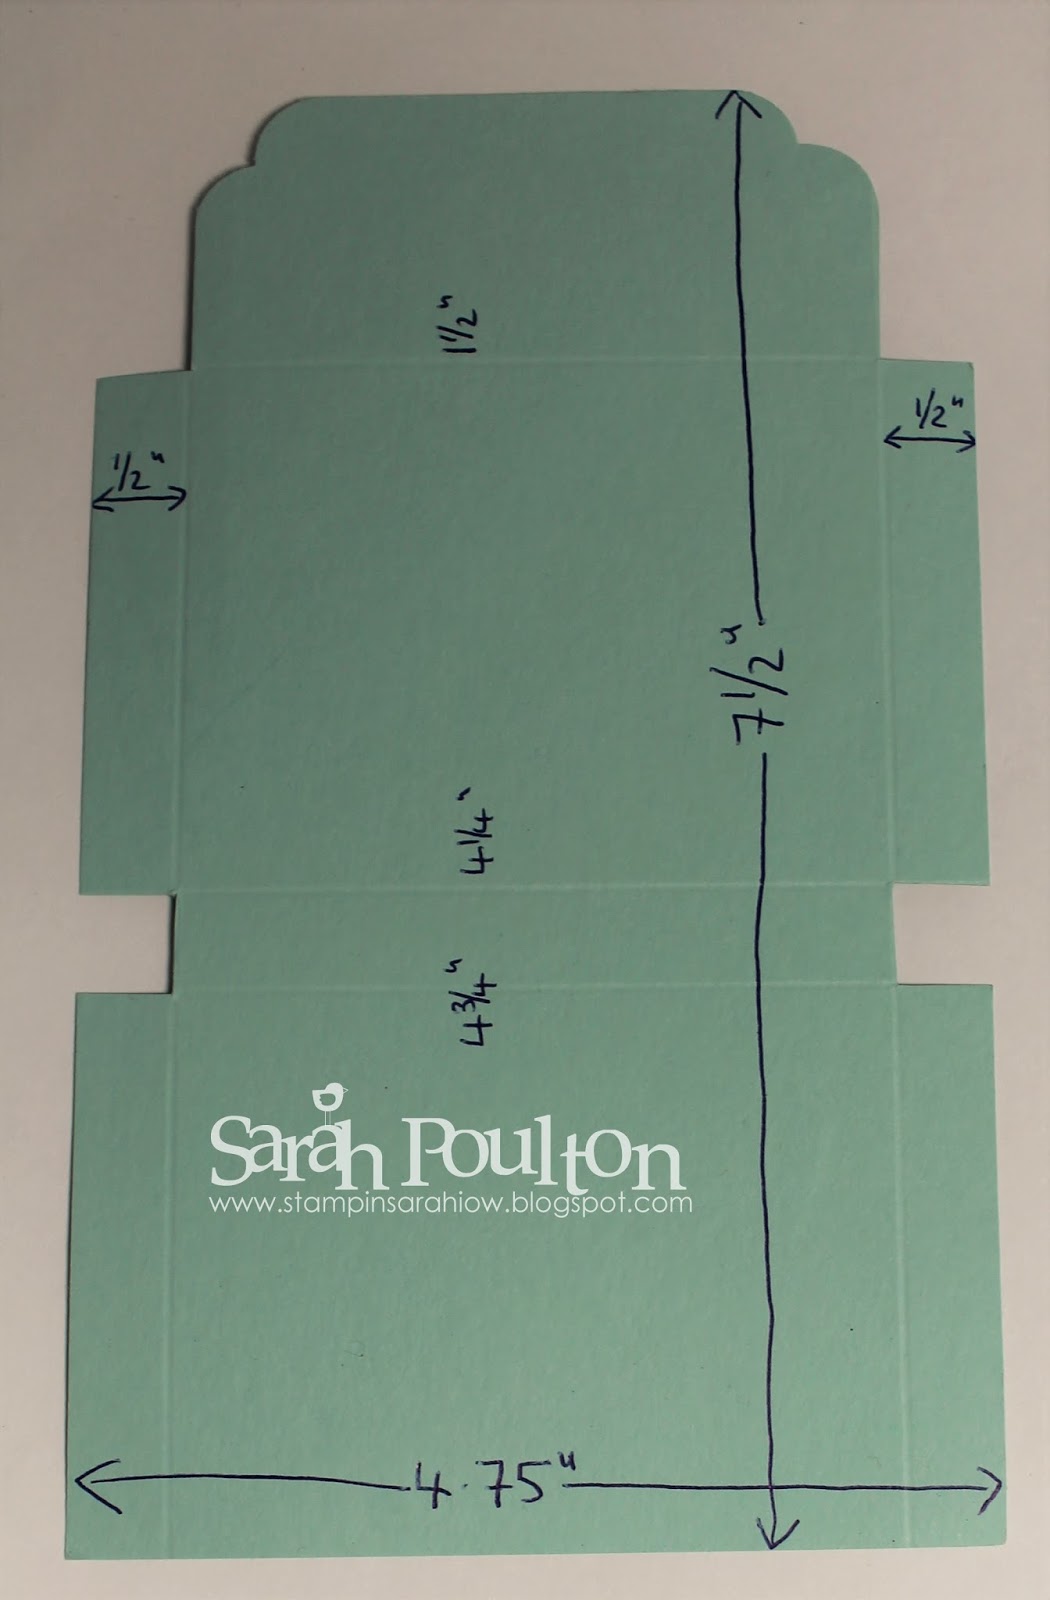
The stand up section is 3.75" x 10.5" scored at 4", 8", 9" & 10".

Thank you for popping by today. Pop back on Monday for more craftiness. Please let me know if you have any questions about Stampin' Up!, Sale-A-Bration or any of our new products. I would love to help. All items can be purchased online via my shop or get in touch directly and I can order them for you to be delivered direct to your door. I'd also love to Demo for you and your friends at a crafty party. As the hostess you earn lots of lovely freebies and you all get to make a fun crafty project too (no crafting experience necessary!).

-XXX-

Built for Free Using: My Stampin Blog

Wednesday, 3 February 2016

A Balloon Celebration Slider Pop Up Card from Stampin' Up! UK Demonstrator Sarah Poulton

Good morning crafters. How is your week going? It has been a busy one here with catching up on a weeks worth of work. I've also been completing the second of my Stitch Along owls. Hopefully he should be finished today and I can share a picture with you on Friday.

I have seen a lot of these Pop Up Slider Cards around on the internet recently. I really love the idea of the surprise pop up element. So I decided to have a go at teaching this card at my last card class. For my colour scheme I used the Cherry on Top Cardstock pack as my inspiration- Watermelon Wonder and Bermuda Bay. 

To create my card I used a fantastic Splitcoast Stampers tutorial (you can find it here). Once I had all my elements cut I covered my base with birthday images from the Party Wishes stamp set. I also stamped my balloon panel. I used the 'stamping off' technique to get the differing tones for my balloons (ink up your stamp and then stamp on to a piece of scrap paper before stamping on to your main project giving a lighter tone to your stamping). I stamped two balloons on to a spare piece of Whisper White and punched with the coordinating Balloon Punch and mounted with Dimensionals.


This is what the card looks like folded flat (this would fit in to a standard sized envelope).


This is the pop up section at the top of the card. I stamped with the Party Wishes sentiment and added detail from the Balloon Celebration stamp set.


Thank you for popping by today. Pop back on Friday for more craftiness. Please let me know if you have any questions about Stampin' Up!, Sale-A-Bration or any of our new products. I would love to help. All items can be purchased online via my shop or get in touch directly and I can order them for you to be delivered direct to your door. I'd also love to Demo for you and your friends at a crafty party. As the hostess you earn lots of lovely freebies and you all get to make a fun crafty project too (no crafting experience necessary!).

-XXX-
Built for Free Using: My Stampin Blog

Friday, 30 October 2015

A Season of Cheer Paper Bauble from Stampin' Up! UK Demonstrator Sarah Poulton

I have something a little different to share with you today. I was flicking through through the catalogue and came across a picture which features these paper baubles made from Season of Cheer Designer Series Paper. I love how jam packed the pages of our catalogues are with ideas of things to recreate yourself.

I decided to have a go at making these baubles using my 2.5" Circle Punch and a pack of glue dots.


  1. To create this I punched 12 circles from my designer paper. 
  2. I folded in half and stacked my circles (to get a balanced symmetrical design I divided my two paper designs in to two piles (A design and B design) and then stacked them ABBAABBAABBA). 
  3. Once I stacked my 12 circles I staples the stack at the top and bottom (right in the crease of the fold). 
  4. I wrapped a length of bakers twine through the middle to serve as the bauble hanger. 
  5. I then started gluing the layers together. Using a glue dot I alternated between placing a glue dot at the top and bottom of each layer. This is how you get the alternating wave pattern to your bauble.

Here is the catalogue picture that inspired today's project. I love how all these projects work together.


Thank you for popping by today. Please let me know if you have any questions about Stampin' Up! or our products. I would love to help. All items can be purchased online via my shop or get in touch directly and I can order them for you to be delivered direct to your door. I'd also love to Demo for you and your friends at a crafty party. As the hostess you earn lots of lovely freebies and you all get to make a fun crafty project too (no crafting experience necessary!)

 -XXX-

Built for Free Using: My Stampin Blog

Monday, 24 August 2015

An English Garden Twisted Box from Stampin' Up! UK Demonstrator Sarah Poulton

Good morning crafters. I thought I would give you a little break from Christmas this morning (although I have lots of lovely festive projects all ready to share with you. I have gone a bit Christmas crafting crazy recently!).

I was surfing the crafty blogosphere on Friday and came across this fantastic tutorial to create these twisted gift boxes. I was looking for inspiration for my card class 3D project and thought this would be perfect. So I set about recreating it.

I used a Mint Macaron based and scored/cut according to Kat's instructions. I realised the tutorial needed to be slightly adapted to fit UK A4 (I simply scored the short edge at 2", 4", 6" and 8" leaving a slightly thinner tab for holding the box together).


I used off cuts of English Garden Designer Series Paper to decorate my box and wrapped a length of Pear Pizzazz Cotton Ribbon all the way around my box to keep it all together.

I created the tag with my Note Tag Punch and stamped the flower from Garden in Bloom with Old Olive and Pear Pizzazz inks. I finished with a Metal Rimmed Pearl.


This is a lovely little project to use a table favour or place setting. It would fit small amounts of sweeties or treats in perfectly. I love that this has the two compartments for fitting treats in to. You could also use it for jewellery or small gifts. 

Thank you for popping by today. I will be back Wednesday with some more festive sneak peeks from the new Autumn Winter catalogue. Please let me know if you have any questions about Stampin' Up! or our products. I would love to help. All items can be purchased online via my shop or get in touch directly and I can order them for you to be delivered direct to your door. I'd also love to Demo for you and your friends at a crafty party. As the hostess you earn lots of lovely freebies and you all get to make a fun crafty project too (no crafting experience necessary!)

 -XXX-

Built for Free Using: My Stampin Blog

Friday, 15 May 2015

A Flower Patch Tic Tac Treat Bag from Stampin' Up! UK Demonstrator Sarah Poulton

Good morning crafty friends. A very happy Friday to you!

I thought I would give you a little sneak peek of my Leadership swaps for our Stampin' Up! get together this weekend. I am so looking forward to catching up with all my lovely Stampin' Up! friends from across the country and maybe getting to have a play with some fab new Stampin' Up! products from the new catalogue.

This was made using the Flower Patch stamp set matched with the 1"x8" Cello Bags.


I filled the cello bags with green tic tacs to look like the flower stem. I stamped each large flower 3 times and cut the layers of each one. The leaves I stamped in Old Olive and Garden Green ink and then cut and glued to the flowers.


My favourite part of these swaps is the curled Pear Pizzazz cardstock which I wrapped around the tic tac stem and decorated with the little Melon Mambo flowers.

Thank you for popping by today. Have a great weekend doing whatever you have planned (and i hope you have time for some craftiness). Don't forget to check out this week's Weekly DealsPlease let me know if you have any questions about Stampin' Up! or our products. I would love to help. All items can be purchased online via my shop or get in touch directly and I can order them for you to be delivered direct to your door. I'd also love to Demo for you and your friends at a crafty party. As the hostess you earn lots of lovely freebies and you all get to make a fun crafty project too (no crafting experience necessary!)

 -XXX-

Built for Free Using: My Stampin Blog

Friday, 13 March 2015

Hostess Club Adventure Awaits Notebooks from Stampin' Up! Demonstrator Sarah Poulton


Good morning crafters.

Its nearly the weekend. Hope you have lots of craftiness planned. I am hoping for a big Project Life catch up. Going to spend some time this evening printing pictures ready for adding to my album.

My crafty share today is a project I made for my hostess club members to accompany their February orders. I absolutely adore the Adventure Bound Paper Stack and Adventure Awaits Stamp Set (also available together as a bundle) and wanted to put them together to make these pocket sized notebooks.

This one is my favourite of my creations. I find any stamp against this brick design looks like fancy graffiti. I just love the effect.


I also had some issues with a very juicy White Craft Pad which gave this large design a more watery effect than I had intended. But I felt it matched the wave papers in the background.


I accessorised each of the 10 notebooks I created with complimentary coloured Candy Dots.

Thank you for popping by today. You can find out more about the new Spring Summer Catalogue and Sale-A-Bration promotion by clicking here or by using the navigation menu on the left. This really is the most exciting time of the year to shop. New products and fantastic freebie rewards too. 

Please let me know if you have any questions about Stampin' Up! or our products. I would love to help. All items can be purchased online via my shop (click on the links below to find out more about specific products) or get in touch directly and I  can order them for you to be delivered direct to your door. 

-X-


Built for Free Using: My Stampin Blog

Friday, 19 December 2014

All is Calm Paper Mug for Christmas from Stampin' Up! UK Demonstrator Sarah Poulton


Hello crafty friends. Can you believe it is only 6 days until Christmas? Are you ready? I have all my gifts but haven't even thought about wrapping anything yet (I always leave this to the last possible moment as I am not the world's most accomplished wrapper of gifts!) I also have a couple of pressies to finish off that I am making. Time has really run away with me this year!!

I thought I would share a quick little gift idea that we made at Saturday's card class. I found a tutorial on Youtube for this fab little paper mug made by a Demo friend of mine, Traci. We made the base mug using Naturals White cardstock which we then covered with lovely festive papers from the All is Calm Speciality Designer Series Paper set.


We filled it with a KitKat and a sachet of gingerbread cappucino to celebrate this season of hot drinks on cold nights.

Thank you for popping by today. I'll have another festive creation for you tomorrow. If you have any questions about today's project or the products I have used, please get in touch on poulton_sarah@yahoo.co.uk or 01983 609249. You can order online direct through my store by clicking the product links below. I also have availability in the next few months for your very own crafty party so drop me a line to find out more and get your date in the diary.

Happy Crafting
-X-

Tuesday, 25 November 2014

Fun Sweety Elf Leg Hanger Decoration from Stampin' Up! UK Demonstrator Sarah Poulton


I love this quick and easy little Christmas make. The picture above makes me think of two cheeky elves leaning against a wall getting in to mischief.

I designed this project for our monthly card class this past Saturday and the ladies all enjoyed making these cheeky little chaps (or their legs at least).

This all came about when I was shopping in my local 99p shop and came across these sherbet and jelly sticks. I knew they would work perfectly as Elf Legs. I've placed the sweeties in to the Stampin' Up! 1"x8" Cello Bags (although these ready packaged sweets don't necessarily need them). So instead of these sticks you could use multicoloured choccies or jelly sweets.


To create the shorts I cut a Top Note from Old Olive and folded in half. I used my Chalk Marker to add the stitched detail. The shoes were cut from a Real Red Top Note shape. And to finish I added Gold Foil button details to the shorts and to the boots and Gold Ribbon around the ankles.

Today sees the launch of a fantastic recruiting promotion from Stampin' Up! You can join my team and get started with your Stampin' Up! business with a fantastic 25% off the £99 Starter Kit (for one week only!). What a great deal! I'd love to welcome you to my team of Inkin' Owls. You can find out more by clicking the 'Join my Team' tab above or get in touch with me directly for more information.

If you have any questions about today's project or the products I have used, please get in touch on poulton_sarah@yahoo.co.uk or 01983 609249. You can order online direct through my store by clicking the product links above or the pictures below. I also have availability in the next few months for your very own crafty party so drop me a line to find out more and get your date in the diary.

Happy Crafting
-X-

Wednesday, 29 October 2014

Halloween Witch Boot Treat Holder from Stampin' Up! UK Demonstrator Sarah Poulton


Good morning crafters.

As promised I am back with my second of this weeks Halloween inspired creations. I was looking for simple little treat holders to give to my 2 year old on Friday. Both she and my 7 month old have super cute monster costumes (matching of course) and I wanted something not too scary for her Trick or Treating basket.

I found a similar Witch Boot designed by Karen Fontinelle and thought this would make a perfect holder for the chocolate brains I'd found in the supermarket. I used a cut down kitchen roll inner tube to create this. I cut 1/2" strips of Rich Razzleberry and Tangerine Tango cardstock and glued to the roll.

I wrapped a 1" strip of Basic Black cardstock around the base and folded back the corners to create the boot opening. The buckle was punched using my Petite Curly Label Punch from Dazzling Diamonds Glimmer Paper (I cut a small rectangle of Basic Black to create the buckle effect).


I used a bone folder to soften the fibres and roll the shaped boot base to give the pointy effect.

Thanks for stopping by today. Please come back on Friday for my final Halloween project (a hat to match our Witch's boot). If you have any questions about today's project or the products I have used, please get in touch on poulton_sarah@yahoo.co.uk or 01983 609249. You can order online direct through my store by clicking the product links above or the pictures below. I also have availability in the next few months for your very own crafty party. 

Happy Crafting
-X

Friday, 26 September 2014

Fun with Nature's Peace and Stampin' Up!'s Petite Cafe Gift Bags


Good morning and welcome to the official start of the weekend. I am all packed and ready for a Stampin' Up! party tonight with a group of new crafters. So excited to meet them all and share Stampin' Up! and our fantastic Autumn Winter catalogue (filled with festive inspiration).

Today's crafty make is inspired by a project I found in the catalogue. I love the simplicity of this stamped Petite Cafe Gift Bag.


I stamped the Nature's Peace stamp straight on to the Petite Cafe Gift Bag in Chocolate Chip ink. It is a little challenging to get a complete image due to the folded ridge in the bag. However, with a firm press down on your stamp it is possible to get a good image. I covered a slight break in the image with my star embellishments which are punched with my Itty Bitty Accents punch from Cherry Cobbler and then finished with a Gold Sequin taken from a length of trim.


For the tag I stamped the 'Merry' from Seasonally Scattered on to a piece of Cherry Cobbler card and punched with my Decorative Label Punch. I secured to a length of tied Gold Baker's Twine with a Mini Metallic Clothespin.

These little gift bags are perfect for presenting your Christmas gifts or making as table place markers filled with chocolates. My ladies at my card class all had lots of ideas for what they would put inside from jewellery to smellies to handmade sweets. I gave them some choccie coins to put inside as I cannot bear to make something Christmas-y without a little chocolatey treat.

I'd love to see your festive creations or ideas for Stampin' Up! products. So if you are reading and have a blog, please leave a comment to point me in your direction. I'd love to come and say hello and see what you've been making too.

Thank you for popping by today. If you have any questions about today's project or the products I have used, please get in touch on poulton_sarah@yahoo.co.uk or 01983 609249. You can order online direct through my store by clicking the product links above or the pictures below. I also have availability in the next few months for your very own crafty party. Click on the Promotions tab above to see the exclusive hostess promotion running until October 31st.

Happy Crafting
-X-