Showing posts with label chocolate. Show all posts

Monday, 21 March 2016

A Honeycomb Happiness Easter Treat Tote from Stampin' Up! UK Demonstrator Sarah Poulton

Hello crafters. Welcome to a new crafty week here on the Isle of Wight. So much to share with you and so many makes to post before Sale-A-Bration finishes on the 31st. I have been having fun over the weekend with my lovely card class ladies and creating a few little Easter projects.

The first of this weeks shares is this little Easter Tote Box. I got the idea for the little tote from Angie Juda's website Chic N Scratch. This uses a piece of DSP (I chose Birthday Bouquet DSP) measuring 5-1/2" x 6-7/8". It is super simple and can be embellished for any occasion. I chose to add the little chick from the Sale-A-Bration Honeycomb Happiness stamp set. I stamped with Memento Black ink and coloured with So Saffron and Cajun Craze Stampin' Write Markers.


I mounted the little chick on to coordinating DSP and a scallop circle punched from Blushing Bride Glimmer Paper. 

At the class on Saturday we filled our Totes with these little Easter treats ready for the Easter weekend. I have tucked my two samples away to give the girls over Easter.


Thank you for popping by today. Please let me know if you have any questions about Stampin' Up!, Sale-A-Bration or any of our new products. I would love to help. All items can be purchased online via my shop or get in touch directly and I can order them for you to be delivered direct to your door. I'd also love to Demo for you and your friends at a crafty party. As the hostess you earn lots of lovely freebies and you all get to make a fun crafty project too (no crafting experience necessary!).

-XXX-

Product List

Saturday, 14 February 2015

Happy Valentines Day from Stampin' Up! UK Demonstrator Sarah Poulton


Good morning and a very Happy St Valentines Day to you.

I have a little bonus crafty make for you this morning. Summer and I spent hours yesterday hand crafting lots of lovely heart shaped choccies for all the family. We used a silicone heart shaped mould and filled the bottoms with lots of lovely pink treats from mini marshmallows to Eton Mess cake topping to freeze dried raspberries. We then melted white and milk chocolate and poured in to each mould and left in the fridge to harden. We were inspired by this Pin.


I should have taken a picture before we packaged them as they were beautiful (and very clearly heart shaped). The pictures don't do them justice.


Anyways, what would lovely handmade chocs be without handmade Stampin' Up! packaging. I set Summer to work with a Real Red ink pad and some Whisper White card and she expertly stamped the little bird from the Hey, Valentine stamp set. I cut round each bird and we mounted on to a tag with a little punched heart. We then popped our choccies in to a little Cello bag and tied with Bakers Twine.


It was as simple as that! Perfect little Valentines gifts for all the family.

And here are my two hard at work making the choccies. Well Summer was making and as you can tell from Sylvie's face she was busy eating our makes ;0)


Thank you for popping by today. You can find out more about the new Spring Summer Catalogue and Sale-A-Bration promotion by clicking here or by using the navigation menu on the left. This really is the most exciting time of the year to shop. New products and fantastic freebie rewards too. 

Please let me know if you have any questions about Stampin' Up! or our products. I would love to help. All items can be purchased online via my shop (or click on the links above to find out more about specific products) or get in touch directly and I  can order them for you to be delivered direct to your door. 

-XXX-

Friday, 31 October 2014

Halloween Chocolate filled Witch's Hat Treat Triangle Box from Stampin' Up! UK Demonstrator Sarah Poulton


Good morning and a very Happy Halloween to you. 

Here is the last of my Halloween projects for this year. I saw a similar project over on Julie Davison's blog. I loved the simplicity of creating a triangle box and then embellishing to create the witch's hat.

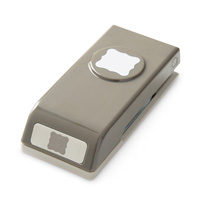
I used a Basic Black card base to create the hat and add on rim (following the pdf instructions on Julie's blog). I then used a scrap of Flower Pot Designer Series Paper left on my desk from  my Curvy Keepsake Pumpkins to create the band. The buckle was created with a scrap of Under the Tree Speciality DSP punched with my Curly Label Punch (any contrasting Halloweeny coloured card or paper would work for the band and buckle).

I did add a little extra embellishment with the little Itty Bitty Accent flower. I wanted my witch to be a friendly one so thought she'd wear flowers in her hat for some reason. I guess when you are making for a 2 year old who suffers with nightmares you don't want to create anything with too scary connotations ;0)

The hat is filled with these little chocolate pumpkins. That'll be Summer's special Friday night treat later.


Don't forget to check out this weeks Weekly Deals. Some great deals to be had.


Thanks for stopping by today. If you have any questions about today's project or the products I have used, please get in touch on poulton_sarah@yahoo.co.uk or 01983 609249. You can order online direct through my store by clicking the product links above or the pictures below. I also have availability in the next few months for your very own crafty party. 

Happy Crafting
-X-

Wednesday, 29 October 2014

Halloween Witch Boot Treat Holder from Stampin' Up! UK Demonstrator Sarah Poulton


Good morning crafters.

As promised I am back with my second of this weeks Halloween inspired creations. I was looking for simple little treat holders to give to my 2 year old on Friday. Both she and my 7 month old have super cute monster costumes (matching of course) and I wanted something not too scary for her Trick or Treating basket.

I found a similar Witch Boot designed by Karen Fontinelle and thought this would make a perfect holder for the chocolate brains I'd found in the supermarket. I used a cut down kitchen roll inner tube to create this. I cut 1/2" strips of Rich Razzleberry and Tangerine Tango cardstock and glued to the roll.

I wrapped a 1" strip of Basic Black cardstock around the base and folded back the corners to create the boot opening. The buckle was punched using my Petite Curly Label Punch from Dazzling Diamonds Glimmer Paper (I cut a small rectangle of Basic Black to create the buckle effect).


I used a bone folder to soften the fibres and roll the shaped boot base to give the pointy effect.

Thanks for stopping by today. Please come back on Friday for my final Halloween project (a hat to match our Witch's boot). If you have any questions about today's project or the products I have used, please get in touch on poulton_sarah@yahoo.co.uk or 01983 609249. You can order online direct through my store by clicking the product links above or the pictures below. I also have availability in the next few months for your very own crafty party. 

Happy Crafting
-X