Showing posts with label paper crafts. Show all posts

Saturday, 30 September 2017

Christmas Mini Pizza Box and Shrink Plastic Necklace from Stampin' Up! UK Demonstrator Sarah Poulton

Happy Saturday Crafters.

How has September been for you? Are you enjoying all the Christmas craftiness in the new Autumn Winter catalogue? I am really enjoying the products this year.  I love playing with the new stamps and seeing all the makes on Pinterest that people are creating with them.


Another of the projects we created at my August Craft Day was a Mini Pizza Box (have you seen these? They are foodsafe and perfect for packaging treats for Christmas) with a Christmas Charm Necklace inside.

We decorated the outside with a belly band created with the Be Merry Designer Series Paper and layered with images cut using the Santa's Sleigh Dies and Red Glimmer Paper and Garden Green DSP. We added embellishments from the Hearts & Stars Elements pack and a length of Cherry Cobbler Ribbon.


Inside the box was a separate project we created, a Christmas necklace with handmade paper beads and a charm stamped with Shrink Plastic.  I used this tutorial to try making different shapes of beads. We glazed with the Fine Tip Glue Pen and added Dazzling Diamonds Glitter for a bit of shimmer. For my two sample necklaces I stamped images from the Santa's Sleigh Stamp Set in Staz On on to clear shrink plastic. I then cut around the image and used my heat tool to shrink the image. I then coloured with alcohol markers to ensure the colours would stay on the plastic.


These would make a great table place setting or extra little gift for a friend. It was a really enjoyable project to make and it went down well with my attendees on the day. I haven't crafted with shrink plastic for years and had forgotten the simple enjoyment of making the image shrink down and creating the little charms.

Please let me know if you have any questions about Stampin' Up! and their products. I would be happy to help. All items can be purchased online via my shop or get in touch directly and I can order them for you to be delivered direct to your door. I'd also love the opportunity to demonstrate for you and your friends at a crafty party. As the hostess you earn exclusive free products and all guests get to create a fun crafty project to take home too. No crafting experience necessary! Get in touch if you'd like any further information.

-XXX-

Saturday, 22 April 2017

A Jar of Love Silhouette Card from Stampin' Up! UK Demonstrator Sarah Poulton

Happy Saturday crafters.

I have a huge task ahead of me today. I have cleared my schedule and I have the Stampin' Up! Retiring List ready in front of me. I am going to tackle my piles of stamps, embellishments, papers and dies and sort out those that are retiring from those that will be carrying over in to the new Stampin' Up! catalogue (which I've had a peek at and is overflowing with loveliness!). I love this time of year, making way for lots of new crafty fabulousness. If you'd like to have a look at the items that are on the retiring list click on the picture below (only available until May 31st).


Today's crafty share is a card I created using my Jar of Love stamp set. I often overlook this set when I am sitting down to craft but when I had a look at some of the smaller images I realised they'd make a perfect silhouette layered over one another. 


I started by punching a circle from a Post-It to create a mask. I then used So Saffron ink with a sponge dauber to ink the circle in the background. Then I simply layered the Jar of Love elements in Memento Black ink over the top. Adding the greeting last.


Please let me know if you have any questions about Stampin' Up! and their products. I would be happy to help. All items can be purchased online via my shop or get in touch directly and I can order them for you to be delivered direct to your door. I'd also love the opportunity to demonstrate for you and your friends at a crafty party. As the hostess you earn exclusive free products and all guests get to create a fun crafty project to take home too. No crafting experience necessary! Get in touch if you'd like any further information.

-XXX-

If you are placing an order during April (and your order is under £150 as you will qualify for your own rewards if the order goes above this amount) please use the hostess code ZBACWNNR and you will receive a special gift from me in June.

Sunday, 5 February 2017

Beautiful You Paper Piecing from Stampin' Up! UK Demonstrator Sarah Poulton


A very happy Sunday my crafty friends. I thought I would take some time out of my Sunday afternoon patchwork piecing schedule to share a set of paper pieced cards I created with some crafty friends last weekend.


If you've been on Pinterest recently you will have come across a multitude of cards created with the Stampin' Up! Beautiful You stamp set. I wasn't a big fan of this set from the  pictures in the catalogue until I saw all the creative things people have been making with it. And then once I'd seen the different paper piecing variations I knew I had to treat myself to the stamp set to have a go myself.


Paper piecing is my all time time favourite stamping technique and this stamp set lends itself perfectly. I began by cutting my layers of Whisper White and DSP from the Blooms and Bliss Designer Series Paper set. Once I had decided on my floral layers I then kept the offcuts of DSP for the stamping of the dresses/hats. I used Memento Black ink and stamped the elegant ladies once on to my Whisper White layer and then again on to my DSP scraps. I chose to turn my DSP over and use the coordinating papers on the other side (and I deliberately chose prints that would look like lovely elegant dresses).


Once you have stamped the image again on to DSP you simply take a sharp pair of scissors and cut around the dress elements from the image. Once cut you simply adhere on to the Whisper White stamped image giving you a simple but effective patterned fill on your stamping.

I love the simplicity of the technique and I felt the images were enough without making too much additional fuss on my cards. So once I had stamped the matching sentiments I simply added a hand doodled frame to each card and voila they were complete!


I am in the middle of so many crafty projects at the moment. I am hoping to share some progress pictures very soon. I have recently started a new charity Stitch Along for Mind and I am loving trying a new style of cross stitching. Once I've finished the colour I am stitching I'll take some pics to share. Similarly I am alternating the SAL with piecing together lots of patchwork hexagons for a quilt for my daughter's birthday (it is a real family affair as Dad is cutting paper patterns, Mum is tacking them and then we are all getting stuck in to stitching the hexagons together- a month till her birthday- wish us luck!!!)

Please let me know if you have any questions about Stampin' Up! and their products. I would be happy to help. All items can be purchased online via my shop or get in touch directly and I can order them for you to be delivered direct to your door. I'd also love an opportunity to Demo for you and your friends at a crafty party.  As the hostess you earns exclusive free products and all guests get to create a fun crafty project to take home too! Get in touch if you'd like any further information.

-xxx-

Wednesday, 29 April 2015

A Flower Patch Thinking of You Card from Stampin' Up! UK Demonstrator Sarah Poulton

Happy Wednesday!

I hope you+ are having a great week so far. I've been busy with cardmaking and pressie making for a few family birthdays coming up on the next week or so. Lots to share over the next week. But I won't post until I've shared my projects with their recipients.

Today I have a card class project to share. This was inspired by this card I saw over on Leonie's Blog. I love the simplicity of the framed stamping.


I created the frame using my Square Framelits Dies. I then marked the corners of the square on to my Whisper White layer so I would know roughly where to position my flowers and stems.

I used Rich Razzleberry, Wisteria Wonder, Daffodil Delight and Pear Pizzazz to stamp the flowers and stems from the Flower Patch stamp set.


The sentiment is from the Sheltering Tree stamp set. I stamped this in Rose Red and added Candy Dots and tiny Basic Pearls to finish.

Thank you for popping by today. Please let me know if you have any questions about Stampin' Up! or our products. I would love to help. All items can be purchased online via my shop or get in touch directly and I can order them for you to be delivered direct to your door. I'd also love to Demo for you and your friends at a crafty party. As the hostess you earn lots of lovely freebies and you all get to make a fun crafty project too (no crafting experience necessary!)

 -XXX-


Built for Free Using: My Stampin Blog

Friday, 6 February 2015

Sheltered Tree Bookmark Card from Stampin' Up! UK Demonstrator Sarah Poulton


Happy Friday!

What do you have planned for the weekend? Crafty fun I hope. I am keeping my fingers crossed for a couple of hours to work on my Project Life album. I have all my January pictures printed and ready and I am just chomping at the bit to get my pages designed. I love how quickly an album can come to life with the Project Life system (you can find out more about Project life and Stampin' Up! here).

I have the final project from my January card class to share with you today. This was inspired by a gorgeous bookmark card creation I found on Debbie's Design's blog in the USA. I'd never thought of creating a fancy fold card with a detachable bookmark. What a lovely little extra for the recipient. And with the Perforating Cutting Blade (part of the Rotary Addition for the Stampin' Trimmer) it couldn't be easier to create an easily detachable bookmark.


I wanted to capture Debbie's fun summer-y feel to the card so I used Old Olive and Real Red as my colour scheme. I coloured Basic Pearls with my Cherry Cobbler Blendabilities markers to add to the stamped Sheltering Tree to create apples.


To give added dimension to the leaves on the tree I simply stamped the 'leaf' stamp freshly inked with Old Olive and then stamped immediately again without reinking. This gives added colour dimension to your tree with both lighter and darker leaves. I used the same effect for the grass too.

I just love stamping with this stamp set. I love all the little extras you can add to your image from the rake and swing to snowflakes and the bicycle. And with our new photopolymer stamps it is super easy to line everything up.

Thank you for popping by today. You can find out more about the new Spring Summer Catalogue and Sale-A-Bration promotion by clicking here or by using the navigation menu on the left. This really is the most exciting time of the year to shop. New products and fantastic freebie rewards too. 

Please let me know if you have any questions about Stampin' Up! or our products. I would love to help. All items can be purchased online via my shop (or click on the links above to find out more about specific products) or get in touch directly and I  can order them for you to be delivered direct to your door. 

-XXX-

Wednesday, 17 December 2014

Glitter Napkin Robin Card from Stampin' Up! UK Demonstrator Sarah Poulton


Good morning crafters ;0) And a very happy Wednesday to you (you know what that means? New Weekly Deals over on my website!). Nearly the weekend. And this time next week it'll be Christmas Eve *hooray*

Today's crafty share is a project we created at this month's final Christmas card class. I always get a bit sad packing away my festive stamp sets. But with the new Spring Summer products just around the corner I won't have time to miss Christmas for long.

So this card uses the tissue paper technique that I have seen all over the blogs and internet recently. It is perfect for using those favourite festive napkins to make in to beautiful cards.

I found these robin napkins in a local garden centre and knew my crafty ladies would love them. So I set about designing this card.


To create this card I first cut my card layers (I layered Brushed Gold over a Cherry Cobbler base). I then cut my top layer to layer the napkin on to. I covered the whole piece of cardstock with glue using the Stampin' Up! Transfer Adhesive Sheets. I then carefully pressed the napkin on to the adhesive making sure to position the image to get the whole robin on to the card. I pressed the tissue down to ensure it was completely adhered all over.

Once you have your napkin layer I pressed my Versamark inkpad all over the napkin layer and covered with Iridescent Ice Stampin' Emboss Powder and heat embossed to give the glitter sheen over the whole image. Once the embossing is set, you have your finished card and can embellish as desired. We created the little banner and stamped with the greeting from the Wondrous Wreath stamp set.

Thank you for popping by today. I'll have another festive creation for you tomorrow. If you have any questions about today's project or the products I have used, please get in touch on poulton_sarah@yahoo.co.uk or 01983 609249. You can order online direct through my store by clicking the product links below. I also have availability in the next few months for your very own crafty party so drop me a line to find out more and get your date in the diary.

Happy Crafting
-X-

Wednesday, 26 November 2014

Stars, Sleighs and Christmas Cheer Card from Stampin' Up! UK Demonstrator Sarah Poulton


I was hopping around Pinterest last week (as you do) and came across this amazing card by the very talented Teneale Williams (her blog is a must for some very inspiring ideas and techniques for using SU products). I had to give a Stampin' Sarah spin (I didn't have all the products required for a direct CASE).

I just loved the simplicity and the tone on tone Cherry Cobbler. When it comes to Christmas crafting, you can never have too much Cherry Cobbler I say. It is my number 1 must have for cards and festive creations. So matching my Cherry Cobbler cardstock base with the gorgeous Under the Tree Speciality Paper was a prefect combination (Under the Tree is actually a very thick and sturdy card perfect for Christmas box making!).

I daubered the edges of the Cherry Cobbler layer and then layered my Under the Tree piece with Brushed Gold cardstock. I created the edging with my Scallop Edge Punch from Champagne Glimmer Paper. 

For the main image I cut a star using my Stars Framelits Dies from Crumb Cake cardstock. I stamped the sleigh image from the Holiday Home stamp set in Basic Black and doodled the stitching around the star using my Cherry Cobbler Stampin' Write marker. The sentiment and frame is from the Project Life December Wonder stamp set (a perfect addition to any Christmas scrapbookers stamp collection),


The final touch was a little Cherry Cobbler star (punched using the Itty Bitty Accents punch) and some swirly Linen Thread.

I just absolutely love the original and I love my Stampin' Sarah'd version too. I have to say a big thank you to Teneale for the inspiration.

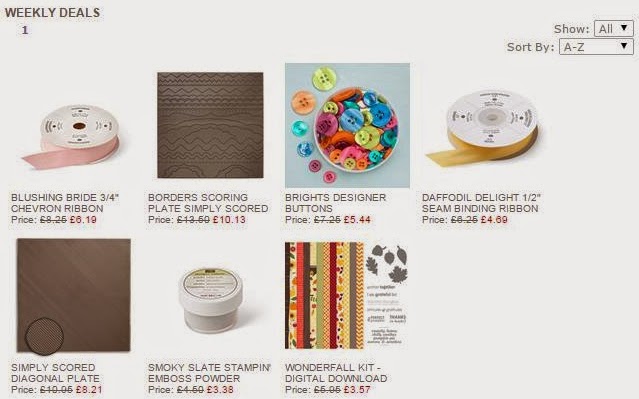
And just before I go, don't forget to check out this weeks fab Weekly Deals by clicking the image below.

Thank you for popping by today. I hope you enjoyed today's crafty festive project. I'll have another project to share tomorrow so please come back to see what else I've been creating.

If you have any questions about today's project or the products I have used, please get in touch on poulton_sarah@yahoo.co.uk or 01983 609249. You can order online direct through my store by clicking the product links above or the pictures below. I also have availability in the next few months for your very own crafty party so drop me a line to find out more and get your date in the diary.

Happy Crafting
-X-

Tuesday, 25 November 2014

Fun Sweety Elf Leg Hanger Decoration from Stampin' Up! UK Demonstrator Sarah Poulton


I love this quick and easy little Christmas make. The picture above makes me think of two cheeky elves leaning against a wall getting in to mischief.

I designed this project for our monthly card class this past Saturday and the ladies all enjoyed making these cheeky little chaps (or their legs at least).

This all came about when I was shopping in my local 99p shop and came across these sherbet and jelly sticks. I knew they would work perfectly as Elf Legs. I've placed the sweeties in to the Stampin' Up! 1"x8" Cello Bags (although these ready packaged sweets don't necessarily need them). So instead of these sticks you could use multicoloured choccies or jelly sweets.


To create the shorts I cut a Top Note from Old Olive and folded in half. I used my Chalk Marker to add the stitched detail. The shoes were cut from a Real Red Top Note shape. And to finish I added Gold Foil button details to the shorts and to the boots and Gold Ribbon around the ankles.

Today sees the launch of a fantastic recruiting promotion from Stampin' Up! You can join my team and get started with your Stampin' Up! business with a fantastic 25% off the £99 Starter Kit (for one week only!). What a great deal! I'd love to welcome you to my team of Inkin' Owls. You can find out more by clicking the 'Join my Team' tab above or get in touch with me directly for more information.

If you have any questions about today's project or the products I have used, please get in touch on poulton_sarah@yahoo.co.uk or 01983 609249. You can order online direct through my store by clicking the product links above or the pictures below. I also have availability in the next few months for your very own crafty party so drop me a line to find out more and get your date in the diary.

Happy Crafting
-X-

Wednesday, 12 November 2014

Seasonally Scattered Thank You from Stampin' Up! UK Demonstrator Sarah Poulton


Continuing the theme of the week, baby wipe stamping, here is another quite thank you note I created with the Seasonally Scattered stamp set.

For this combination of colours I used Cajun Craze and Cherry Cobbler reinkers. I wanted a more yellow-y orange effect but didn't have the right reinkers (something I have now rectified with an extra order for the remaining colour families I didn't already own in reinker). I stamped the 'Thanks' image on to Naturals White cardstock (more of a homemade paper feel).

I love how this turned out. It still has an autumnal feel about it.

The little flowers I added were punched with my Itty Bitty Accents flower punch from Cherry Cobbler cardstock. I punched the images from a scrap piece of card which I had previously stamped the same image in Encore Gold which gives the slightly patterned flowers.


Today is Wednesday, so you know what that means, Weekly Deals. Click on the picture below to connect through to my online store to find out more about this weeks product bargains.


Thanks for stopping by today. If you have any questions about today's project or the products I have used, please get in touch on poulton_sarah@yahoo.co.uk or 01983 609249. You can order online direct through my store by clicking the product links above. I also have availability in the next few months for your very own crafty party so drop me a line to find out more and get your date in the diary.

Happy Crafting
-X-

Monday, 10 November 2014

Seasonally Scattered Christmas Greetings from Stampin' Up! UK Independent Demonstrator Sarah Poulton


Happy Monday Crafters!

How was your weekend? It was a rainy, thundery and windy one here on the Isle of Wight. Perfect for crafting weather. I tucked myself up to craft in my craft room and then realised some of my cardstock was damp. So one thing led to another and I ended up having a tidy up and a bit of a move around. It certainly is tidier but there is still a long way to go (I always end up preferring to craft than to organise!)

Today's crafty share is a project we made in last month's card class. I love the baby wipe technique. It is so effective. And I especially love the dimensional look it gives the Seasonally Scattered stamps. 

For this card I folded two baby wipes on a plate and dropped reinker in Soft Sky, Pool Party, Marina Mist and Island Indigo to create my own multi-coloured ink pad. The key is to drop the ink spots close to one another and it give it a couple of minutes to spread a bit as you'll end up with a complete image. 


I then simply embellished with Frosted Sequins and layered on to Marina Mist cardstock embossed with the Northern Flurry Embossing Folder. The final touch was a length of Island Indigo Cotton Ribbon tied around the card to hide the join in the layers.

Thanks for stopping by today. If you have any questions about today's project or the products I have used, please get in touch on poulton_sarah@yahoo.co.uk or 01983 609249. You can order online direct through my store by clicking the product links above or the pictures below. I also have availability in the next few months for your very own crafty party so drop me a line to find out more and get your date in the diary.

Happy Crafting
-X-