Showing posts with label stamping. Show all posts

Saturday, 13 February 2016

More Tin of Cards Creations from Stampin' Up! UK Demonstrator Sarah Poulton


Happy Saturday. I've woken to rain and cold outside. So what better way to spend your day then crafting and creating with friends. I have a lovely group of ladies spending the afternoon with the Tin of Cards Project Kit this afternoon. 

Today I am sharing the 4 cards I made with the lovely die cut heart swirly card base. This is my favourite of the 4 card bases as I love the swirly doodles around the die cut area.

Again I have mixed up each of the designs and mixed up the elements I used on each card.

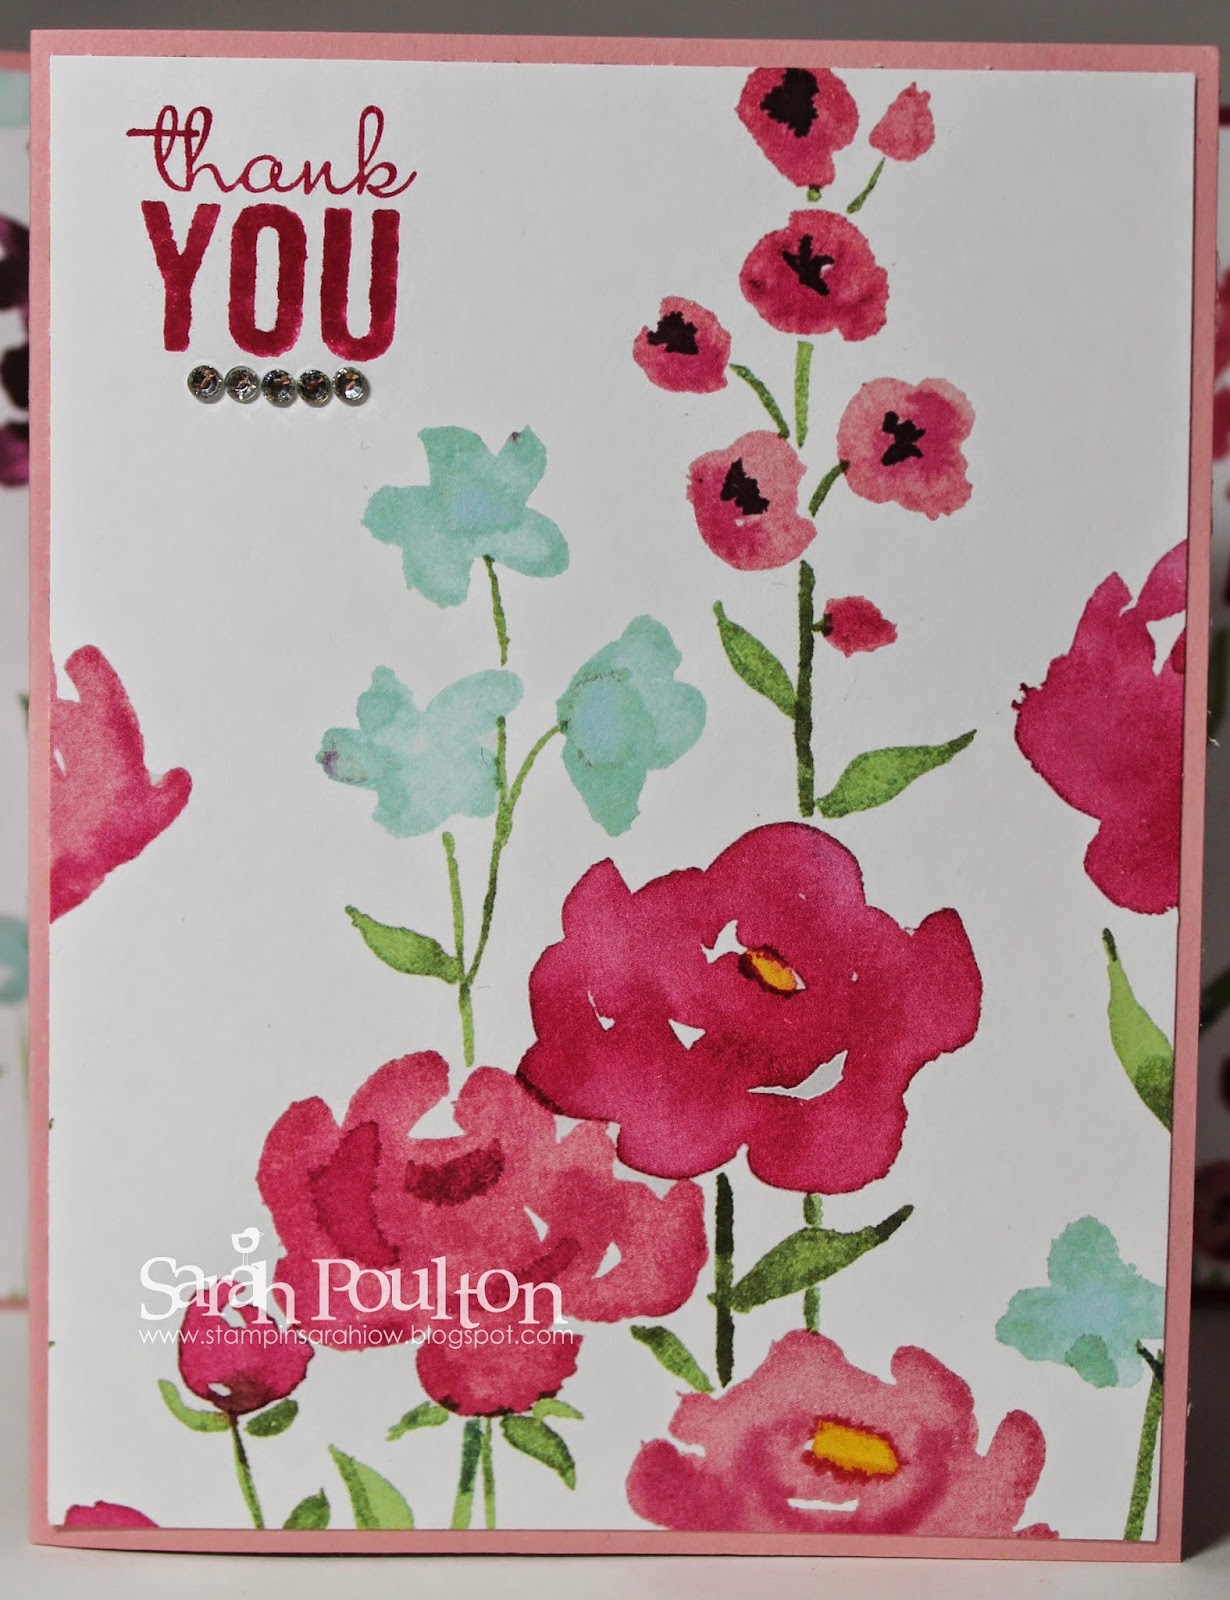
This is the card I shared earlier in the week. This follows the kit instructions. 

I used one of the gold foil shutter elements behind the die cut area. I then embellished the heart with one of the epoxy gold hearts.


You can't really tell from the picture but the DSP is stuck to the inside of the card on this one giving a window effect.

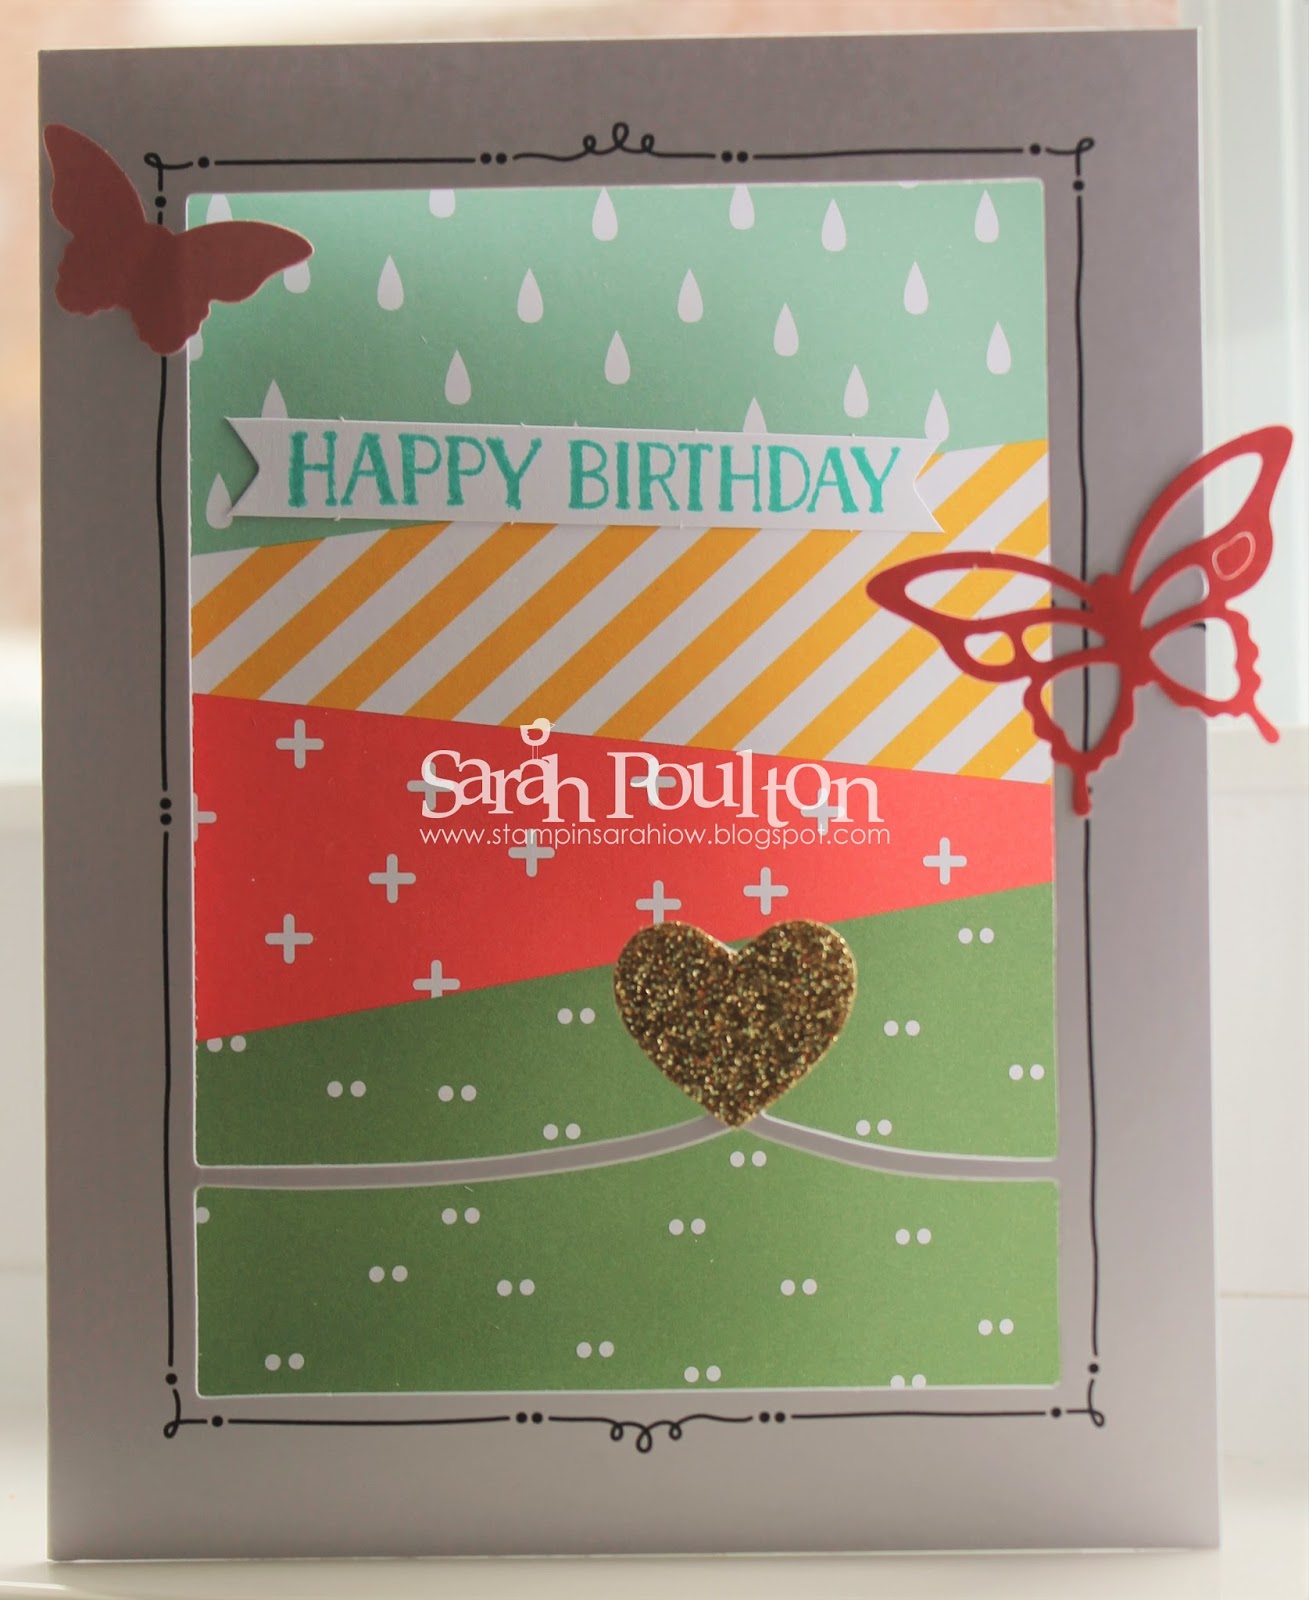
This is my favourite of the four cards. I used the leftover piece of DSP from the organisation tabs inside the tin to create this card. I love the simplicity of the stripes and Mint Macaron. Plus I like to use as many of the elements as possible and I had a few of the white banners leftover at this point.


Don't forget it is still Sale-A-Bration (until the end of March). If you purchased the Tin of Cards Project Kit and coordinating stamp set plus a Snail Adhesive you'd be able to choose a Sale-A-Bration freebie as an extra. Who doesn't love a free crafty gift?


There are three ways to benefit during Sale-A-Bration.

Here’s the deal: for every 60 €/£45 you spend (before tax and shipping), you get a FREE Sale-A-Bration product. That means it’s the perfect time to purchase those products you’ve had your eye on while earning more products for free.


Note: Pages 4–15 of the Sale-A-Bration brochure show products available throughout the entire Sale-A-Bration sales period (5 January–31 March 2016); Pages 16–19 show limited-time products available only until 15 February.* Watch for another batch of limited-time products coming 16 February!
*Based on inventory, availability may be temporarily extended.


Need another excuse to get together with friends? Just host a qualifying party with at least 275 €/£200 in sales during Sale-A-Bration and you’ll earn 27 €/£20 more Stampin’ Rewards! You can even apply your Stampin’ Rewards toward a Starter Kit and become a demonstrator yourself!
It’s the best time of year to join Stampin’ Up! During Sale-A-Bration, you can become a demonstrator for just 129 €/£99 and choose 45 €/£30 more of FREE products for your Starter Kit. Plus, the kit ships for free. Click here to sign up direct and join my Inkin' Owls team.
 
Thank you for popping by today. Pop back on Monday for more Tin of Cards craftiness. Please let me know if you have any questions about Stampin' Up!, Sale-A-Bration or any of our new products. I would love to help. All items can be purchased online via my shop or get in touch directly and I can order them for you to be delivered direct to your door. I'd also love to Demo for you and your friends at a crafty party. As the hostess you earn lots of lovely freebies and you all get to make a fun crafty project too (no crafting experience necessary!).

-XXX-

Built for Free Using: My Stampin Blog

Wednesday, 10 February 2016

A Trio of Tin of Cards Makes from Stampin' Up! UK Demonstrator Sarah Poulton

Good morning lovelies. It is a new cross stitch owl chart day so I am excited to see what Owl 3 has in store later today (I really should start giving my owls names!). But in the mean time I have a trio of cards to share today. I mentioned on Monday how much fun I had been having with my Tin of Cards Project Kit. These three cards are the first three I have made as examples for my Saturday class.

For these first three cards I used the examples from the kit instructions to create my cards. The kit contains enough supplies to make 16 cards as well as all the file dividers and the tin itself. The instructions suggest 4 cards of 4 designs. I wanted to mix things up a bit so I am going to be using the supplies to make cards for all sorts of occasions to fill my tin with.

This is my favourite of card of the three made with the beautiful butterfly elements in the kit.


I love the added detail of stamping your greeting underneath the Crushed Curry butterfly to show through.


I stayed quite close to the example for this card. I love the layered look of this card. This is actually just one piece of Designer Series Paper which is designed to give this effect behind the die cut card base.  To any followers of my blog you'll know how much I love adding doodling and dots to my cards. Well this card base features that effect already.


This is my third creation using the bakers twine, star shaped elements and die cuts. I love this gold foil shutter element. Plus you get lots of thin bits of gold foil punched out that you can reuse on other cards too.


This is just the first three creations using the kit. There are so many elements still left in the kit. I am really enjoying putting the cards together and looking forward to seeing my class ladies on Saturday even more.

Don't forget it is still Sale-A-Bration (until the end of March). If you purchased the Tin of Cards Project Kit and coordinating stamp set plus a Snail Adhesive you'd be able to choose a Sale-A-Bration freebie as an extra. Who doesn't love a free crafty gift?


There are three ways to benefit during Sale-A-Bration.

Here’s the deal: for every 60 €/£45 you spend (before tax and shipping), you get a FREE Sale-A-Bration product. That means it’s the perfect time to purchase those products you’ve had your eye on while earning more products for free.

Note: Pages 4–15 of the Sale-A-Bration brochure show products available throughout the entire Sale-A-Bration sales period (5 January–31 March 2016); Pages 16–19 show limited-time products available only until 15 February.* Watch for another batch of limited-time products coming 16 February!
*Based on inventory, availability may be temporarily extended.

Need another excuse to get together with friends? Just host a qualifying party with at least 275 €/£200 in sales during Sale-A-Bration and you’ll earn 27 €/£20 more Stampin’ Rewards! You can even apply your Stampin’ Rewards toward a Starter Kit and become a demonstrator yourself!
It’s the best time of year to join Stampin’ Up! During Sale-A-Bration, you can become a demonstrator for just 129 €/£99 and choose 45 €/£30 more of FREE products for your Starter Kit. Plus, the kit ships for free. Click here to sign up direct and join my Inkin' Owls team.
 
Thank you for popping by today. Pop back on Friday for more Tin of Cards craftiness. Please let me know if you have any questions about Stampin' Up!, Sale-A-Bration or any of our new products. I would love to help. All items can be purchased online via my shop or get in touch directly and I can order them for you to be delivered direct to your door. I'd also love to Demo for you and your friends at a crafty party. As the hostess you earn lots of lovely freebies and you all get to make a fun crafty project too (no crafting experience necessary!).

-XXX-
Built for Free Using: My Stampin Blog

Monday, 25 January 2016

A Bright Balloon Celebration Card from Stampin' Up! UK Demonstrator Sarah Poulton

Hello lovely crafty friends. How was your weekend? I had a lovely time with my card class ladies. I pushed the boat out this month and cooked two fab Waitrose seasonal recipes I'd picked up in store. I baked Orange, Ginger and Date Cookies and a Sweet Potato & Apricot Cake. I don't often have an excuse to bake so really enjoyed making them.

I have a Balloon Celebration card to share today. I absolutely love stamping with this set. It is one of my fun to stamp with favourites. And even better this is one of the great value bundles in the Spring Summer catalogue. The bundle includes the Balloon Punch and matching Balloon Celebration stamp set.

I picked a combination of brights ink pads for my balloons - Melon Mambo, Daffodil Delight, Tangerine Tango & Tempting Turquoise. To bring out the contrast between the two layers (the balloons have two stamps- the main image and then the textured layer you stamp over the top giving the spotted effect) I stamped off first when I stamped the main balloon to give a paler tone. I then stamped the textured layer directly over the top.

I then cut a Vellum layer to fit centrally over the balloons. I used the Botanicals for You Sale-A-Bration set to gold heat emboss the sentiment. I attached my vellum layer with four glue dots (one in each corner). I have found this is the most discreet way to adhere vellum without the glue being too noticeable.


Thank you for popping by today. Pop back on Wednesday for more craftiness. Please let me know if you have any questions about Stampin' Up!, Sale-A-Bration or any of our new products. I would love to help. All items can be purchased online via my shop or get in touch directly and I can order them for you to be delivered direct to your door. I'd also love to Demo for you and your friends at a crafty party. As the hostess you earn lots of lovely freebies and you all get to make a fun crafty project too (no crafting experience necessary!).

-XXX-
Built for Free Using: My Stampin Blog

Monday, 11 January 2016

A Papercut Botanicals For You Card from Stampin' Up! UK Demonstrator Sarah Poulton

Happy Monday crafters. I have been doing my best to combat the January blues this weekend by spending some time making super lovely Sale-A-Bration celebration cards. I have a whole week of projects to share with you using the exclusive stamp sets you can receive for free with an order of £45+ during Sale-A-Bration. 

My first project of the week uses the Botanicals For You stamp set (designed to coordinate with the Botanical Blooms bundle from the Spring Summer catalogue). And I love a project where I can combine more than one of my crafty interests. For this card I stamped the greeting and the flowers so they each overlapped the other giving one continuous image. I stamped them in Calypso Coral, Melon Mambo and Old Olive.


I then used a craft knife to cut around all the elements of the joined stamped images giving a very delicate paper cut piece which I then mounted using cut up Dimensionals on the reverse. This was very different to my usual papercutting process as I would normally cut on the reverse (cutting a flipped image) on much thinner paper. However, I loved the effect of papercutting using my Stampin' Up! supplies. By mounting with Dimensionals you can see the shadow created by the papercut on the Very Vanilla piece behind.


I finished my card by mounting my paper cut over Very Vanilla, Old Olive and Melon Mambo. I then added Basic Rhinestones to my flowers. Such a fun way to bring together two of my crafting loves.

If you'd like to get hold of your own Botanicals for You stamp set you can receive it for free with a purchase of £45. So if you purchased the matching Botanical Blooms bundle you could receive this stamp set as a bonus for free!! Click the image below for more info on this years lovely Sale-A-Bration extras.


Pop back on Wednesday to see two cards I made with my favourite stamp of this years Sale-A-Bration, the little bird from Honeycomb Happiness. Thank you for popping by today. Please let me know if you have any questions about Stampin' Up!, Sale-A-Bration or any of our new products. I would love to help. All items can be purchased online via my shop or get in touch directly and I can order them for you to be delivered direct to your door. I'd also love to Demo for you and your friends at a crafty party. As the hostess you earn lots of lovely freebies and you all get to make a fun crafty project too (no crafting experience necessary!) 

 -XXX-.

Built for Free Using: My Stampin Blog

Friday, 11 December 2015

A Joyous Little Letters Christmas Card from Stampin' Up! UK Demonstrator Sarah Poulton

A very happy Festive Friday crafters.

I love today's project. I cased this from Teneale Williams in Australia. I created my own version as I didn't have all the same elements. I love the effect and colours. 

I started with a Crumb Cake base and a layer of Very Vanilla. I stamped the Vanilla layer with the snowflakes from the Hello December stamp set (stamped in Crumb Cake). I then layered with Circles punched from Cherry Cobbler Cardstock and the music notes design from the Home for Christmas DSP.


I inked the edges of my DSP and then added my Little Letters cut from Cherry Cobbler. Once I layered and adhered all my pieces I used Crystal Effects over my letters to give them a glossy sheen. I also fussy cut holly leaves from one of the Home for Christmas DSP designs to add to my J and Y circles. To finish I added the tiny stars punched from Glimmer Paper using my Confetti Stars Punch.


Thank you for popping by today. Please let me know if you have any questions about Stampin' Up! or our products. I would love to help. All items can be purchased online via my shop or get in touch directly and I can order them for you to be delivered direct to your door. I'd also love to Demo for you and your friends at a crafty party. As the hostess you earn lots of lovely freebies and you all get to make a fun crafty project too (no crafting experience necessary!)
 -XXX-

Built for Free Using: My Stampin Blog

Tuesday, 8 December 2015

An inky Cozy Christmas from Stampin' Up! UK Demonstrator Sarah Poulton

Good morning crafters.

How was your weekend? I hope your festive preparations are going well. I was busy finishing off a few final handmade gifts and working on my Christmas journal. I look forward to sharing some pics later in the week. I have kept things quick and easy this year and I am enjoying my daily note taking and picture printing.

I have a card I designed for a recent Stampin' Up! party to share today. I have really been enjoying getting inky and messy with some masking and sponging recently. 

To create this card I punched a 2" circle from a Post It and positioned where I wanted the moon to go. I then stamped the tree and deer image from the To You & Yours stamp set at the base of the card. Then I sponged a mixture of Pool Party and Island Indigo to create the moody winter sky.


Once the sky was inked I removed the Post It and used a dauber to sponge So Saffron over the moon, I added the sleigh and silver stars. To finish I added the Cozy Christmas sentiment.


I designed this card to fit on a Stampin' Up! Whisper White Note Card. So it was super simple to create a pile of them in one go (with an envelope all ready to go). This is one of my favourite Christmas cards of the year so I have made a few to send to friends and family.

Thank you for popping by today. Please let me know if you have any questions about Stampin' Up! or our products. I would love to help. All items can be purchased online via my shop or get in touch directly and I can order them for you to be delivered direct to your door. I'd also love to Demo for you and your friends at a crafty party. As the hostess you earn lots of lovely freebies and you all get to make a fun crafty project too (no crafting experience necessary!)

 -XXX-
Built for Free Using: My Stampin Blog

Wednesday, 1 July 2015

Bonus Weekly Deals and a Clearance Rack Update from Stampin' Up! UK Demonstrator Sarah Poulton

Good morning and welcome to a fantastic morning of bonus Weekly Deals and product discounts.

This morning Stampin' Up! have announced a limited time expansion of the normal Weekly Deals. So for the month of July you can benefit from extra products at fantastic prices.

Starting with this fantastic selection of products including washi tape, punches, cardstock and ribbons. Click on the picture below for more information on the products.These products are available in limited quantities while supplies last.


New items have been added to the Clearance Rack today too. Some great punches, kits, embellishments and stamp sets to be found at prices up to 60% off their original catalogue price.


And before I leave you to explore all the lovely product offerings this morning, I wanted to share a quick Father's Day card I made for my girls to give Sam. I forgot to share this last week. I used the gorgeous Neutrals Designer Series Paper Pack as a background which I distressed and daubered with Soft Suede. I added the Happy using the Simply Serif mini alphabet which I punched and layered on to Island Indigo stars (punched with the Itty Bitty Accents Punch Pack). I stamped the 'Daddy' using the Layered Letters alphabet (stamped with Memento Black ink). The last detail I added were the shades of blue Candy Dots.


Thank you for popping by today. Please let me know if you have any questions about Stampin' Up! or our products. I would love to help. All items can be purchased online via my shop or get in touch directly and I can order them for you to be delivered direct to your door. I'd also love to Demo for you and your friends at a crafty party. As the hostess you earn lots of lovely freebies and you all get to make a fun crafty project too (no crafting experience necessary!)

 -XXX-


Built for Free Using: My Stampin Blog

Friday, 1 May 2015

A pop up Sketched Birthday Card from Stampin' Up! UK Demonstrator Sarah Poulton

Good morning and welcome to May. And of course a very Happy Birthday to my Dad.

Today's card is not my Dad's actual birthday card (I cannot share that until after he has received it). But in celebration of his birthday I am sharing one of our card class projects from last month. I came across this fantastic pop up card over on Vicky's blog and decided to make my own pop up birthday card.


 For the front cover I used Tangerine Tango, Real Red, Daffodil Delight and Pacific Point. I stamped the greeting from the Age Awareness stamp set and added the balloons from the same set.


For the inside I used the measurements shared by Vicky (cut a piece of whisper white card stock 4 1/4" x 2 3/4"  and score at 1", 2", 3" and 4") to create the pop up section. I then stamped images from the soon to be retired Sketched Birthday and cut then to attach to the pop up square. 


This is such a simple way to create a fun pop up interactive card. It could be used for any occasion or with any stamp set. 

Have you checked out this week's Weekly Deals? Gorgeous buttons, ribbons and binding to be had at great prices just for this week.


Thank you for popping by today. Please let me know if you have any questions about Stampin' Up! or our products. I would love to help. All items can be purchased online via my shop or get in touch directly and I can order them for you to be delivered direct to your door. I'd also love to Demo for you and your friends at a crafty party. As the hostess you earn lots of lovely freebies and you all get to make a fun crafty project too (no crafting experience necessary!)

 -XXX-

Built for Free Using: My Stampin Blog

Monday, 13 April 2015

A collection of Painted Blooms Notecards from Stampin' Up! UK Demonstrator Sarah Poulton

Good morning crafty friends. What have you been up to? Have you had a crafty weekend or simply been enjoying our beautiful weather? I managed a bit of both. But I was mainly overcome with a need to Spring Clean so ended up on a mission to clean the kitchen cupboards. So while I may not have lots of crafty projects to update you on I certainly have a sparkly clean kitchen ;0)


My project today is another of the projects my lovely ladies completed at the Painted Petals class on Easter Saturday. We used the fabulous Patty Bennett's blog post as inspiration for making 6 note cards from one sheet of Painted Blooms Designer Series Paper (the beautiful floral sheet with the large flower images).  I gave my ladies 6 card bases cut from Rose Red, Blackberry Bliss and Blushing Bride and the measurements for cutting the DSP. I also gave them a variety of embellishments from Blackberry Bliss Ribbon to die cut butterflies. I left them to create their own selection of note cards.

Here are the examples I made to display. There were originally 6 but unfortunately one fell foul to a cup of coffee and was ruined.


I used the Note Tag Punch to create little stamped embellishments with different greetings to add a little dimension to my cards.


I love the simplicity of keeping the cards plain and letting the papers take centre stage with just a simple embellishment or stamped sentiment.


Thank you for popping by today. Please let me know if you have any questions about Stampin' Up! or our products. I would love to help. All items can be purchased online via my shop (or click on the links below to find out more about specific products) or get in touch directly and I can order them for you to be delivered direct to your door.

 -XXX-

Built for Free Using: My Stampin Blog

Friday, 10 April 2015

A Painted Blooms Mini Scrapbook Page from Stampin' Up! UK Demonstrator Sarah Poulton

Happy Friday.

What are your crafty plans for the weekend. It looks to be a lovely day outside here today so I am packing the girls in to our new bicycle kiddie trailer and going out for a ride to Mums. Hopefully we'll get some gardening done in the lovely weather. Then maybe Mum and I will get to make a start on the beautiful Lily Pond Crochet Blanket I shared with you last week ;0)

I have two 6"x6" scrapbook pages to share with you today. I held the first of my new product classes last weekend. All attendees received the Painted Petals stamp set and three project kits to complete. This was one of the projects they got to make. They could choose to make their project in to a little scrapbook page and add their own pictures at home. Or they could create a card front or picture to frame.

This was my first creation:


I used a 6" square base of Blackberry Bliss and then cut a 5.75" square Whisper White layer to stamp on. I used Blushing Bride and Wild Wasabi ink to stamp the flowers from the Painted Petals set. I then punched three postage stamps from Blackberry Bliss cardstock. I used my 1" Square Punch to cut the little detail pictures to add to my squares.

I finished by stamping the Rose Red dots and the Blackberry Bliss sentiment and added a row of Pearls for added texture and detail.


The alternative version I created used the two step stamping bloom in the stamp set. I stamped the flowers in both Blushing Bride and Rose Red. I added Wild Wasabi leaf detail. Instead of photos I created floral frames instead using all the different floral stamps in the set.


Both pages were embellished with Butterflies punched from the matching Painted Blooms Designer Series Papers. 

If you haven't already hopped on over to the newly updated Clearance Rack it is well worth checking up. There are some real bargains to be had. I have been receiving some great feedback on the bargains some of my lovely customers have been getting. I might have to partake of a stocking up trip to the Rack myself over the weekend.


Thank you for popping by today. Please let me know if you have any questions about Stampin' Up! or our products. I would love to help. All items can be purchased online via my shop (or click on the links below to find out more about specific products) or get in touch directly and I can order them for you to be delivered direct to your door.

 -XXX-
Built for Free Using: My Stampin Blog

Friday, 27 March 2015

Wellie Boot Butterfly Basics Card from Stampin' Up! UK Demonstrator Sarah Poulton

Happy Friday crafters.

What a fantastically busy and crafty week I have had here at Stampin' Sarah! HQ. I've been busy planning a special product class next week using the Painted Petals stamp set and matching papers. I've also been making Hostess Club gifts for my lovely virtual club members (more on that next week once I've taken some pictures). And lastly I have fallen in love with this online crafty project. Going to give it a go (with a lot of help from my Mum no doubt).

I have another of our card class projects to share with you today. This is a project and template I have cased from Stamping T in Australia. I loved the simplicity of the wellie boot template which could be used in endless combinations for all the gardening or outdoor loving people in your life.


For this card I used a Very Vanilla cardstock base and then stamped the flower from Butterfly Basics in black ink. I then layered the fern/leaf image by stamping multiple times from one inking in Wild Wasabi. I coloured the main floral image and then stamped and punched two little butterflies from Papillion Potpourri.


I finished with Candy Dots in tones of purple (taken from the Regals and Subtles Dots) and Basic Pearls to embellish the butterflies.

I absolutely love creating different shaped cards and this one is perfect for the time of year with Spring beginning to show itself in all the beautiful blooms popping up everywhere.

Thank you for popping by today. Don't forget Sale-A-Bration finishes on Tuesday so only a few more days to take advantage of all the lovely freebie products available only while supplies last.

Please let me know if you have any questions about Stampin' Up! or our products. I would love to help. All items can be purchased online via my shop (or click on the links above to find out more about specific products) or get in touch directly and I  can order them for you to be delivered direct to your door. 

-XXX-

Built for Free Using: My Stampin Blog