Tuesday 29 July 2014

A Blooming Birthday Card using Flower Patch from Stampin' Up!


Good morning crafters. Welcome to a new summer-y crafting week here at Stampin' Sarah.

I've been locked up in my craft room creating some lovely festive projects for my upcoming Christmas Craft Days in August. I have been designing and prepping lots of different projects including cards, decor and gifts. I cannot wait to share them with you very soon. But I don't want to spoil the surprise for my event attendees.

Today's crafty share is one of the cards we made at my July Monthly Card Class. It was inspired by this beautiful card. I loved the colour scheme and how beautifully the Flower Patch stamps layered over one another so gave it a Stampin' Sarah spin.

The layered colours are: Daffodil Delight, Crisp Cantaloupe, Tangelo Twist, Real Red and Old Olive. I used a half A4 card base in Blackberry Bliss layered with a 10.1cm x 14.4cm Hello Honey layer and the stamping was on a 9.7cm x 14cm Whisper White layer.


To create the sentiment layer I stamped the 'Happy Blooming Birthday' in Blackberry Bliss and layered on to a piece of Mossy Meadow which I punched with my Scallop Trim punch (I hadn't realised this punch had retired when I created the card, so you could very easily substitute this for the Scallop Edge Border Punch). The layered flowers are punched using the Itty Bitty Accents Punch Pack and finished with a Basic Rhinestone.

I hope you all had a lovely weekend. This is the best time of year to live on the Isle of Wight as every weekend there are Fayres and Festivals to pop along to and enjoy. This past weekend was the RSPCA IW Branch Gala Weekend. A huge fundraising event for the Branch and also a community event for people to visit the Centre and meet the staff and find out more about the work we do on the Island. I took my girls along both days to have a go at the games, indulge in ice cream and bounce on the bouncy castle. 

Sylvie is a little young to participate but she did spend some time with Papa (my Dad) on the coconut shy. She absolutely loved playing with the foiled animal balloons.


And the bouncy castle was conveniently located right next to the coconut shy so Summer loved having a bounce. And she slept well that night too.


Thank you for stopping by today and sharing in a little Stampin' Up! craftiness. All products are available to order through my Online Store.  And while you are there, don't forget to check out the Weekly Deals and Clearance Rack for some excellent bargains.

My diary is filling up for Christmas Crafty Parties so if you are on the Isle of Wight and would like to get together with some friends for some Festive crafting inspiration please get in touch on poulton_sarah@yahoo.co.uk or 01983 609249 to chat about earning crafting products for free and to book your date.

Happy Crafting
-X-

Thursday 24 July 2014

In Colour Flower Patch Fry Box Birthday Gift


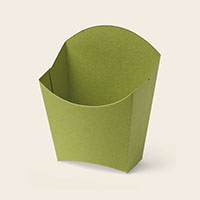
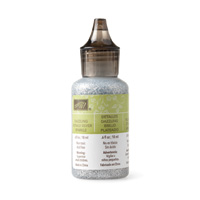
When I unpacked my lovely new box of goodies from the catalogue I was super excited to try out the new French Fry Box Die. I had seen so many lovely projects on Pinterest using this die. I found the perfect occasion last weekend when I went out for a crafty friend's birthday. I had bought these two little sparkly glitter glues in Silver Sparkle and Cherry Cobbler and needed a little container to put them in. The Fry Box was the perfect fit.

I cut the Fry Box in Whisper White and then cut a lining panel from the Moonlight Designer Series Paper Stack for the inside of the box. I then stamped the outside of the box using the FAB new photopolymer stamp set, Flower Patch, in Hello Honey and Blackberry Bliss (colours taken directly from the DSP colour scheme). I finished the box with a length of Coastal Cabana Thick Bakers Twine tied around with a bow.


I created the little matching birthday tag using my Scallop Tag Topper Punch. I punched the matching flowers and then inked the edges of the tag in Blackberry Bliss with a Sponge Dauber.

I had so much fun creating this little Fry Box. It has made me want to order the matching Hamburger Box Die now too. I can see I'll be making a lot of these for friends and family for the upcoming festive season.

Yes I said it, Christmas is not too far away in crafting terms. I have been super busy prepping for my Christmas Craft Days. The first of which is only a fortnight away now. I have some lovely projects lined up for my crafting ladies. I cannot wait to share the projects with you very soon with some fab project tips and tutorials too.

Thank you for stopping by today and sharing in a little crafty creativity. If you'd like any further information about the project, please get in touch.

All products can be ordered direct with me or via my Online StorePlease get in touch with any questions or queries about Stampin' Up! or please pop over to my Online Store for more information on all our products. Get in touch on poulton_sarah@yahoo.co.uk or 01983 609249.

Happy Crafting
-X-


Tuesday 22 July 2014

A Belated Chalkboard Stampin' Up! Birthday

Good morning crafty friends. 

How was your weekend? I hope you had a lovely one. It was beautiful sunshine here on the island and we enjoyed spending some time together with the family. Saturday was my card class and Summer loves chatting to all my lovely ladies in attendance. However, when she got home from her afternoon with Nana and Papa she zonked out on the sofa so missed her usual monthly crafty gossip (in a 2 year olds jibber jabber). But her nap meant she was fully energised for Saturday evening's carnival. She loved dancing and marching along with the marching bands and floats. 


But back to crafting. It was one of my lovely crafty friends birthday at the beginning of July. She celebrated on Friday evening and I made this chalkboard card for her. It was inspired by this post. Wendy is a teacher so this chalkboard made a perfect birthday card for her.

To create this I used Hardwood stamped on the 1cm lengths of Crumb Cake in Soft Suede ink (the card uses 4 x (14cm x 1cm) lengths and 4 (7cm x 1cm) lengths).  I then mounted these lengths on to a piece of Basic Black measuring 28cm x 9cm (scored in the centre at 14cm). Once my basic chalkboard was created I then decorated with the cake image from Sketched Birthday which I heat embossed with White Embossing Powder. I used the sentiment and star stamp from Something to Say. To finish I coloured and embellished with my White Stampin' Chalk Marker. The chalk marks on the black cardstock were created by over zealously patting with my Embossing Buddy.


Here is a little peek at my weekend. Summer loves Despicable Me and the 'Ah Ahs' (her word for banana which she associates with the Minions due to the Banana Song she has watched many times on Youtube). We treated her to a helium balloon at the Carnival which she proudly walked around with all evening.


Thank you for stopping by today and sharing in a little crafty creativity. If you'd like any further information about the project, please get in touch.

All products can be ordered direct with me or via my Online StorePlease get in touch with any questions or queries about Stampin' Up! or please pop over to my Online Store for more information on all our products. Get in touch on poulton_sarah@yahoo.co.uk or 01983 609249.

Happy Crafting
-X-

Saturday 19 July 2014

Welcome to the Isle of Wight for a little craftiness: Pinkies New Catalogue Blog Hop


Thank you for joining us on another Pinkies Blog Hop! We're showcasing lots of gorgeous projects using products from the new Stampin' Up!® Annual Catalogue. Simply use the buttons at the end of each post to keep hopping!

Welcome to the Isle of Wight for my little corner of this fantastic Pinkies new catalogue blog hop. Hello if you have joined me from Lucy's blog. 

When it came to designing a project for today's hop I knew exactly what I wanted to use: my lovely new Epic Alphabet Photopolymer Stamp Set paired with the fantastic Little Moments Project Life Accessory Pack. I had purchased these box frames from a well known Scandinavian home store recently and wanted to created these newborn shadow boxes with little newborn keepsakes for each of my girls. Although I didn't realise just how impossible the glass would be to photograph.


For the first frame I used the Epic Alphabet to stamp 'Summer' and the Skinny Mini Alphabet for 'Rose' and the birthdate. I stamped these completely by eye. The new photopolymer stamps make stamping alphabets so much easier and they are so easy to line up.


I then used my new Hearts Decorative Mask to create the corner feature. I sponge daubered So Saffron ink first and then lightly added Blushing Bride as an accent over the top. I wanted the ink colours to match the colours in the onesie sleeve I included in the box. This was the sleepsuit Summer wore home from the hospital.


For the second frame I again used the Epic Alphabet for 'Sylvie' but this time I used my Little Bundle Accessory Pack for the 'Grace'. I also used the stickers within the pack to create the corner feature with the ducks, elephants and hearts.

To create the little circle embellishment I covered the lid of an empty Designer Button container with sticky strip and then cut round the Tatty Ted image from Sylvie's onesie (this is the same onesie she is wearing in the photo) and stuck it over the lid. I then secured with sticky strip on the inside to create this 3d embellishment.

I also just wanted to point out how beautiful the little 2013-2015 In Color Sequins are. I have used these throughout both frames as they are just so lovely. I can see these will be a favourite feature on all my projects going forward.


Thank you for joining me today. I hope you enjoyed my crafty shares and that you are loving all the new catalogue inspiration today. Please hop on over to Anne Marie's blog to continue our hop.


Wednesday 16 July 2014

70th Birthday Perfect Peacock, Blendabilities and Gold Sequins from Stampin' Up!


Good morning crafty friends.

I hope your week is going well and you are enjoying the summer sunshine. The weather is beautiful on the Isle of Wight and Summer, Sylvie and I have been enjoying our summer strolls. 

I have just about managed to fit in some crafting over the past few days getting ready for this weekends craft class at my home. I also sat down to create a very special 70th Birthday card for a crafty friend of mine who is celebrating her special birthday next week.

My favourite stamp from the new catalogue is the Perfect Peacock. I fell in love with this stamp the first time I opened the catalogue. I knew it would make a beautiful feature for this card. I have stamped the image using Memento Black ink on to a 14cm square of Whisper White. I then coloured with my Coastal Cabana, Daffodil Delight, Rich Razzleberry, Old Olive and Pumpkin Pie Blendabilities Markers. I embellished the feathers with Gold Sequin Trim. For the sentiment I used Memorable Moments stamped in Island Indigo and Gold Encore Metallic Ink.

Card layers: 

Coastal Cabana: 14.8cm x 29.6cm (scored at 14.8cm)
Island Indigo:        14.6cm x 14.6cm
Real Red:             14.4cm x 14.4cm
Whisper White:    14cm x 14cm


And to all those who may be wondering how the weigh in went yesterday, half a pound down *phew*. This week I am definitely back on plan to get me my 1 stone award next week. Keep your fingers crossed for me. I am going to resist the urge to treat myself to a Caramel Macchiato anytime soon.

Please get in touch with any questions or queries about Stampin' Up! or please pop over to my Online Store for more information on all our products. Get in touch on poulton_sarah@yahoo.co.uk or 01983 609249.

Happy Crafting
-X-

Monday 14 July 2014

Watercolor Thank You Notes


Good evening! A bit of a late one from me today. Not sure what happened. I had my project all lined up to blog and then my brain had a 'post baby' moment and I thought I had written and published this post. Imagine my surprise when it didn't publish, only for me to find I didn't write the post to begin with! Just one of those baby brain moments.

So today's share is a quick thank you card inspired by this Pinterest find.  I made this for my recent workshop attendees to go with their orders. I absolutely adore this single sentiment stamp from the new catalogue called Watercolor Thank You. It is another of the textured stamps that gives a beautiful watercoloured effect when you stamp with it.

I used a standard half of A4 cardstock base in Whisper White. I then used my Aqua Painter and Pistachio Pudding ink pad to create the painted wash background. I stamped the Thank You in Island Indigo over the top. The embellishments to finish were created with the new Itty Bitty Accents Punch Pack and Basic Rhinestones.

I hope you've all had lovely weekends whereever you are in the world. Ours flew by. I have been on a health kick since having Sylvie and have been gradually introducing more exercise in to my daily life. I went for a lovely 5 mile walk on Saturday. I love being able to pack up the double buggy and venture off with my two girls. I even invested in a little battery radio so we can listen to music while out strolling. So far so good. I am feeling a lot better and the weight is coming off slowly. Although it is weigh in day tomorrow and I did have a sneaky Starbucks this morning. We'll see what happens at Slimming World tomorrow......

Please get in touch with any questions or queries or please pop over to my Online Store for more information on all our products. Get in touch on poulton_sarah@yahoo.co.uk or 01983 609249.

Happy Crafting
-X-

Friday 11 July 2014

Watercolor Wonder meets Petite Petals Hostess Gift


Happy Friday! I hope you have a lovely weekend planned. I'm keeping my fingers crossed for some lovely weather so the girls and I can get out and about. We've been enjoying long walks and feeding the ducks this week. But should the weather take a turn as predicted I have lots of crafty projects on the go at home planning for my Christmas Craft Days next month.

Today's crafty make is another gift set for one of my recent party hostesses. I always like to give a handmade crafty gift to my hostesses to say thank you on top of the lovely product freebies they receive from Stampin' Up! I created another of these super simple handbags that we were shown at our Telford Regional. I shared a similar one here. This is made from one sheet of standard UK A4 card (in this case I used Strawberry Slush with Blushing Bride and Rich Razzleberry accents).  

Here is the picture on our instruction sheet from the Stampin' Up! event. This was designed by Julie Kettlewell and shows exactly how you need to divide up your base sheet of cardstock.


Once you have cut and scored your A4 sheet you then just layer your cardstock for the decorative outside panels. I used the Petite Petals stamp set to stamp a layer of Whisper White and mounted on to Rich Razzleberry. 


For this card I used the new Work of Art stamp set. This is such a versatile set with brush stroke stamps, mixed sentiments and the chevron design used above too. For this card I used my Apothecary Accents Framelits Dies to create the window. On the base Whisper White layer I stamped the Chevrons in Rose Red, Melon Mambo and Blushing Bride to create the layered pink look. I then used my Blushing Bride and Rose Red markers to doodle an edging to my window. 


I finished by stamping the sentiment and highlighting with 3 shades of pink Candy Dots.


Thank you for stopping by today. I hope you all have a lovely crafty weekend. I would love to hear what you are up to or see your crafty projects. Please pop over to my Facebook page and share your weekends crafty plans:


Please get in touch with any questions or queries or please pop over to my Online Store for more information on all our products. Get in touch on poulton_sarah@yahoo.co.uk or 01983 609249.

Happy Crafting
-X-

Wednesday 9 July 2014

Vivid Vases and Stampin' Up! Blendabilities


I have been having fun playing with a brand new product from Stampin' Up!, the Blendabilities alcohol markers. I wanted to show these new pens at my new catalogue Open House so came up with this card design using the Vivid Vases stamp.

The Blendabilities are fantastic pens for colouring and blending with in a range of Stampin' Up! toned colours. They work beautifully with our stamped images (stamped in Memento Tuxedo Black ink) and are completely complimentary and coordinated with our cardstock, ribbons, Designer Series Papers  and embellishments. Click on the Blendabilities image below to see our full range of pens and accessories:


The card I created uses our new 2014-2014 In Colors as its inspiration. I coupled a cardstock base of Hello Honey with papers from the Moonlight Designers Series Paper Stack. As you can see from the top photo I used different colour card bases with different paper designs for a different effect.


We stamped the image from Vivid Vases and then coloured with my Old Olive, Daffodil Delight, Cherry Cobbler, Pumpkin Pie and Rich Razzleberry Blendabilities to colour the vase bases. I found just through trial and error ways to colour the vases to give the blended effect. It is well worth giving yourself a guilt free sheet of images to colour just to get the hang of it. I am always incredibly tough on myself when using a new technique. But I enjoyed playing with these pens and trying different ways of colouring. In the end I started with the darkest shade first and blended to the lightest. I then coloured the whole vase with the lightest pen to help blend all the colours together.


Please get in touch with any questions or queries or please pop over to my Online Store for more information on all our products. Get in touch on poulton_sarah@yahoo.co.uk or 01983 609249.

Happy Crafting
-X-

Monday 7 July 2014

A focus on the new Stampin' Up! In Colors


I demonstrated for some lovely friends last week in celebration of the launch of the new catalogue. As I am still awaiting my big parcel of goodies from the new catalogue I had to design a project with the sneak peek products I had received during our Demonstrator preorder period. I decided what better way to launch the new catalogue than with a card which focuses on our beautiful new In Colors.


The new In Colors are:
  • Blackberry Bliss
  • Hello Honey
  • Lost Lagoon
  • Mossy Meadow
  • Tangelo Twist
I love the dusty tones of these colours and how beautifully they work together. I already envisioning beautiful festive cards made with Blackberry Bliss and Lost Lagoon. If you click on the In Color peg picture above it will connect you through to the full range of new In Color products available online or by ordering direct with me.

The card we stamped together at Pat's party used the paint stroke swish stamp from the beautiful Work of Art stamp set. We stamped it in 4 of the In Color inks and then stamped the gorgeous swirly sentiment from the exclusive Hostess stamp set 'Hello There' in Blackberry Bliss ink. We then finished with flowers punched from the In Color cardstock pack using the Itty Bitty Accents punch pack.


 The In Colors are such a fantastic way to get started with Stampin' Up! And there is a special bundle of products priced at £27.95 for all 5 ink pads and a pack of In Color cardstock to match (Click here to find out more). There are also beautifully coordinated clothespins and Stitched Satin Ribbon in all 5 colours to help you coordinate your projects.

If you'd like to read through a PDF of the catalogue, click on the photo below. Alternatively I'd love to help you earn free product by Demonstrating for you and your friends and family (and popping a free catalogue in the post to you to get you started). If you are not local to me I'd love to help you collect orders and host a virtual party, just drop me a line on poulton_sarah@yahoo.co.uk  to find out more.


Please get in touch with any questions or queries or please pop over to my Online Store for more information on all our products. Get in touch on poulton_sarah@yahoo.co.uk or 01983 609249.

Happy Crafting
-X-