Showing posts with label gift bag. Show all posts

Monday, 30 November 2015

A Fry Box Die Gift Bag from Stampin' Up! UK Demonstrator Sarah Poulton

Happy Monday Crafters ;0)

Hope you've had a lovely weekend. Things certainly feel festive here with Christmas lights and music. Shame about the weather though. Our local lights switch on was cancelled due to the crazy wind and rain. Hopefully things'll calm down this week and we can get involved with a few more festive activities. And tomorrow will mark the start of my Christmas journal which I look forward to sharing with you over the next few weeks.

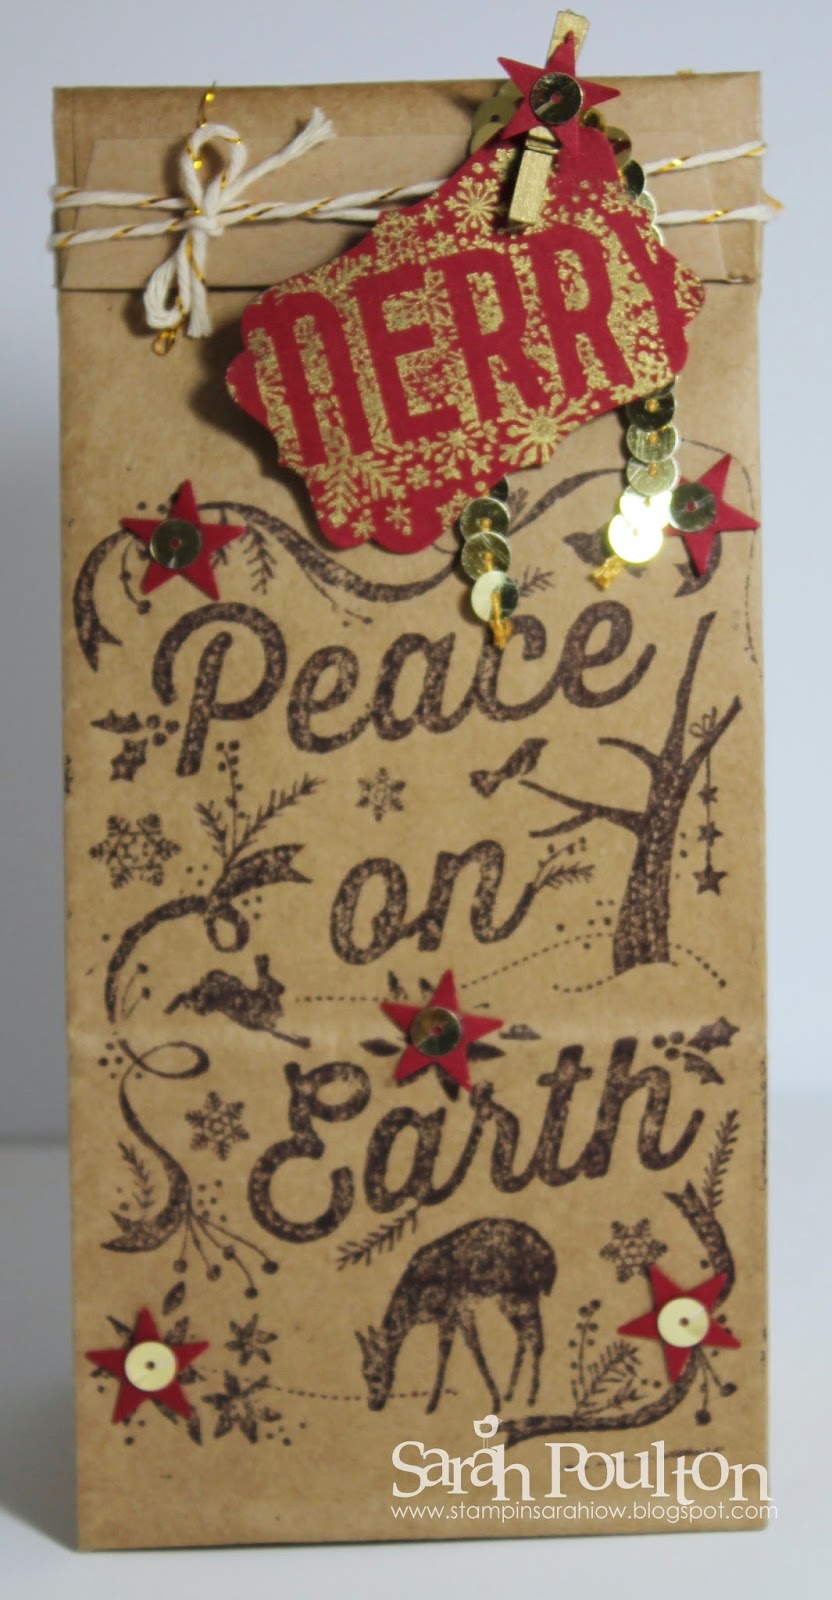
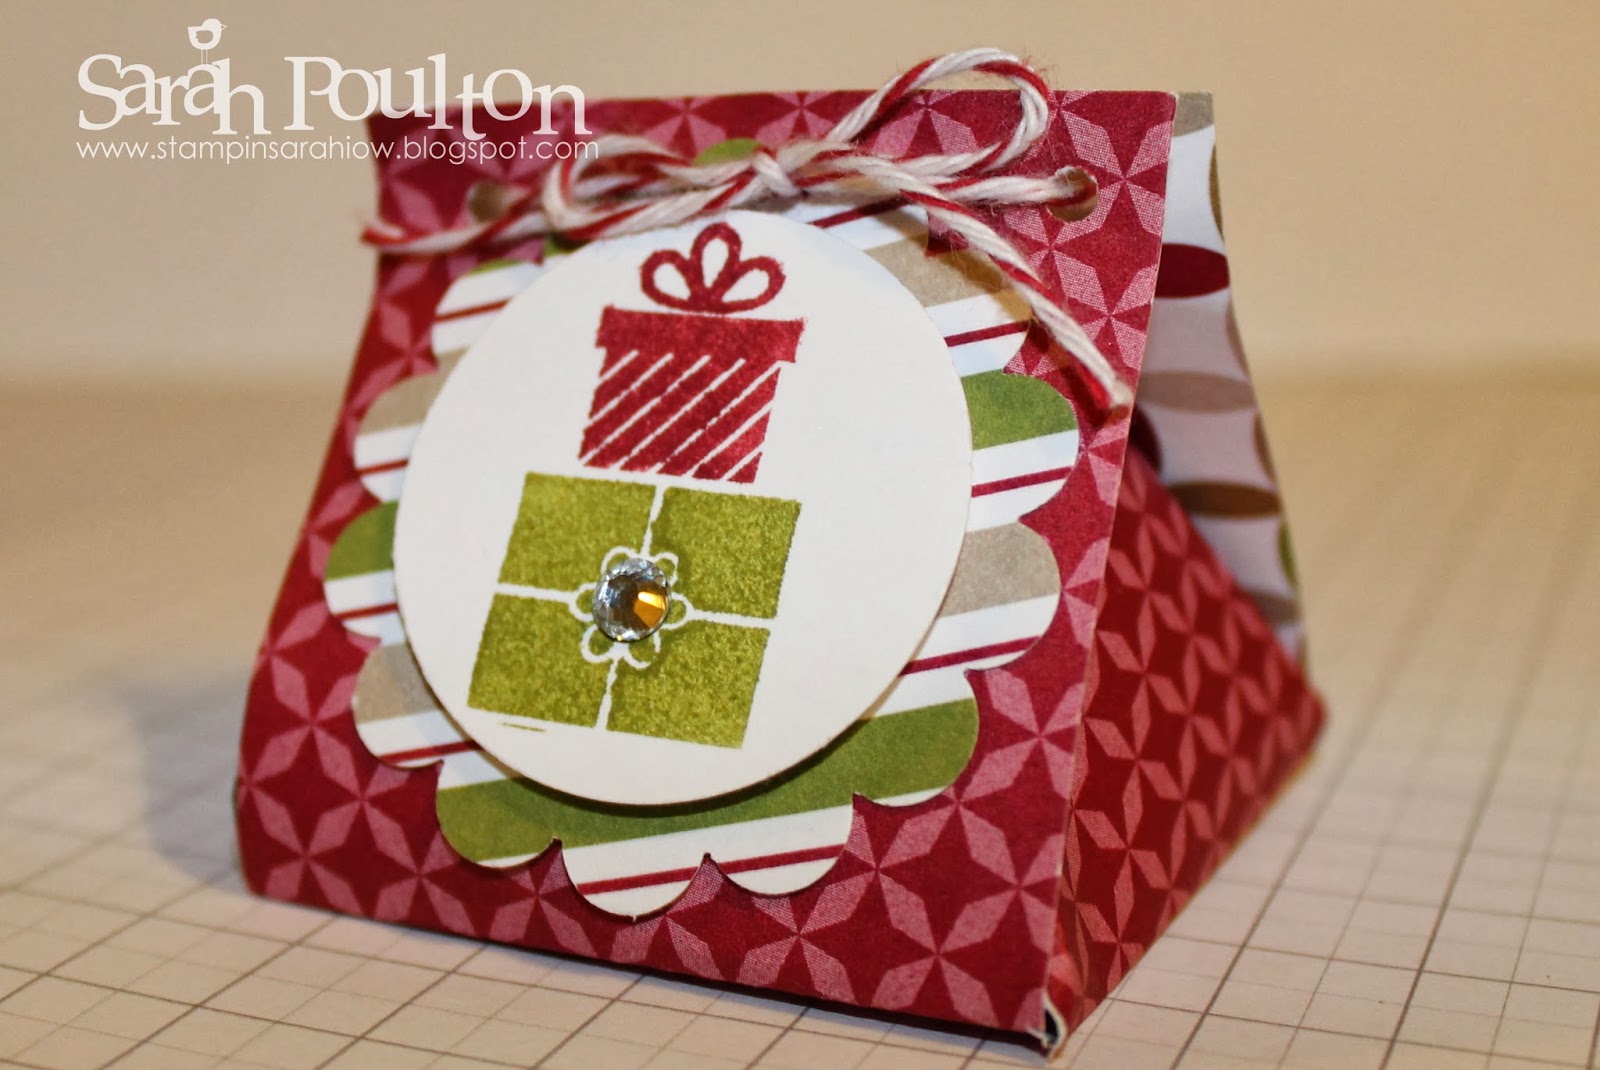
Today's creative share is a project from my November card class and is made with the gorgeous Home for Christmas Designer Series Papers with the Fry Box Bigz Die.


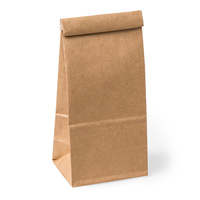
To make this gift box you just have to cut two of the Fry Boxes from your chosen DSP and then cut the sides from one of the boxes and then stick the bottom panels together (one on top of the other).  To create the handles I used my Large Oval Punch on each panel front and back.

To create the label I used the Making Spirits Bright stamp from the Among the Branches stamp set. I stamped using my Gold Encore pad and then punched with my 2" circle punch. I hung this from my gift box with Cherry Cobbler Baker's Twine.


To finish we filled the gift bags with novelty Christmas choccies (not that all of them made it in to the bags). This would make a lovely little table favour or decoration to hang from the Christmas tree.

Thank you for popping by today. Please let me know if you have any questions about Stampin' Up! or our products. I would love to help. All items can be purchased online via my shop or get in touch directly and I can order them for you to be delivered direct to your door. I'd also love to Demo for you and your friends at a crafty party. As the hostess you earn lots of lovely freebies and you all get to make a fun crafty project too (no crafting experience necessary!)

 -XXX-

Built for Free Using: My Stampin Blog

Friday, 17 July 2015

A Circle of Spring Stamped Mini Muslin Bag from Stampin' Up! UK Demonstrator Sarah Poulton

Good morning crafters. What a gloomy start to a Friday here on the Isle of Wight. I'm hoping it'll brighten up for a walk later. But in the meantime I am enjoying a peaceful morning snuggle with the girls watching Wall E (and simultaneously blogging too).

I have a project to share with you today that I made with my lovely Hostess Club ladies at our get together this month. For anyone belonging to one of my virtual clubs we get together every other month for a coffee and a crafty project. And for those that join from afar the project is mailed out with your order as a thank you for being a part of the monthly club. You can find out more by clicking the Virtual Clubs tab above.


This months project was a little different. We used the Mini Muslin Bags and stamped the beautiful Circle of Spring wreath.  We stamped the wreath using Memento Tuxedo Black ink. We then coloured with the Subtles Collection of Stampin' Write markers.

I used Pool Party, Blushing Bride, So Saffron and Wild Wasabi to colour my wreath. We then created a little tag using the Triple Banner Punch.  The greeting is from the Work of Art stamp set. We pegged the banner to the bag with a Mini Metallic Clothespin.


This is such a simple little gift bag and really fun to stamp and colour. This would be perfect for an end of term teacher gift or little gift packaging idea for jewellery or sweeties. I think the Mini Muslin Bags are a great addition to any crafters stash as they can be personalised for any occasion or event.

Thank you for popping by today. Please let me know if you have any questions about Stampin' Up! or our products. I would love to help. All items can be purchased online via my shop or get in touch directly and I can order them for you to be delivered direct to your door. I'd also love to Demo for you and your friends at a crafty party. As the hostess you earn lots of lovely freebies and you all get to make a fun crafty project too (no crafting experience necessary!)

 -XXX-
Built for Free Using: My Stampin Blog

Friday, 15 May 2015

A Flower Patch Tic Tac Treat Bag from Stampin' Up! UK Demonstrator Sarah Poulton

Good morning crafty friends. A very happy Friday to you!

I thought I would give you a little sneak peek of my Leadership swaps for our Stampin' Up! get together this weekend. I am so looking forward to catching up with all my lovely Stampin' Up! friends from across the country and maybe getting to have a play with some fab new Stampin' Up! products from the new catalogue.

This was made using the Flower Patch stamp set matched with the 1"x8" Cello Bags.


I filled the cello bags with green tic tacs to look like the flower stem. I stamped each large flower 3 times and cut the layers of each one. The leaves I stamped in Old Olive and Garden Green ink and then cut and glued to the flowers.


My favourite part of these swaps is the curled Pear Pizzazz cardstock which I wrapped around the tic tac stem and decorated with the little Melon Mambo flowers.

Thank you for popping by today. Have a great weekend doing whatever you have planned (and i hope you have time for some craftiness). Don't forget to check out this week's Weekly DealsPlease let me know if you have any questions about Stampin' Up! or our products. I would love to help. All items can be purchased online via my shop or get in touch directly and I can order them for you to be delivered direct to your door. I'd also love to Demo for you and your friends at a crafty party. As the hostess you earn lots of lovely freebies and you all get to make a fun crafty project too (no crafting experience necessary!)

 -XXX-

Built for Free Using: My Stampin Blog

Friday, 26 September 2014

Fun with Nature's Peace and Stampin' Up!'s Petite Cafe Gift Bags


Good morning and welcome to the official start of the weekend. I am all packed and ready for a Stampin' Up! party tonight with a group of new crafters. So excited to meet them all and share Stampin' Up! and our fantastic Autumn Winter catalogue (filled with festive inspiration).

Today's crafty make is inspired by a project I found in the catalogue. I love the simplicity of this stamped Petite Cafe Gift Bag.


I stamped the Nature's Peace stamp straight on to the Petite Cafe Gift Bag in Chocolate Chip ink. It is a little challenging to get a complete image due to the folded ridge in the bag. However, with a firm press down on your stamp it is possible to get a good image. I covered a slight break in the image with my star embellishments which are punched with my Itty Bitty Accents punch from Cherry Cobbler and then finished with a Gold Sequin taken from a length of trim.


For the tag I stamped the 'Merry' from Seasonally Scattered on to a piece of Cherry Cobbler card and punched with my Decorative Label Punch. I secured to a length of tied Gold Baker's Twine with a Mini Metallic Clothespin.

These little gift bags are perfect for presenting your Christmas gifts or making as table place markers filled with chocolates. My ladies at my card class all had lots of ideas for what they would put inside from jewellery to smellies to handmade sweets. I gave them some choccie coins to put inside as I cannot bear to make something Christmas-y without a little chocolatey treat.

I'd love to see your festive creations or ideas for Stampin' Up! products. So if you are reading and have a blog, please leave a comment to point me in your direction. I'd love to come and say hello and see what you've been making too.

Thank you for popping by today. If you have any questions about today's project or the products I have used, please get in touch on poulton_sarah@yahoo.co.uk or 01983 609249. You can order online direct through my store by clicking the product links above or the pictures below. I also have availability in the next few months for your very own crafty party. Click on the Promotions tab above to see the exclusive hostess promotion running until October 31st.

Happy Crafting
-X-

Friday, 11 July 2014

Watercolor Wonder meets Petite Petals Hostess Gift


Happy Friday! I hope you have a lovely weekend planned. I'm keeping my fingers crossed for some lovely weather so the girls and I can get out and about. We've been enjoying long walks and feeding the ducks this week. But should the weather take a turn as predicted I have lots of crafty projects on the go at home planning for my Christmas Craft Days next month.

Today's crafty make is another gift set for one of my recent party hostesses. I always like to give a handmade crafty gift to my hostesses to say thank you on top of the lovely product freebies they receive from Stampin' Up! I created another of these super simple handbags that we were shown at our Telford Regional. I shared a similar one here. This is made from one sheet of standard UK A4 card (in this case I used Strawberry Slush with Blushing Bride and Rich Razzleberry accents).  

Here is the picture on our instruction sheet from the Stampin' Up! event. This was designed by Julie Kettlewell and shows exactly how you need to divide up your base sheet of cardstock.


Once you have cut and scored your A4 sheet you then just layer your cardstock for the decorative outside panels. I used the Petite Petals stamp set to stamp a layer of Whisper White and mounted on to Rich Razzleberry. 


For this card I used the new Work of Art stamp set. This is such a versatile set with brush stroke stamps, mixed sentiments and the chevron design used above too. For this card I used my Apothecary Accents Framelits Dies to create the window. On the base Whisper White layer I stamped the Chevrons in Rose Red, Melon Mambo and Blushing Bride to create the layered pink look. I then used my Blushing Bride and Rose Red markers to doodle an edging to my window. 


I finished by stamping the sentiment and highlighting with 3 shades of pink Candy Dots.


Thank you for stopping by today. I hope you all have a lovely crafty weekend. I would love to hear what you are up to or see your crafty projects. Please pop over to my Facebook page and share your weekends crafty plans:


Please get in touch with any questions or queries or please pop over to my Online Store for more information on all our products. Get in touch on poulton_sarah@yahoo.co.uk or 01983 609249.

Happy Crafting
-X-

Monday, 30 June 2014

Isle of Wight Craft Party- Stampin' Up! Envelope Punch Board Makes


Good morning and what an exciting week we have ahead of us with the new Stampin' Up! catalogue launching TOMORROW!!! I cannot wait to share some projects and products with you all and also start placing orders from the new catalogue. There are SO many lovely new things I'd like to have a craft with. If you haven't got your hands on a copy of the new Stampin' Up! catalogue yet, please drop me a line on poulton_sarah@yahoo.co.uk and I'll happily pop one in the post for you.

I demonstrated for some lovely friends of mine on Friday evening. At the request of the hostess we made two projects using the Stampin' Up! Envelope Punch Board. My ladies love crafting with their boards and wanted some extra inspiration. So I had a quick search on Pinterest for some unusual punch board ideas and found these lovely two projects by a fellow Demonstrator, Sam Donald. I loved how she has created two boxes thinking outside of the usual EPB box (tee hee!).

The first is this curved sweetie treat box.  I used the very soon to be retired Watercolor Wonder Designer Series Paper to create both boxes. I love the big splodges of colour on this paper design. If you'd like to get hold of this paper then place your order super quick as its only available for the rest of today and then it will be gone for good!


The box was designed to hold two tubes of Love Hearts. But I managed to squeeze a treat size Crunchie and Chomp in to the sweetie holder. You can see a little sneak peek of a new little punch from the new Stampin' Up! catalogue above. I love this new little floral punch which comes as part of a set with a star and little heart too.

  
The second project we made was this standing sweetie holder. It was perfect for using with a Medium Cello Bag filled with some M&Ms. I love how this stands alone and would make a perfect wedding favour or table place setting. You can change the occasion or season simply by using a different colour scheme or Designer Series Paper.


Thank you to all who popped by to my new catalogue Open House on Saturday. We had a lovely day creating and chatting (and eating some tasty biscuits too). As you can see from the photos below my own copy of the new catalogue has been super busy. Firstly it is showing off the creative make and take on Saturday designed to showcase the FAB new Blendabilities.


And after all the excitement of my Open House both my babies fell asleep for about an hour and a half of Saturday. As you can imagine a whole 90 minutes of quiet time is rare in this house, so I tucked up on the sofa with my littlies sleeping either side of me and I made my (very long) wishlist of stamps, punches, dies, embossing folders, pens, Designer Series Papers, Project Life sets... and much much more. Something tells me I won't be ordering it all at once. Unless I win the lottery in the mean time of course......


Please let me know if you'd like a copy of the catalogue. I'd love to pop one in the post to you.

And don't forget today is the last chance to order from the Retiring List. So if there is a product you'd love to own from the current catalogue please check my online store to make sure it is not on the Retiring List. Tomorrow is a brand new catalogue and all retiring products will be gone for good.


Please get in touch with any questions, I'd love to help: poulton_sarah@yahoo.co.uk or 01983 609249.

Happy Crafting
-X-

Tuesday, 28 January 2014

Top Note Owl Card Tutorial


To celebrate today's launch of Sale-A-Bration and the new Spring Summer catalogue I am sharing the instructions to create the little Top Note Owl I posted on Saturday for the Pinkies Blog Hop.

I had seen a few variations of this lovely little owl on Pinterest (this one is my favourite by Bronwyn Eastley) and on blogs so I decided to give him a go myself. By looking at various pictures I was able to break down the component parts. Sorry for the low-tech instructions, I haven't quite worked out how to do this next part using technology. But I thought my handwritten instructions might give you the idea. These are all the component parts you will need to create your owl.


For Saturday's gift bag I used 2 1/2" Circle punched from Sweet Sorbet DSP (free with a qualifying Sale-A-Bration order) with matching Crisp Cantaloupe Full Hearts for the feet. Today's card above uses the gorgeous Retro Fresh Designer Series Paper with Tangerine Tango punched Full Hearts. You can change the colour scheme and DSP to fit your occasion. 

I inked the edges of all Crumb Cake elements of the owl using Crumb Cake ink and a sponge dauber to give a bit of definition.

I then glued the elements together as below. The scored Top Note becomes the hinge to hold the card together. In the example above I used Dimensionals to secure the Top Note closed before I attached the face components. For Saturday's gift bag version I created one of these mini gift bags using the Envelope Punch Board (I had to slightly squish the gift bag to fit the inside of the Owl-  I gently folded the edges inwards to give an inward V. See Saturday's post for reference). I then secured the Owl face hinge using a velcro dot to keep the bag closed.


Once you have assembled your component parts as above you can then either form in to a gift box, bag or card and then finalise with the eyes and small heart for the beak. To create the little whites of the eyes i have used a medium sizes Basic Pearl.

You will then have the main body of your Owl and you are free to embellish as fitting for your occasion. I have kept the card above plain and will embellish when I need the card. However, my example of Saturday I added a Valentines 'I Love U' banner using the fabulous Sale-A-Bration Banner Blast stamp set and matching Banner punch.


I hope that has made this project a little simpler for you to recreate. Please leave me a comment or drop me a line on poulton_sarah@yahoo.co.uk if you have any questions. I'd be only too happy to help.

Happy Owl-y Crafting
-X-

Friday, 27 December 2013

Stampin' Up! UK Gift Packaging & Class Dates for 2014


Good morning crafty friends.

I hope you've had a lovely Christmas wherever you are or whoever you have been with. And I hope the weather hasn't wreaked too much havoc with you. We've had a lovely one here on the Isle of Wight visiting our families and spending time with one very excited Summer ;0)

I thought I would share a quick gift bag I created from a sheet of 12"x12" Designer Series Paper to wrap a gift for my lovely friend Hayley. I used a sheet of Cherry Cobbler patterned paper from the Season of Style DSP which I cut to create a 11"x12" base. I then used the principle of the 2,4,6,8 gift box/bag to create this tall gift bag (I have seen these bags used widely across the blogosphere). I scored at 2.5", 5", 7.5" and 10" along the 11" side (the remaining 1" becomes the fold around tag that you attach your sticky strip to). On the 12" side I scored at 2" and then cut along the score lines to the 2" mark to create the base flaps that you sticky strip and fold up to create a sturdy base (all four flaps layer on to each other to give a good strong base for your gift inside the bag).


I punched holes through the top of the bag and secured with Cherry Cobbler Ribbon. I created this little gift tag using Crumb Cake Cardstock and I then paper pieced the coffee cup image from the Perfect Blend stamp set using the leftover scraps from the Cherry Cobbler DSP. I deliberately picked this image and the design of DSP to make the cup look like a festive Starbucks mug. Inside the gift bag I had included a bottle of Starbucks Gingerbread Syrup for festive coffees and treats. I was looking forward to treating Hayley to a Christmas coffee in our first Isle of Wight Starbucks. But it is now not due to open until the New Year. So our festive red cup treats will have to wait till next Christmas (hopefully the gingerbread will tide her over to 2014).

And while you are here today I wanted to announce my first two card class dates for 2014:

Saturday January 18th 1-4pm
Saturday February 15th 1-4pm

And I will also be hosting a new catalogue Open House on Saturday February 1st between 10.30 and 3pm. I will have samples of Sale-A-Bration and new cataogue products, as well as door prizes, on the day ordering incentives and a make and take project for all attendees. It would be lovely to see you then, so please pop along to pick up your copy of the new catalogue. Please drop me a line for more info and to let me know you might be popping along: poulton_sarah@yahoo.co.uk or 01983 609249.

And don't forget, for all those lovely crafty pennies you might have received for Christmas, my online store is open 24/7. You can visit my store here:


Or I am still placing orders so let me know if there is anything you'd like me to add to an order for you ;0)

Hope you've all had a good one and look forward to catching up with you all again soon. Pop back on Monday for a sneak peak look at some of the GORGEOUS new Sale-A-Bration products coming in January (and don't forget, these are products you will receive for free with a qualifying order from January 28th onwards!).

Happy Festive Crafting
-X-

Friday, 6 December 2013

Stampin' Up! UK Mini Christmas Table Favour Treat Bag Tutorial


Good morning crafters. How is your December going so far? I am up super early this morning for a little bit of a crafty catch up. I have a weeks worth of December scrapbooking to catch up on and a small window of opportunity before Summer wakes up for the day.

I thought I would share this little table favour treat bag today. I created this project for my November Hostess Club get together. I run a regular monthly crafty get together for all the ladies who have a place in my Hostess Club. We create a small crafty project as well as chat over a cuppa and cake. 

I love the simplicity of this little 2"x2" favour bag created from a 6" square piece of Designer Series Paper (I used the Season of Style DSP from Stampin' Up!). This is the bag laid flat to show you the basic template (and show you how I have scored and folded the two edge pieces).


Here are the measurements for scoring the 6" square. It needs to be scored at 2" and 4" along both sides. You can then remove the 4 corner pieces. You then need to measure and mark 1" (the centre) on two opposite sides (these will form the triangle folded sides of your bag). 


 You can then score from the 1" mark to the opposite corner (I have marked in pen on the template below where to score if you look closely. It was very difficult to make the pen show against the patterned papers). The picture above shows on the left hand side the result you are looking to achieve with your scoring. Both sides of the bag will form this triangular shape.

To create the method for closing the bag you will need to punch 4 small holes (two on each opposite piece). You need to punch the holes in the two squares which haven't been scored. You can then fold the bag up and thread fine ribbon or bakers twine through the holes and tie shut. You can then decorate to fit your occasion (I have used the Stampin' Up! Wishing You stamp set for mine paired with my scallop circle and circle punches).


So that's really it. A 6" square scored at 2" and 4" on either side. Remove the 4 corners. Score two opposite sides from the 1" mark on the outside edge to the inner corner to create a triangle. Punch holes in the two remaining squares to form your closure. Fold up in to shape and decorate.

And just before I disappear for my scrapbooky catch up I thought I would share this amazing swap I received at Convention. Over upcoming posts I am going to share a few of the amazing creations I received from fellow Demonstrators. This just stood out for me as I love the Fishin' Around stamp. I have never been brave enough to try this hair gel pocket technique. But I just love the overall effect. This was made by a lovely German Demonstrator called Angela.


Thanks for popping by today. Please say hello and leave a comment. I have set myself a target to find new blogs to read throughout December, so leave me a comment and I'd love to stop by and say hello.

And if you'd like to find out more about any of the Stampin' Up! products used for today's creations please drop me a line on poulton_sarah@yahoo.co.uk or 01983 609249. Or alternatively pop by my online store which you can find here:


Happy Crafting ;0)
-X-

Wednesday, 6 November 2013

Stampin' Up! UK Joyful Christmas Gift


Good morning and welcome to a crafty Wednesday here at Stampin' Sarah! Hope you all had a lovely Bonfire Night. As the weather was a bit changeable, Summer and I opted for a night in with indoor fireworks at Mum and Dads. She was fascinated by the sparklers so it was a big success (and the drive home got her to sleep which is always a big plus!).

Today I thought I would share a hostess thank you gift I made for my friend Hayley who hosted a Stampin' Up! party at her house in Southampton on Saturday. I had seen lots of variations of this idea across Blogland and Pinterest. I loved the idea of making seasonal coasters for upcoming festivities. I searched online for cork coasters and also purchased two shades of Stazon ink to colour the image with (I could have used a spray sealant with Stampin' Up! inkpads but as I wished to demo the technique it wouldn't have left enough time to dry the coasters).


I began by stamping the Poinsettia image from the Joyful Christmas stamp set using Black Stazon on to the 4 cork coasters. I then used a sponge dauber to ink the red on to the image.  I finished by stamping the leaves in green and then added a touch of sparkle to the centre of the flowers.

I was really pleased with the result and thought these would make perfect little gifts for a neighbour or friend. And if you package them up using the current Stampin' Up! packaging promotion they will fit easily in the post of through a letter box with a lovely handmade touch. Please click here for more information on the fantastic packaging bundles featuring Stampin' Up! gift boxes, ribbon and gift tags. Or to order the bundles directly through my store, please click on the photo below.


The last image is a close up the packaging for the coasters which uses:


If you place an online order for any Stampin' Up! products through my online store remember to add the code below and I will add your name to the draw to win the hostess benefits for the month's combined orders (with a minimum of £25 in hostess freebies):

V99TUSS2

Please get in touch if you have any questions about todays project or My Digital Studio, about placing an order or about Stampin' Up! in general. You can contact me on poulton_sarah@yahoo.co.uk or 01983 609249.

Happy Crafting

-X-

Thursday, 29 August 2013

The Autumn Winter Catalogue is here


The new Autumn Winter seasonal catalogue from Stampin' Up! is here. Click on the picture above to link through to all the lovely new seasonal makings and craftiness. I have been sharing projects made with all the lovely new products over the last week and now the products are available to purchase. If you'd like a copy of the new catalogue, just drop me a line on poulton_sarah@yahoo.co.uk and I'll happily pop one in the post for you.

There are also two new promotions launched today from Stampin' Up!, one fab bundle discount  on Papillion Pot Pourri and the matching punch, and also the very lovely 'Best of Christmas' stamp set for September. More information on the promotions tab above.


And now for a quick crafty share to celebrate the new catalogue launch.


Just a quick and simple creative share with you today. My lovely Mum brought home a whole box of these black gift bags from work thinking I could use them for my Christmas day. I was more than happy to have a go at decorating them as I knew the black bag would work perfectly with the Stampin' Up! Glimmer Papers and the beautiful new Winter Frost Speciality Designer Series Paper.

Each of the bags originally featured a popular whisky brands logo on each side. So to cover these logos up and to create a lovely bottle gift bag I made these pennant style snowflake embellishments. The pennant was cut using the beautiful Winter Frost Speciality DSP. I then layered up snowflakes cut with the Festive Flurry Framelits from Silver Glimmer Paper, Bermuda Bay cardstock and then a smaller snowflake cut from one of the patterned foiled sheets from the Speciality DSP.  I made two of these pennants to stick to each side of the gift bag.

A quick and simple crafty project to embellish and personalise a quick bottle gift bag.

Thanks for popping by today. I know there is a lot to take in with all the news and a new catalogue launch. Please get in touch with any questions or to be sent a copy of the fantastic new seasonal catalogue. I'm always more than happy to chat Stampin' Up! and all things crafty.

Happy Crafting ;0)
-X-