Showing posts with label framelits. Show all posts

Friday, 4 November 2016

Fab New Stitched From The Heart Framelits + 25% Selected Coordinating Stamp Sets

Hello Crafty Friends.

I'm finally back online after our recent move. I got up with the girls bright and early to find it had been switched on overnight. So I can now catch up on this weeks Walking Dead as well as celebrate the internet with this blog post.

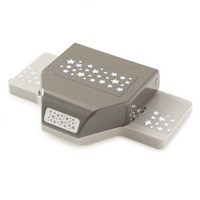
This week Stampin' Up! have released an exclusive new catalogue product called the Stitched From The Heart Framelits. These are a lovely layering Framelit to add texture to your cards with a stitched effect edging to the circles, squares and ovals.

And even better than a sneak peek product is a 2nd promotion offering 25% off selected coordinating stamps sets through to the end of November. To find out more click on the pictures below.


View the Stampin' Up! Stitched from the Heart commercial below:


I am hosting a Partylite Candle party this upcoming Friday (November 11th). Have you seen their lovely new festive products? There are some irresistible warmers and scents in their seasonal catalogue.  If you'd like to add an order in with my party just drop me a line on poulton_sarah@yahoo.co.uk. I'd love to help you get your hands on all your Christmas fragrance must haves.

Please let me know if you have any questions about Stampin' Up! and their products. I would be happy to help. All items can be purchased online via my shop or get in touch directly and I can order them for you to be delivered direct to your door. I'd also love an opportunity to Demo for you and your friends at a crafty party.  As the hostess you earns exclusive free products and all guests get to create a fun crafty project to take home too! Get in touch if you'd like any further information.

Monday, 29 August 2016

A Festive Frame from Stampin' Up! UK Demonstrator Sarah Poulton

Good morning and a very Happy Bank Holiday Monday. 

Firstly, I'll begin with apologies due to my lack of updates. My laptop went off for repairs as all of a sudden it stopped responding a couple of weeks back. I felt like I'd had a friend removed (more an indication of how much time I spend on Pinterest than anything!). So I've had all my pictures ready but no way of updating. I am now fully up and running (thankfully with my pictures backed up ready to share) and have a fun week of projects to share with you! And lets not forget the new catalogue will be live on Wednesday too. What a week!!!

So today I have a project that I created for my August Christmas Craft Days earlier this month. I am a big fan of these Ribba frames from IKEA. I have crafted with them several times before including memory frames for my girls. They measure 23cm square and are perfect for adding a touch fun and festiveness to your December decor.

I started with a Cherry Cobbler card base and added my layered Very Vanilla and DSP squares over the top. I then took elements from the This Christmas DSP and various festive stamp sets to add images, words and embellishments.


What I love about the simplicity of this project is that you could easily theme the panels to match your own colour scheme of decor theme. I am currently working on another frame with some of the lovely new stamp sets available from Wednesday. I will share it as soon as the project is finished.


Thanks for sticking with me and for your patience. I'm happy to be back blogging again and have so many things in the works to share in the upcoming weeks. I'll leave you today with a bit of a cross stitchy update. I have been working on this huge hare and moon design since the New Year. I have so far finished 2 of 8 pages but I am loving every minute. I'll give you an update of some of my stitch along projects later in the week.


Thank you for popping by today. Please let me know if you have any questions about Stampin' Up! or our products. I would love to help. All items can be purchased online via my shop or get in touch directly and I can order them for you to be delivered direct to your door. I'd also love to Demo for you and your friends at a crafty party. As the hostess you earn lots of lovely freebies and you all get to make a fun crafty project too (no crafting experience necessary!)

 -XXX-
Product List

Wednesday, 16 December 2015

A simple Snow Place Christmas Card from Stampin' Up! UK Demonstrator Sarah Poulton

Happy Wednesday crafters.

I have a super simple Christmas card to share today. I only just invested in the Snow Place stamp set. I cannot believe I didn't purchase it earlier as it is so much fun to stamp with. I do love a stamp set I enjoy the actual stamping process with. 

I had seen various versions of this card on Pinterest and loved the use of the Real Red Pompom Trim for the earmuffs. So here is my take on the happy little Christmas penguin.


It really is as simple as just stamping your penguin, stamping your scarf on a scrap piece and either cutting with scissors or the matching Framelit and then adhering together with a matching sentiment.

And speaking of sentiments, don't you love the fun sayings in this set? I prefer more traditional greetings normally. But I love these funny little greetings and I especially love the font too.

Thank you for popping by today. Please let me know if you have any questions about Stampin' Up! or our products. I would love to help. All items can be purchased online via my shop or get in touch directly and I can order them for you to be delivered direct to your door. I'd also love to Demo for you and your friends at a crafty party. As the hostess you earn lots of lovely freebies and you all get to make a fun crafty project too (no crafting experience necessary!)
 -XXX-
Built for Free Using: My Stampin Blog

Monday, 28 September 2015

A Happy Scenes Birthday Celebration from Stampin' Up! UK Demonstrator Sarah Poulton

Good morning crafty friends. How was your weekend? Yesterday was my middle sister's birthday so we celebrated with homemade cake and a trip to Tapnell Farm for everyone to have a go on the giant bouncing pillow.

I wanted to share one of the cards I made for my sister. She has two cats. Yes you guessed it, a black one and a ginger one (their names are Harry and Ron for all you HP fans). I knew the Hearth and Home Thinlits would be perfect coupled with the cat from the Festive Fireside Framelits. I wanted to create a birthday cake scene for Harry and Ron to be looking in on.


I stamped the cake from Endless Birthday Wishes and coloured with a Blender Pen. I hand cut the curtains from the Cherry on Top Designer Series Paper Stack. I wanted to have birthday themed curtains to suit the occasion.


Thank you for popping by today. Please let me know if you have any questions about Stampin' Up! or our products. I would love to help. All items can be purchased online via my shop or get in touch directly and I can order them for you to be delivered direct to your door. I'd also love to Demo for you and your friends at a crafty party. As the hostess you earn lots of lovely freebies and you all get to make a fun crafty project too (no crafting experience necessary!)

 -XXX-


Built for Free Using: My Stampin Blog

Friday, 21 August 2015

A Festive Fireplace Easel Card Sneak Peek from Stampin' Up! UK Demonstrator Sarah Poulton

Good morning crafters and welcome to another Christmas-y Autumn Winter Catalogue Sneak Peek. This time I am sharing a project I came up with using the upcoming Autumn Winter Festive Fireplace stamp set and Fireside Framelit bundle.

As soon as I saw this stamp I knew it would be PERFECT for a vellum and battery tealight easel card creation. I am a big fan of using battery tealights for my special Christmas cards. They become a decoration in themselves and its nice to sometimes give an extra special card. So this is what I came up with.


 I found packs of battery tealights in my local pound shop and as a bonus they were the flickering ones giving the fire an extra realistic light effect. I deliberately photographed this card as it was getting dark to give you an idea of how lovely and warm the card felt with the glowing fireplace.

For this card I used a 10.5cm x 29.7cm (half A4 cut at 10.5cm). I scored the card at 14.8 and again at 7.4 (this formed the folded over easel part of the card).  This is a standard easel card in format. However, I had to cut the window through three layers of card using a craft knife to give the tealight the chance to glow through the fireplace. I started by cutting the middle of the fireplace out and using the middle rectangle as a template to cut the next two layers (I then carefully lined them up to adhere them together).  I stamped the fire on to a small piece of Vellum cardstock (slightly larger than the hole in the middle of the fireplace) and turned over to color the image with Stampin' Write markers. I sandwiched the Vellum between the layers before adhering the fireplace to the main card.


I used a Cherry Cobbler based layered with Crumb Cake and Very Vanilla. I stamped the fireplace on to Very Vanilla and coloured with Blender Pens and Cajun Craze ink. The Merry Christmas sentiment is from another new stamp set called Cozy Christmas. To help the easel stand up I used Candy Dots and jewels. It gives just enough height to help the card stand up.

Finally here is a view of the card from the side to show how I positioned the tealight to make the fire glow.


I think I have earned a cuppa and a sit down today. It is 11.37am as I type this and the girls had me up at 5am. By 7am we were out walking and enjoying the warm morning (I thought as the weather is so changeable at the moment it would be best to take advantage of the sunshine early). We walked up over the hill to Carisbrooke Castle and the girls enjoyed the sights and meeting lots of early morning dog walkers. We then came home and baked a cake, a quiche, painted Summer's nails and I finally found time to publish this blog. A cuppa is definitely now in order. Phew......

Thank you for popping by today. Please let me know if you have any questions about Stampin' Up! or our products. I would love to help. All items can be purchased online via my shop or get in touch directly and I can order them for you to be delivered direct to your door. I'd also love to Demo for you and your friends at a crafty party. As the hostess you earn lots of lovely freebies and you all get to make a fun crafty project too (no crafting experience necessary!)

 -XXX-

Built for Free Using: My Stampin Blog

Tuesday, 9 June 2015

A Butterfly Basics Hostess Gift from Stampin' Up! UK Demonstrator Sarah Poulton

Good morning crafty friends.

I'm a bit later with my posting than normal this week. We returned from a lovely week away to France at the weekend so fitting in crafting amid washing and unpacking proved a little challenging. But I did manage to sneak an hour for creating last night. I have a Stampin' Up! crafty party this week and wanted to make something special for my Hostess. 

I found a pack of these little notebooks in my 'crafty inspiration' drawer full of things I will get round to making eventually. I thought they would make perfect gifts for upcoming new catalogue party hostesses.


I used my Butterfly Basics stamp set with the Butterfly Framelits (available together as a fantastic bundle for a 15% saving) to create the background and butterfly feature. For the background I stamped the flower from Butterfly Basics in Versamark and heat embossed with White Stampin' Emboss powder. I then stamped the small butterflies in Watermelon Wonder ink.

I added the white film frame cut with the On Film Framelits and the larger butterfly cut with my Butterfly Framelits. To finish I added an In Color Blossom in Mint Macaron and Itty Bitty Flowers punched with the Itty Bitty Accents Punch Pack from Mint Macaron Cardstock (I added a White Candy Dot for the centre of the flower).

I have added a special Stampin' Up! pen to the gift and will set about designing a gift bag this evening.


If you would like to host your own Stampin' Up! party I would love to come and demo for you and your friends and family. I always make a gift for all my hostesses on top of the fab product freebies you will receive from Stampin' Up! themselves. I also provide all materials for you and your attendees to complete a stamping project aimed at all levels of experience from a new stamper through to the more experienced crafter.

Thank you for popping by today. Don't forget to check out this week's Weekly DealsPlease let me know if you have any questions about Stampin' Up! or our products. I would love to help. All items can be purchased online via my shop or get in touch directly and I can order them for you to be delivered direct to your door. I'd also love to Demo for you and your friends at a crafty party. As the hostess you earn lots of lovely freebies and you all get to make a fun crafty project too (no crafting experience necessary!)

 -XXX-
Built for Free Using: My Stampin Blog

Friday, 16 January 2015

A gold tone Little Letters scrapbook page by Stampin' Up! UK Demonstrator Sarah Poulton

Good morning crafters. It is the weekend ;0) And you know what that means? Another fab Pinkie team blog hop tomorrow. This time we will be celebrating the Spring Summer Catalogue I have a lovely set of notecards to share with you tomorrow so be sure to pop by to check out all the lovely creative inspiration from some fab fellow Demonstrators.

Today I have a scrapbook page to share with you. I'm a little scrapbook rusty. I've been so enjoying Stampin' Up! and Project Life that I've neglected my traditional 12"x12" scrapbooking. But I really enjoyed getting back to it this week.


For this page I used a Very Vanilla base with a 6" square of Gold Fancy Foil Designer Vellum. I stamped the small star flurries in Gold Encore ink using the background stamp from the Perpetual Birthday Calendar Stamp Set.

I created my title with my Little Letters Thinlits Dies using Champagne Glimmer Paper. I added a length of Gold Satin Ribbon and Gold Sequin Trim.


I cut three stars from Brushed Gold cardstock using my Stars Framelits and scored from every point. I folded and then mounted to my page using Dimensionals layered on top of one another (I used 4) to keep the 3D effect.

To embellish my star background I added a little colour with my 2013-2015 In Colour Sequins.


I really enjoyed getting back to scrapbooking and I never need an excuse to show off pictures of my girls. This picture was taken on a walk to my Mum's house in the cold weather. My youngest is never shy of smiling when she sees a camera.

You can find out more about the new Spring Summer Catalogue and Sale-A-Bration promotion by clicking here or by using the navigation menu on the left. This really is the most exciting time of the year to shop. New products and fantastic freebie rewards too. 

Please let me know if you have any questions about Stampin' Up! or our products. I would love to help. All items can be purchased online via my shop (or click on the links above or pictures below to find out more about specific products) or get in touch directly and I'll order them for you. You can get in touch on poulton_sarah@yahoo.co.uk or 01983 609249.

-XXX-

Friday, 14 November 2014

Wonderful Wreath Joy Shaker Card from Stampin' Up! UK Demonstrator Sarah Poulton


Hello lovely crafty friends! It is the weekend. Time to celebrate and get festive. The ads on TV are well and truly Christmasy now so I don't feel bad for spending my weekends making little festive fun things for my girls. I might even have to break open Elf over the weekend and partake of some festive film frolics with a bowl of maple syrup covered spaghetti.

Today's crafty share is a project I CASED from the lovely Kimberly Van Diepen over in the States. I just adored this simple Whisper White layered shaker card the moment I came across it on Pinterest. So I used it as the basis for my creation for my lovely team ladies get together this week.

I cut the 'Joy' using the fab Wonderful Wreath Framelits and then glued a small piece of Window Sheet over the back (a step I initially forgot and then wondered why all my shaker bits fell out the front of the card!! Doh!) to cover the cut out word. 

For the shaker elements I used my Star Confetti Punch to cut lots of little Champagne and Silver Glimmer Paper stars which I then mixed with sequins from the In Color Sequin Assortment.


I surrounded the Joy with Dimensionals to create a seal around the area I wanted to shake. This prevents all the little stars from flying everywhere. It also gives this lovely shadowed raised effect too.

To finish the card I used some of the punched stars, sequins and basic rhinestones to create a little bit of bling and colour on the front of my card.

Thanks for stopping by today. If you have any questions about today's project or the products I have used, please get in touch on poulton_sarah@yahoo.co.uk or 01983 609249. You can order online direct through my store by clicking the product links above or the pictures below. I also have availability in the next few months for your very own crafty party so drop me a line to find out more and get your date in the diary.

Happy Crafting
-X-

Wednesday, 5 November 2014

Wondrous Wreath Cardmaking Class Make from Stampin' Up! UK Independent Demonstrator Sarah Poulton


Happy Wednesday crafters.

I am so in love with the Wondrous Wreath stamp set. I just love the layered stamping. I find it relaxing. And I love all the different effects you can get simply through layering different colours.

I've seen these floating style cards a lot in crafting magazines and online and thought the wreath would make a perfect centre piece to hold the layers together.

I started with a Garden Green card base and covered my two sections with strips of patterned paper from the Trim The Tree Designer Series Paper Stack.


I created the centre piece by stamping Old Olive, Mossy Meadow and Cherry Cobbler to create the leaves, bow and berries. I then cut the wreath and bow with the Wonderful Wreath Framelits. I used the Framelits again with Champagne Glimmer Paper to cut the 'joy' which I then glued with Tombow on to my wreath.

Have you checked out this weeks Weekly Deals? Pop over to my online store to see all the great offers from Stampin' Up! for this week.


Thanks for stopping by today. If you have any questions about today's project or the products I have used, please get in touch on poulton_sarah@yahoo.co.uk or 01983 609249. You can order online direct through my store by clicking the product links above or the pictures below. I also have availability in the next few months for your very own crafty party. 

Happy Crafting
-X-