Showing posts with label Wondrous Wreath. Show all posts

Monday, 29 August 2016

A Festive Frame from Stampin' Up! UK Demonstrator Sarah Poulton

Good morning and a very Happy Bank Holiday Monday. 

Firstly, I'll begin with apologies due to my lack of updates. My laptop went off for repairs as all of a sudden it stopped responding a couple of weeks back. I felt like I'd had a friend removed (more an indication of how much time I spend on Pinterest than anything!). So I've had all my pictures ready but no way of updating. I am now fully up and running (thankfully with my pictures backed up ready to share) and have a fun week of projects to share with you! And lets not forget the new catalogue will be live on Wednesday too. What a week!!!

So today I have a project that I created for my August Christmas Craft Days earlier this month. I am a big fan of these Ribba frames from IKEA. I have crafted with them several times before including memory frames for my girls. They measure 23cm square and are perfect for adding a touch fun and festiveness to your December decor.

I started with a Cherry Cobbler card base and added my layered Very Vanilla and DSP squares over the top. I then took elements from the This Christmas DSP and various festive stamp sets to add images, words and embellishments.


What I love about the simplicity of this project is that you could easily theme the panels to match your own colour scheme of decor theme. I am currently working on another frame with some of the lovely new stamp sets available from Wednesday. I will share it as soon as the project is finished.


Thanks for sticking with me and for your patience. I'm happy to be back blogging again and have so many things in the works to share in the upcoming weeks. I'll leave you today with a bit of a cross stitchy update. I have been working on this huge hare and moon design since the New Year. I have so far finished 2 of 8 pages but I am loving every minute. I'll give you an update of some of my stitch along projects later in the week.


Thank you for popping by today. Please let me know if you have any questions about Stampin' Up! or our products. I would love to help. All items can be purchased online via my shop or get in touch directly and I can order them for you to be delivered direct to your door. I'd also love to Demo for you and your friends at a crafty party. As the hostess you earn lots of lovely freebies and you all get to make a fun crafty project too (no crafting experience necessary!)

 -XXX-
Product List

Wednesday, 17 December 2014

Glitter Napkin Robin Card from Stampin' Up! UK Demonstrator Sarah Poulton


Good morning crafters ;0) And a very happy Wednesday to you (you know what that means? New Weekly Deals over on my website!). Nearly the weekend. And this time next week it'll be Christmas Eve *hooray*

Today's crafty share is a project we created at this month's final Christmas card class. I always get a bit sad packing away my festive stamp sets. But with the new Spring Summer products just around the corner I won't have time to miss Christmas for long.

So this card uses the tissue paper technique that I have seen all over the blogs and internet recently. It is perfect for using those favourite festive napkins to make in to beautiful cards.

I found these robin napkins in a local garden centre and knew my crafty ladies would love them. So I set about designing this card.


To create this card I first cut my card layers (I layered Brushed Gold over a Cherry Cobbler base). I then cut my top layer to layer the napkin on to. I covered the whole piece of cardstock with glue using the Stampin' Up! Transfer Adhesive Sheets. I then carefully pressed the napkin on to the adhesive making sure to position the image to get the whole robin on to the card. I pressed the tissue down to ensure it was completely adhered all over.

Once you have your napkin layer I pressed my Versamark inkpad all over the napkin layer and covered with Iridescent Ice Stampin' Emboss Powder and heat embossed to give the glitter sheen over the whole image. Once the embossing is set, you have your finished card and can embellish as desired. We created the little banner and stamped with the greeting from the Wondrous Wreath stamp set.

Thank you for popping by today. I'll have another festive creation for you tomorrow. If you have any questions about today's project or the products I have used, please get in touch on poulton_sarah@yahoo.co.uk or 01983 609249. You can order online direct through my store by clicking the product links below. I also have availability in the next few months for your very own crafty party so drop me a line to find out more and get your date in the diary.

Happy Crafting
-X-

Friday, 5 December 2014

A Wondrous Wreath Thank You from Stampin' Up! UK Demonstrator Sarah Poulton


Good morning a very Happy December 5th to you.

I recently made a large batch of these thank you cards for my November customers as a big thank you for their Christmas crafting custom.

I love the versatility of the Wondrous Wreath stamp set. It doesn't just have to be your traditional red and green Christmas wreath. I stamped this in Soft Sky, Island Indigo and Encore Silver ink and then embellished with Basic Rhinestones.


The 'Thanks' stamp is from the Another Thank You Photopolymer stamp set (stamped here in Island Indigo).

I hope you have a lovely festive weekend planned wherever you are. I am hoping to be catching up on my December Journal to share my pages with you next week. I will certainly have lots of lovely things to journal after our lovely trip away and of course sharing creativity with my fellow Demo's yesterday at our regional event in Basingstoke.

 If you have any questions about today's project or the products I have used, please get in touch on poulton_sarah@yahoo.co.uk or 01983 609249. You can order online direct through my store by clicking the product links above. I also have availability in the next few months for your very own crafty party so drop me a line to find out more and get your date in the diary.

Happy Crafting
-X-

Friday, 28 November 2014

A very Happy Wonderful Christmas Card from Stampin' Up! UK Demonstrator Sarah Poulton


Good morning crafters!

Hope you are having a lovely crafty week. I had a rare day of craftiness yesterday as my Mum and Dad took Summer to visit my grandparents on the mainland. I managed to make 40 swaps for a Stampin' Up! Sale-A-Bration event next week and a retirement card for my lovely chiropractor (both projects I will share next week). So all in all a very productive day.

Today's card share is the project we made at my November craft parties. I combined the Festival of Trees stamp set with a strip of Trim the Tree Designer Series Paper. The sentiment is stamped in Cherry Cobbler ink and is taken from the Wondrous Wreath stamp set.

I love the two step stamping effect (made so much easier with the new photopolymer stamps) of the tree with baubles. I added an extra dimension by first stamping the baubles in Gold Encore then stamping over the top in Cherry Cobbler ink (slightly off setting the baubles).

To finish I punched a star using my Itty Bitty Accents star punch from Champagne Glimmer Paper.

This is a great card to reproduce quickly and easily. Perfect for all those cards for family, friends and colleagues. 

Don't forget to check out this weeks fab Weekly Deals by clicking the image below.

Thank you for popping by today. I hope you enjoyed today's crafty festive project. I'll have another project to share tomorrow so please come back to see what else I've been creating.

If you have any questions about today's project or the products I have used, please get in touch on poulton_sarah@yahoo.co.uk or 01983 609249. You can order online direct through my store by clicking the product links above or the pictures below. I also have availability in the next few months for your very own crafty party so drop me a line to find out more and get your date in the diary.

Happy Crafting
-X-

Friday, 14 November 2014

Wonderful Wreath Joy Shaker Card from Stampin' Up! UK Demonstrator Sarah Poulton


Hello lovely crafty friends! It is the weekend. Time to celebrate and get festive. The ads on TV are well and truly Christmasy now so I don't feel bad for spending my weekends making little festive fun things for my girls. I might even have to break open Elf over the weekend and partake of some festive film frolics with a bowl of maple syrup covered spaghetti.

Today's crafty share is a project I CASED from the lovely Kimberly Van Diepen over in the States. I just adored this simple Whisper White layered shaker card the moment I came across it on Pinterest. So I used it as the basis for my creation for my lovely team ladies get together this week.

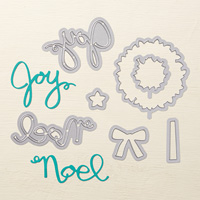
I cut the 'Joy' using the fab Wonderful Wreath Framelits and then glued a small piece of Window Sheet over the back (a step I initially forgot and then wondered why all my shaker bits fell out the front of the card!! Doh!) to cover the cut out word. 

For the shaker elements I used my Star Confetti Punch to cut lots of little Champagne and Silver Glimmer Paper stars which I then mixed with sequins from the In Color Sequin Assortment.


I surrounded the Joy with Dimensionals to create a seal around the area I wanted to shake. This prevents all the little stars from flying everywhere. It also gives this lovely shadowed raised effect too.

To finish the card I used some of the punched stars, sequins and basic rhinestones to create a little bit of bling and colour on the front of my card.

Thanks for stopping by today. If you have any questions about today's project or the products I have used, please get in touch on poulton_sarah@yahoo.co.uk or 01983 609249. You can order online direct through my store by clicking the product links above or the pictures below. I also have availability in the next few months for your very own crafty party so drop me a line to find out more and get your date in the diary.

Happy Crafting
-X-

Wednesday, 5 November 2014

Wondrous Wreath Cardmaking Class Make from Stampin' Up! UK Independent Demonstrator Sarah Poulton


Happy Wednesday crafters.

I am so in love with the Wondrous Wreath stamp set. I just love the layered stamping. I find it relaxing. And I love all the different effects you can get simply through layering different colours.

I've seen these floating style cards a lot in crafting magazines and online and thought the wreath would make a perfect centre piece to hold the layers together.

I started with a Garden Green card base and covered my two sections with strips of patterned paper from the Trim The Tree Designer Series Paper Stack.


I created the centre piece by stamping Old Olive, Mossy Meadow and Cherry Cobbler to create the leaves, bow and berries. I then cut the wreath and bow with the Wonderful Wreath Framelits. I used the Framelits again with Champagne Glimmer Paper to cut the 'joy' which I then glued with Tombow on to my wreath.

Have you checked out this weeks Weekly Deals? Pop over to my online store to see all the great offers from Stampin' Up! for this week.


Thanks for stopping by today. If you have any questions about today's project or the products I have used, please get in touch on poulton_sarah@yahoo.co.uk or 01983 609249. You can order online direct through my store by clicking the product links above or the pictures below. I also have availability in the next few months for your very own crafty party. 

Happy Crafting
-X-

Wednesday, 17 September 2014

An Autumnal Wondrous Wreath Thank You


Good morning and a very happy Autumnal September morning to you. It looks like it might be a lovely bright and sunny day here on the Isle of Wight. Perfect for our planned trip to Starbucks and then to the park to drink our Pumpkin Spice Lattes.

As you might have guessed, my thoughts have turned to Autumn and breaking out my shades of yellow and orange ink pads. I needed to make a quick set of Thank You notes for a recent party order I am delivering this evening and wanted to have a go at creating a non-Christmas card with the gorgeous Wondrous Wreath stamps. I like to create purely stamped thank you notes to show my lovely party customers all the different ways you can create easy cards just with your stamps.

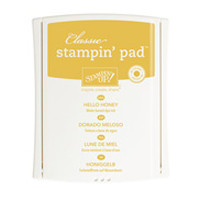
The Wondrous Wreath stamp set works beautifully on its own simply layering up the image. I started with Hello Honey for the main leaf layer and then stamped over with Tangelo Twist and Blackberry Bliss for the berries and bow.

I stamped the 'Thanks' sentiment from the Another Thank You stamp set in Blackberry Bliss on to Hello Honey cardstock and punched with my Modern Label Punch. I finished with two Regals Candy Dots.


 It has been a busy couple of weeks at Stampin' Sarah HQ and I have really missed blogging (all my posts last week were scheduled while I was away on a motorhoming holiday in Lincolnshire). Before we went away we celebrated Sylvie's Christening. It kept Mum and I busy as we had handmade decorations, I decorated the cake, we had handmade jam and scones. But it was all well worth it as it was a lovely day shared with lovely people. It made me so happy that so many friends and family came to share the day. Some travelled from over the water too. I was grateful to each and every person who celebrated with us. And to give a little insight in to the day, here is the happy girl herself.


And here is Summer performing her special Red Arrows show for us in the garden after everyone had gone home.


Thank you for popping by today and for sharing in my Autumn creating excitement. If you have any questions about today's project or the products I have used, please get in touch on poulton_sarah@yahoo.co.uk or 01983 609249. You can order online direct through my store by clicking the product links above or the pictures below. I also have availability in the next few months for your very own crafty party. Click on the Promotions tab above to see the exclusive hostess promotion running until October 31st.

And don't forget to check out this weeks Weekly Deals by clicking on the image below.


Happy Crafting
-X-