Showing posts with label isle of wight papercrafting. Show all posts

Monday, 18 May 2015

Crazy About You Typeset Papercut Birthday Card from Stampin' Up! UK Demonstrator Sarah Poulton

Happy Monday crafters.

What a weekend. I spent Friday and Saturday with my fantastic Stampin' Up! team and friends. It is one of my favourite things about being a Demonstrator. Sharing inspiration and ideas with lots of other fellow Demos from around the country. At our Telford Regional there are lots of opportunities to win prizes (I was very lucky and won a prize patrol from the new catalogue!) as well as sample display boards, lovely lunch and swaps with friends.


I wanted to share another birthday project with you today. I made this for my sister earlier in the month. I have become a little obsessed with a new hobby- papercutting (a long process but very therapeutic and fun). I used a template to cut the quill which I mounted on to Rich Razzleberry.

I used a Typeset Speciality Designer Series Paper layer over a Champagne Glimmer Paper layer (unfortunately this is now sold out so could be substituted for Gold Glimmer).


For the greeting I used my Crazy About You Bundle. I cut the 'Happy' with the Hello You Thinlits and then matched this with the 'Birthday' from the Crazy About You stamp set.


My sister loves to read and to write stories.  So I matched her quill card with a folded book (another of my FAB new hobbies). I used a template created by Anna Marie Book Art on Etsy.


And here is the framed paper cut I also made for my sister. Template by the amazing Paper Panda.


Pop back later in the week and I'll share some of the amazing swaps I received at Telford as well as share a few little sneak peeks too.

Thank you for popping by today. Please let me know if you have any questions about Stampin' Up! or our products. I would love to help. All items can be purchased online via my shop or get in touch directly and I can order them for you to be delivered direct to your door. I'd also love to Demo for you and your friends at a crafty party. As the hostess you earn lots of lovely freebies and you all get to make a fun crafty project too (no crafting experience necessary!)

 -XXX-
Built for Free Using: My Stampin Blog

Wednesday, 13 May 2015

Bright Little Letters Birthday Card from Stampin' Up! UK Demonstrator Sarah Poulton

Good morning crafty friends.

It is a bright and sunny Wednesday here on the Isle of Wight and I have the perfect way to celebrate- this week's Weekly Deals. Pop over and check out some fantastic offers on punches, pens and embellishments.

Now for my crafty creation for the day. This is the card I made for my girls to give to Aunty Sophie for her birthday last week.


I used a selection of cardstock from the Brights Collection to punch the circles. I then ran the circles through my Big Shot with the Little Letters Framelits Dies to create the 'Happy' and 'Birthday'. 


I used my Simply Serif Mini Alphabet for the 'Sophie' which I layered over bright stars punched with my Itty Bitty Accents Mini Star Punch. I  finished with Brights Candy Dots.


Thank you for popping by today. Don't forget to check out this week's Weekly Deals. Please let me know if you have any questions about Stampin' Up! or our products. I would love to help. All items can be purchased online via my shop or get in touch directly and I can order them for you to be delivered direct to your door. I'd also love to Demo for you and your friends at a crafty party. As the hostess you earn lots of lovely freebies and you all get to make a fun crafty project too (no crafting experience necessary!)

 -XXX-


Built for Free Using: My Stampin Blog

Wednesday, 4 February 2015

A Happy Thing Blendabilities Card from Stampin' Up! UK Demonstrator Sarah Poulton


Good morning crafty friends. And a very Happy Wednesday to you. We're on to the happy downward slide to another fantastic weekend.

We saw a small smattering of snow here yesterday. Not enough to build a snowman. But enough for Summer to throw a couple of snow balls at her Dad. I enjoyed watching the snow fall from my office window periodically through the day.


I have another of our class cards to share today. I featured previously a pair of cards I made with the lemon stamp from the A Happy Thing Sale-A-Bration stamp set so I wanted to give a bit of focus to the beautiful bird stamp from the same set.

I had seen this card on Pinterest made by the talented Fran Sabad (thank you for the inspiration) and decided to grab my Blendabilities and give it a go. I love the natural tone to this card and knew it would be a perfect Father's Day or male birthday card (I left the card without a sentiment so my ladies could personalise it themselves).


I used the following products for this card:


  1. Cherry Cobbler, Old Olive and Crumb Cake Blendabilities Markers
  2. Crumb Cake Cardstock
  3. Tuxedo Black Memento Ink
  4. Hardwood Background Stamp
  5. Soft Suede and Early Espresso Ink
  6. Sponge Daubers
  7. Naturals Candy Dots
I so love using my Blendabilities now and love finding the perfect blend of colours for my stamps. I love the development of colouring stamped images. Stampin' Up! have really innovated with their new ranges and I love trying new techniques and stamping ideas.

And don't forget that as it is Wednesday we have a new range of Weekly Deals launching today. There are some great products this week including Blendabilities and Silver Foil cardstock at fantastic prices!


Thank you for popping by today. You can find out more about the new Spring Summer Catalogue and Sale-A-Bration promotion by clicking here or by using the navigation menu on the left. This really is the most exciting time of the year to shop. New products and fantastic freebie rewards too. 

Please let me know if you have any questions about Stampin' Up! or our products. I would love to help. All items can be purchased online via my shop (or click on the links above to find out more about specific products) or get in touch directly and I  can order them for you to be delivered direct to your door. 

-XXX-
Friday, 16 January 2015

A gold tone Little Letters scrapbook page by Stampin' Up! UK Demonstrator Sarah Poulton

Good morning crafters. It is the weekend ;0) And you know what that means? Another fab Pinkie team blog hop tomorrow. This time we will be celebrating the Spring Summer Catalogue I have a lovely set of notecards to share with you tomorrow so be sure to pop by to check out all the lovely creative inspiration from some fab fellow Demonstrators.

Today I have a scrapbook page to share with you. I'm a little scrapbook rusty. I've been so enjoying Stampin' Up! and Project Life that I've neglected my traditional 12"x12" scrapbooking. But I really enjoyed getting back to it this week.


For this page I used a Very Vanilla base with a 6" square of Gold Fancy Foil Designer Vellum. I stamped the small star flurries in Gold Encore ink using the background stamp from the Perpetual Birthday Calendar Stamp Set.

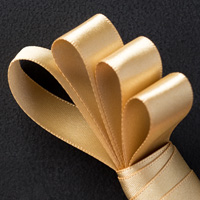
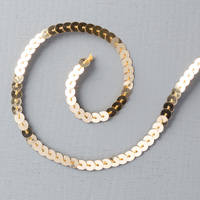
I created my title with my Little Letters Thinlits Dies using Champagne Glimmer Paper. I added a length of Gold Satin Ribbon and Gold Sequin Trim.


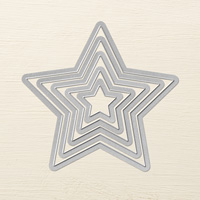
I cut three stars from Brushed Gold cardstock using my Stars Framelits and scored from every point. I folded and then mounted to my page using Dimensionals layered on top of one another (I used 4) to keep the 3D effect.

To embellish my star background I added a little colour with my 2013-2015 In Colour Sequins.


I really enjoyed getting back to scrapbooking and I never need an excuse to show off pictures of my girls. This picture was taken on a walk to my Mum's house in the cold weather. My youngest is never shy of smiling when she sees a camera.

You can find out more about the new Spring Summer Catalogue and Sale-A-Bration promotion by clicking here or by using the navigation menu on the left. This really is the most exciting time of the year to shop. New products and fantastic freebie rewards too. 

Please let me know if you have any questions about Stampin' Up! or our products. I would love to help. All items can be purchased online via my shop (or click on the links above or pictures below to find out more about specific products) or get in touch directly and I'll order them for you. You can get in touch on poulton_sarah@yahoo.co.uk or 01983 609249.

-XXX-

Wednesday, 31 December 2014

A Lotus Blossom Sale-A-Bration 2015 sneak peek from Stampin' Up! UK Demonstrator, Sarah Poulton


Hello crafters and a very happy last day of 2014 to you all.

I have another quick crafty share for you today. This was the make and take project from the Basingstoke Stampin' Up! Regional Event earlier in the month showcasing the gorgeous Lotus Blossom triple stamping photopolymer stamp set exclusively available through Sale-a-Bration.

I love this single colour layering of the Lotus image. To get the base image we stamped off onto scrap paper once and then used the less inked stamp to create the lightest layer. We then used the layering images in the same tone to give this dimensional finished flower in Calypso Coral and Crushed Curry.


I love how simple and effective this image is and how easy it is to line up (each stamp has an arrow marked on the stamp to making aligning the images super simple).

Only a few days left to wait now, Sale-a-Bration kicks off on Tuesday 6th January. If you'd like a copy of the brochure, drop me a line on poulton_sarah@yahoo.co.uk and I'll pop one in the post to you.

Thank you so much for popping by today. Thank you for supporting my blog throughout the year and I wish you a very Happy New Year for this evening. Please let me know if you have any questions about Stampin' Up! or our products. I would love to help. All items can be purchased online via my shop (you can click here and then click shop in the top right corner) or get in touch directly and I'll order them for you. You can get in touch on poulton_sarah@yahoo.co.uk or 01983 609249.

Happy Crafting 

-XXX-

Tuesday, 25 November 2014

Fun Sweety Elf Leg Hanger Decoration from Stampin' Up! UK Demonstrator Sarah Poulton


I love this quick and easy little Christmas make. The picture above makes me think of two cheeky elves leaning against a wall getting in to mischief.

I designed this project for our monthly card class this past Saturday and the ladies all enjoyed making these cheeky little chaps (or their legs at least).

This all came about when I was shopping in my local 99p shop and came across these sherbet and jelly sticks. I knew they would work perfectly as Elf Legs. I've placed the sweeties in to the Stampin' Up! 1"x8" Cello Bags (although these ready packaged sweets don't necessarily need them). So instead of these sticks you could use multicoloured choccies or jelly sweets.


To create the shorts I cut a Top Note from Old Olive and folded in half. I used my Chalk Marker to add the stitched detail. The shoes were cut from a Real Red Top Note shape. And to finish I added Gold Foil button details to the shorts and to the boots and Gold Ribbon around the ankles.

Today sees the launch of a fantastic recruiting promotion from Stampin' Up! You can join my team and get started with your Stampin' Up! business with a fantastic 25% off the £99 Starter Kit (for one week only!). What a great deal! I'd love to welcome you to my team of Inkin' Owls. You can find out more by clicking the 'Join my Team' tab above or get in touch with me directly for more information.

If you have any questions about today's project or the products I have used, please get in touch on poulton_sarah@yahoo.co.uk or 01983 609249. You can order online direct through my store by clicking the product links above or the pictures below. I also have availability in the next few months for your very own crafty party so drop me a line to find out more and get your date in the diary.

Happy Crafting
-X-

Wednesday, 29 October 2014

Halloween Witch Boot Treat Holder from Stampin' Up! UK Demonstrator Sarah Poulton


Good morning crafters.

As promised I am back with my second of this weeks Halloween inspired creations. I was looking for simple little treat holders to give to my 2 year old on Friday. Both she and my 7 month old have super cute monster costumes (matching of course) and I wanted something not too scary for her Trick or Treating basket.

I found a similar Witch Boot designed by Karen Fontinelle and thought this would make a perfect holder for the chocolate brains I'd found in the supermarket. I used a cut down kitchen roll inner tube to create this. I cut 1/2" strips of Rich Razzleberry and Tangerine Tango cardstock and glued to the roll.

I wrapped a 1" strip of Basic Black cardstock around the base and folded back the corners to create the boot opening. The buckle was punched using my Petite Curly Label Punch from Dazzling Diamonds Glimmer Paper (I cut a small rectangle of Basic Black to create the buckle effect).


I used a bone folder to soften the fibres and roll the shaped boot base to give the pointy effect.

Thanks for stopping by today. Please come back on Friday for my final Halloween project (a hat to match our Witch's boot). If you have any questions about today's project or the products I have used, please get in touch on poulton_sarah@yahoo.co.uk or 01983 609249. You can order online direct through my store by clicking the product links above or the pictures below. I also have availability in the next few months for your very own crafty party. 

Happy Crafting
-X

Monday, 27 October 2014

Holiday Home Halloween Greetings from Stampin' Up! UK Demonstrator Sarah Poulton


Good morning and welcome to a Stampin' Sarah! week of Halloween creativity and inspiration to celebrate the festivities. My girls are a bit young still for Trick or Treating, but we will be indulging in a little dressing up and popping around to visit family for a few little treats on Friday.

I spent a very lazy Sunday morning yesterday with a cuppa and a browse of Pinterest. It was while perusing my feed that I came across this card by Melissa Davies. I just fell in love with it so gave it my own Stampin' Sarah spin. And so was born my week of Halloween projects as I loved creating this so much. I will  be back on Wednesday and Friday to share some great Halloween treat ideas and fun gifts.

For this card I used a Pumpkin Pie card base (would you believe this colour is the reason I fell in love with Stampin' Up!? My very first order included a Pumpkin Pie ink pad and pack of card!). I then embossed a second Pumpkin Pie layer with the Filigree Frame Embossing Folder and mounted on to a layer of Rich Razzleberry.


To create the main focal image I started by sponging a 7.5cm square of Whisper White cardstock with Tangerine Tango and Rich Razzleberry ink. I then stamped the spider, bats and trees in Basic Black. I stamped the tall house from the Holiday Home stamp set on to Old Olive card and cut the image out. I stamped the ghost and pumpkin on to a Whisper White scrap and hand cut the little images.

Once all elements were stamped and cut I simply glued and mounted with dimensionals. The final touch was a quick hand cut banner and the Happy Halloween greeting stamped in Tangerine Tango.

Thanks for stopping by today. Please come back later in the week for more Halloween ideas. If you have any questions about today's project or the products I have used, please get in touch on poulton_sarah@yahoo.co.uk or 01983 609249. You can order online direct through my store by clicking the product links above or the pictures below. I also have availability in the next few months for your very own crafty party. Click on the Promotions tab above to see the exclusive hostess promotion running until October 31st.

Happy Crafting
-X