Showing posts with label scrapbook class. Show all posts

Monday, 7 September 2015

An English Garden Scrapbook Celebration from Stampin' Up! UK Demonstrator Sarah Poulton

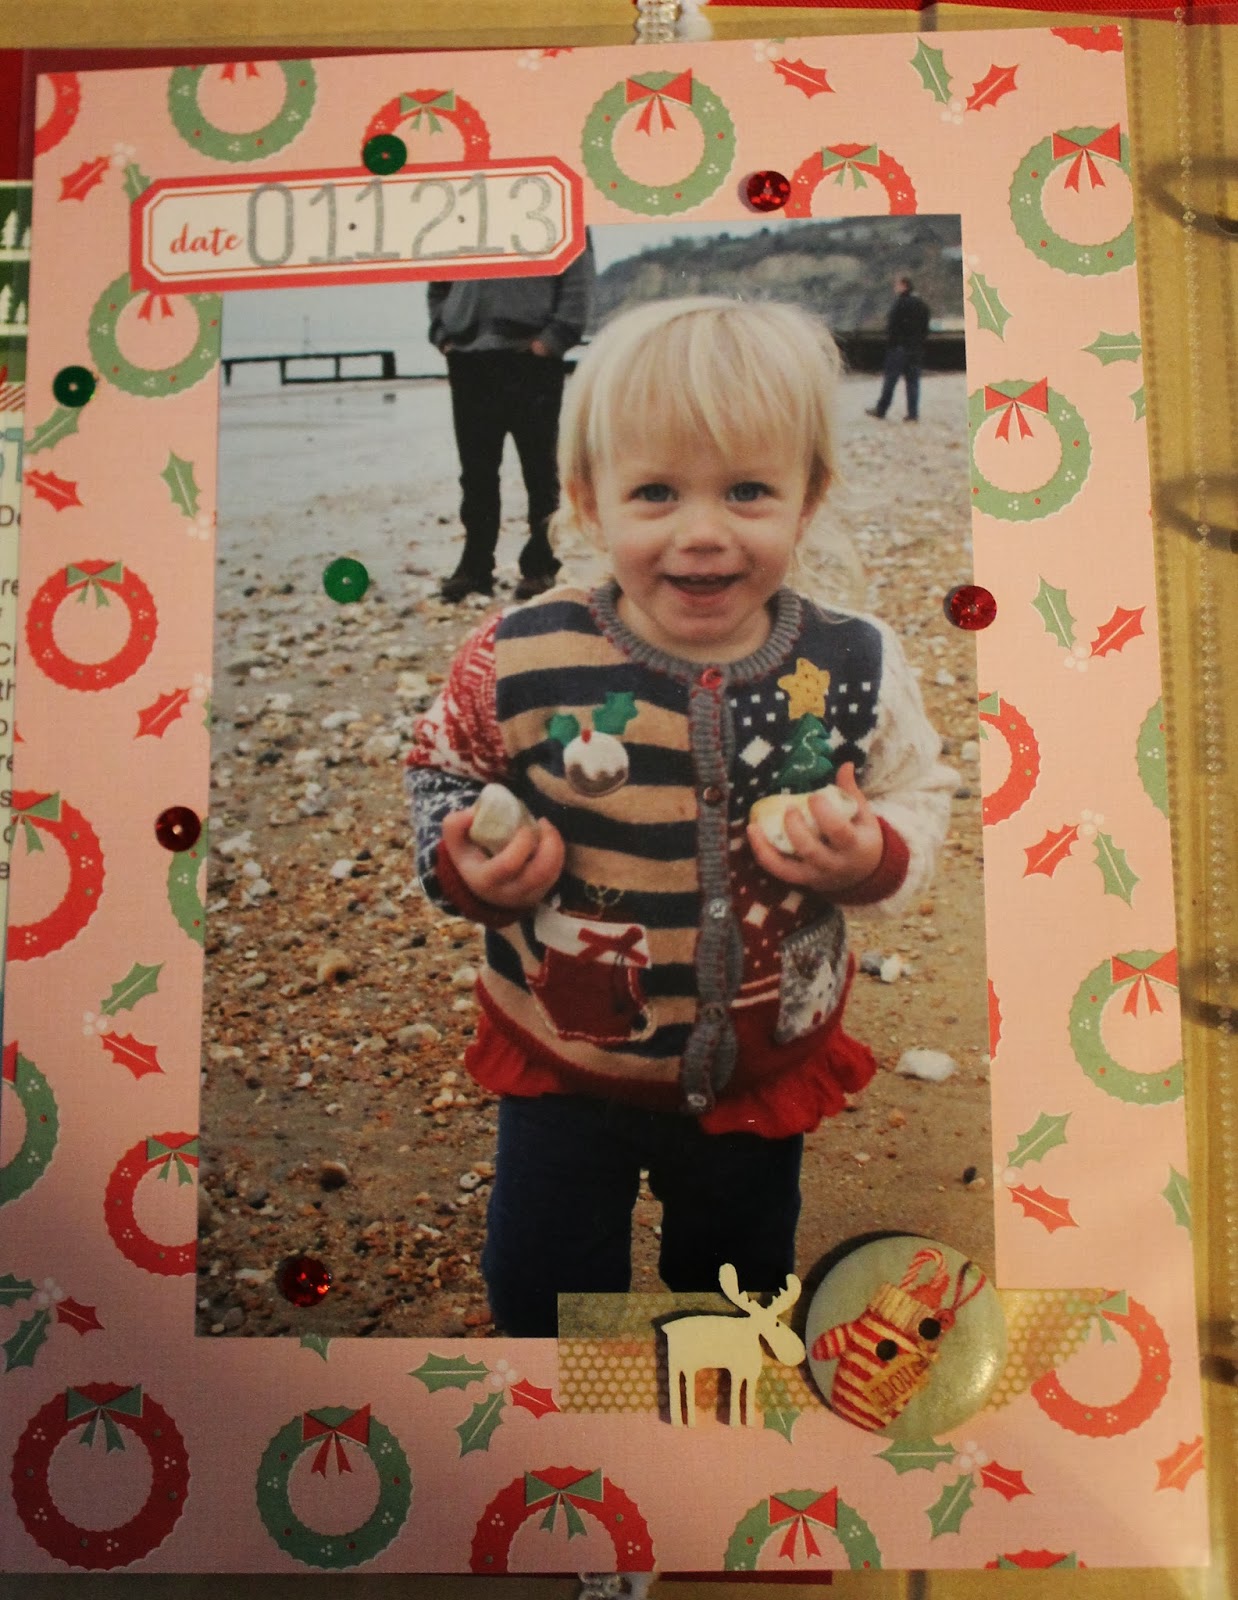
Morning crafty friends. I thought I would take a little break from festive makes this morning and share a scrapbook page I made a couple of months back. I came across it over the weekend and thought I'd take a couple of pictures to share.

This page uses the lovely English Garden Designer Series Paper paired with the three step stamping set Garden in Bloom (photopolymer- so super easy to line up).

I started with a Whisper White 12"x12" base and then punched patterned circles using my 2" Circle Punch to create the patterned background.


I stamped the butterflies using colours taken from the English Garden DSP- Hello Honey, Night of Navy and Mint Macaron.

I added Metallics Sequins and Tiny Pearls for a little shimmer and texture.


I cut my title using the super useful Little Letters Thinlits in coordinating DSP. 


I love creating scrapbook pages with lots of DSP and this was a perfect design for using up lots of little bits of English Garden paper that I had accumulated. I love the simplicity of adding a little bit of stamping detail too.

I hope you've had a lovely weekend. What beautiful weather we have been having. We ventured out for some fun in our campervan as well as visiting the Wolverton Garden Show. It is the last big event of the summer here on the Isle of Wight and we had a lovely time playing on games seeing all the beautiful hand made fair. It inspired me to create a lot of lovely bits and pieces that I look forward to sharing with you over the week. I've been having some festive fun and also creating with some of the lovely Stampin' Up! kits.

Thank you for popping by today. Please let me know if you have any questions about Stampin' Up! or our products. I would love to help. All items can be purchased online via my shop or get in touch directly and I can order them for you to be delivered direct to your door. I'd also love to Demo for you and your friends at a crafty party. As the hostess you earn lots of lovely freebies and you all get to make a fun crafty project too (no crafting experience necessary!)

 -XXX-

Built for Free Using: My Stampin Blog

Friday, 14 August 2015

A Merry Moments Christmas Scrapbook Page from Stampin' Up! Demonstrator Sarah Poulton

Happy Friday! It is nearly the weekend *hooray* And in celebration of the fact that tomorrow is my first Christmas Craft Day 2015 (and the official start of Christmas crafting season at Stampin' Sarah HQ) I have a Christmas scrapbook page to share with you today.

As I was working on the projects for my Christmas Day I ended up with lots of little bits of beautiful Merry Moments Designer Series Paper left over. They were the perfect size to create the background for my photo for this page. I then themed the rest of the pages colours around the DSP (and as with all Stampin' Up! papers the colours are all listed on the reverse of the paper pack as well as in the catalogue too).


Behind the picture I slipped two of Stampin' Up!'s lovely new Foil Doilies. I love the festive fanciness of adding these to a project.

To create my chain of decorations I used lots of mixed embellishments (sadly some of these are now retired). I can give you a little bit of insider info, there are some seriously lovely embellishments in the new Autumn Winter catalogue that would be PERFECT for this page. But any buttons and sparklies you have in your stash would work well.

I hand drew the string on to my 12"x12" Cherry Cobbler cardbase and then adhered my mix of embellishments. I created baubles with circle punches and the Lots of Joy stamp set, I added a punched star and various buttons and pearls to give a mix of textures and sizes.


I do have a confession, the beautiful glimmery 'Wishes' is from a retired kit from last years Autumn Winter catalogue (do you remember the gorgeous star box kit?). But I can assure you that there are lots more lovely kits and embellishments coming on September 1st. If you'd like a catalogue posting out to you now (so you can get a head start on all that Christmas loveliness) please drop me a line on poulton_sarah@yahoo.co.uk and I'll pop one in an envelope for you.


The final finishing touch was the 'Christmas' that I stamped with Staz On ink and my rotary stamp and stamped directly on to the photo.

Thank you for popping by today. Please let me know if you have any questions about Stampin' Up! or our products. I would love to help. All items can be purchased online via my shop or get in touch directly and I can order them for you to be delivered direct to your door. I'd also love to Demo for you and your friends at a crafty party. As the hostess you earn lots of lovely freebies and you all get to make a fun crafty project too (no crafting experience necessary!)

 -XXX-
Built for Free Using: My Stampin Blog

Wednesday, 12 August 2015

A Garden in Bloom Summer Scrapbook page from Stampin' Up! UK Demonstrator Sarah Poulton

Happy Weekly Deals Wednesday! All new special deals are live today for the next week. Great products included this week including In Color Blossom Accents and my favourite Scallop Tag Topper Punch.

Today's crafty share is another of my week of scrapbook pages. This uses the Garden in Bloom stamp set with a variety of colours including Blushing Bride & Melon Mambo, Old Olive & Mint Macaron, Hello Honey & So Saffron. I thought this garden inspired set would be a perfect partner for my photos from one of the Isle of Wight's fantastic summer shows. The girls and I had a fantastic time pretending to drive the tractors at the Chale Show.


I created the banners with the English Garden Designer Series Paper (and I punched the pennant end with my Triple Banner Punch- so handy for getting a perfect punched end every time).

I love how simple this stamp set is to stamp and line up. The set comes in photopolymer and matches up perfectly with the assistance of a little tab at the top of each stamp which helps you to match up each layer of the flowers each time you stamp. It is so easy to get this lovely watercoloured effect.


I finished the page with this stamped and cut out flower embellished with a Metal Rimmed Pearl. I stamped my title with my Alphabet Rotary Stamp.


Pop over to my online store to see this weeks fantastic new Weekly Deals. 


Thank you for popping by today. Please let me know if you have any questions about Stampin' Up! or our products. I would love to help. All items can be purchased online via my shop or get in touch directly and I can order them for you to be delivered direct to your door. I'd also love to Demo for you and your friends at a crafty party. As the hostess you earn lots of lovely freebies and you all get to make a fun crafty project too (no crafting experience necessary!)

 -XXX-

Built for Free Using: My Stampin Blog

Monday, 20 April 2015

An Artisan Embellishment Scrapbook Page from Stampin' Up! UK Demonstrator Sarah Poulton

Good morning crafty friends. Sorry about the week long absence. Would you believe I had a case of crafters block? I should keep projects in reserve for those weeks where I just don't have the time to get in my craft room and have some fun.

You'll be pleased to hear that I am over the block now. Cannot wait to get scrapbooking some lovely pictures I took over the weekend. We went away in our campervan to visit friends. The weather was so lovely that I managed to get some great snaps.

But back to today's crafty share. I was rummaging through a big box of photos awaiting scrapping and came across this pic of my Mum and Pops at my cousin's wedding.


I wanted to create something vintage-y and wedding-y so knew the beautiful Artisan Embellishment Kit would be a perfect starting point (currently reduced as part of the Weekly Deals promotion. Available at the bargain price of £6.71). I used a Crumb Cake 12"x12" base and stamped in Crumb Cake with the Swallowtail stamp and added extra detail with the Butterfly Basics stamp set. I also inked the edges of my cardstock with more Crumb Cake. I sprayed my base layer with a little Smooch Spritz to give a little extra sparkle.

I then created my Blushing Bride layer. I used the beautiful rose die-cut in the Embellishment kit as a stencil and daubered Blushing Bride ink through to create the rose background.


I then embellished with the flowers and ribbon from the Artisan kit. I created my title using the Little Letters Thinlits Dies (cut from Rose Red).

I love how the page came together using the Artisan Embellishment Kit as my colour inspiration. It was perfect for a wedding page.

Pop over to the Weekly Deals page to see the other products available at a reduced price just for today and tomorrow. New deals will be available on Wednesday.


Thank you for popping by today. Please let me know if you have any questions about Stampin' Up! or our products. I would love to help. All items can be purchased online via my shop (or click on the links below to find out more about specific products) or get in touch directly and I can order them for you to be delivered direct to your door. I'd also love to Demo for you and your friends at a crafty party. As the hostess you earn lots of lovely freebies and you all get to make a fun crafty project too (no crafting experience necessary!)

 -XXX-

Built for Free Using: My Stampin Blog

Monday, 16 February 2015

A Big Sketched Birthday Bash Scrapbook Page from Stampin' Up! UK Demonstrator Sarah Poulton


Good morning and a very Happy Monday to yoiu. What a beautiful weekend we had here on the Isle of Wight. I took the girls for a walk yesterday in the beautiful sunshine. With a smattering of bulbs pushing through the soggy ground and sun blazing down it feels like Spring is just around the corner.

I have another scrapbook page to share with you today. I wanted to create a simple birthday layout with the gorgeous gold foiled Birthday Bash Speciality Designer Series Papers in the Spring Summer catalogue. I knew they would be a perfect match with the Sketched Birthday stamp set. 

I used a Whisper White 12"x12" base and then created a Daffodil Delight strip (12"x4") which I stamped with the images from Sketched Birthday. I used the colours from the DSP as my theme: Bermuda Bay, Calypso Coral, Crushed Curry and Tangelo Twist.


I then created my banner using the Banner Framelit Dies and offcuts of the Birthday Bash DSP. I arranged my photos first (layered over a 4.25"x6.25" piece of DSP) then positioned my banners before glueing. I added small embellishments to my banners including Brights Buttons, glimmer paper stars punched with my Itty Bitty Accents Star Punch and Candy Dots.

To finish I added my title. I cut the 'Happy' using my Hello You Thinlits and the 'Birthday' was cut from Gold Foil card using my Little Letters Thinlits.


I hope you enjoyed my crafty make today. The pictures are from Summer's 2nd birthday last year. She loves balloons of all shapes and sizes so I knew the lovely gold foiled Speciality Papers with the ballooon design would be a perfect accent for my scrapbook page. Birthday season is nearly upon my again. I am in the process of starting my planning for Sylvie next month and Summer in May. Where does the time go?

Thank you for popping by today. You can find out more about the new Spring Summer Catalogue and Sale-A-Bration promotion by clicking here or by using the navigation menu on the left. This really is the most exciting time of the year to shop. New products and fantastic freebie rewards too. 

Please let me know if you have any questions about Stampin' Up! or our products. I would love to help. All items can be purchased online via my shop (or click on the links above to find out more about specific products) or get in touch directly and I  can order them for you to be delivered direct to your door. 

-XXX-

Friday, 16 January 2015

A gold tone Little Letters scrapbook page by Stampin' Up! UK Demonstrator Sarah Poulton

Good morning crafters. It is the weekend ;0) And you know what that means? Another fab Pinkie team blog hop tomorrow. This time we will be celebrating the Spring Summer Catalogue I have a lovely set of notecards to share with you tomorrow so be sure to pop by to check out all the lovely creative inspiration from some fab fellow Demonstrators.

Today I have a scrapbook page to share with you. I'm a little scrapbook rusty. I've been so enjoying Stampin' Up! and Project Life that I've neglected my traditional 12"x12" scrapbooking. But I really enjoyed getting back to it this week.


For this page I used a Very Vanilla base with a 6" square of Gold Fancy Foil Designer Vellum. I stamped the small star flurries in Gold Encore ink using the background stamp from the Perpetual Birthday Calendar Stamp Set.

I created my title with my Little Letters Thinlits Dies using Champagne Glimmer Paper. I added a length of Gold Satin Ribbon and Gold Sequin Trim.


I cut three stars from Brushed Gold cardstock using my Stars Framelits and scored from every point. I folded and then mounted to my page using Dimensionals layered on top of one another (I used 4) to keep the 3D effect.

To embellish my star background I added a little colour with my 2013-2015 In Colour Sequins.


I really enjoyed getting back to scrapbooking and I never need an excuse to show off pictures of my girls. This picture was taken on a walk to my Mum's house in the cold weather. My youngest is never shy of smiling when she sees a camera.

You can find out more about the new Spring Summer Catalogue and Sale-A-Bration promotion by clicking here or by using the navigation menu on the left. This really is the most exciting time of the year to shop. New products and fantastic freebie rewards too. 

Please let me know if you have any questions about Stampin' Up! or our products. I would love to help. All items can be purchased online via my shop (or click on the links above or pictures below to find out more about specific products) or get in touch directly and I'll order them for you. You can get in touch on poulton_sarah@yahoo.co.uk or 01983 609249.

-XXX-

Tuesday, 10 June 2014

Project Life is Here! #PLxSU


So the day we've all been waiting for has come. The Customer Sneak Peak of Project Life has arrived.

As I've mentioned previously Stampin' Up! have partnered with Becky Higgins the creator of Project Life to bring an exclusive range of Stampin' Up! scrapbooking goodies. For those who haven't come across Project Life, it is a simple day to day solution for scrapbooking all those everyday and beloved photographs. It is based around divided page protectors and coordinating sets of insert cards, embellishments, stickers and stamp sets (oh and Framelits, and Washi Tape, and journallers.....).


I was super lucky to have won a Project Life bundle of products at the Telford Regional last month so I had an even sneakier peek. And let me assure you that these products are the quality we expect from Project Life and Stampin' Up! in all the beautiful Stampin' Up! colours.

You can find out more in this Stampin' Up! video:


Please hop on over to my online store to check out all the lovely Project Life products available to order today:


Click 'Shop' in the top right and then click Project Life.

Please drop me a line if you have any questions or queries: poulton_sarah@yahoo.co.uk or 01983 609249. I'd love to hear from you.

Thanks for popping by today.
-x-

Sunday, 8 December 2013

Journal Your Christmas Week 1

Good evening all.

A bit of a late one from me today. And not entirely Stampin' Up! either. For those that have been regular followers of my blog you will know I take part in an annual scrapbooking class called Journal Your Christmas. Each day I get sent prompts to reflect on for the days journaling or photo taking. Normally I stick quick strictly to the prompts. But this year I have decided to make a guilt free, no pressure December journal without the frills and over the top embellishments. I am just going with the flow and enjoying the prompts for a creative kick start but doing my own thing with my pictures and pages.

This year I have simplified. I purchased an album kit which I had shipped over from the US complete with album, inserts, embellishments and divided page protectors. I decided that not every day in December will be entirely journal worthy so I'll make the most of the days I do have things to share and just capture the fun of the festivities. I wanted to keep my supplies very limited so I didn't get overwhelmed with pretty sparkly things. I have been beating myself up about the simplicity a bit. But actually I am enjoying the process and know i will love the result in years to come when I reflect back on it.

So here is the album cover. I couldn't resist a bit of extra sparkle in the form of some lovely gold sequin trim. To be seen in a Stampin' Up! catalogue near you very soon!


Each December diary starts with a Day 1 Manifesto. This year I didn't really write a manifesto just more of a reflection on what I hope to achieve through the creative process. I used My Digital Studio to create my opening 8"x8" mini scrapbook page. I loved the ease of using the digital design software to put this together and get such a professional result. I simply saved it to a SD card and printed it off an instant printing machine in Boots to include in my journal on the same day!


Page 1: A simple calendar intro to my journal ;0)


Day 1:

Quick and simple pages capturing a walk on the beach last weekend to welcome in December on an unseasonably warm December 1st. I love the happy pictures we captured of Summer enjoying running around picking up stones and chasing the tide.


 Day 2:

Capturing my handmade Advent Calendar (hopefully I can add to this year on year to show my calendars development).


 Simple page to include the years postage stamps. It is a bit of a tradition now to pop along to the Post Office to buy some single stamps to include in my journal. I also included a handmade card between these two pages to journal about my week as I didn't have too many photos to share. The second page captures Summer enjoying a trip to Mothercare (her own personal playground it seems).


Day 7:

Festive treats and another walk on the beach.

I love the simplicity of the divided page protectors and how easily I can put my very simple pages together. Summer doesn't allow me much free time for scrapbooking on a daily basis so its lovely still being able to produce my pages in a time efficient way.


 Thank you for popping by today and visiting Stampin' Sarah. Normal Stampin' Up! service will resume tomorrow ;0)

Please get in touch if you have any questions or queries about Stampin' Up! or My Digital Studio, I'd be only too happy to help: poulton_sarah@yahoo.co.uk or 01983 609249.

Happy Festive Crafting ;0)
-X-

Tuesday, 15 October 2013

Stampin' Up! UK A Happy Day at the Beach Scrapbook Page


Good morning all.

Lovely to be back blogging. I have a whole file on my computer of edited and ready to go project pictures and I just haven't had any free time to write the necessary blog posts for you. I will ensure I get back on track this week to share lots of lovely crafting.

By way of apology I will share a couple of crafty projects today to get the crafty week started.

The above project was a page from last month's scrapbooking class. I was asked to think along the lines of cruising and holiday scrapbooking. So this was the page I came up with inspired by the Stampin' Up! By The Seashore stamp set and Soho Subway Designer Series Paper (mixed with matching sheets of blue DSP from other sets including the Epic Day This and That DSP and DSP Paper Stacks).

I loved the beach embellishment created with a length of the new Burlap Ribbon in the Autumn Winter catalogue. So simple yet perfect for any seaside or beachy themed page.  The '2013' was stamped with the Memorable Moments stamp set in the main catalogue.


And as a Tuesday bonus here is a Christmas card I created for my card class last month. I absolutely adore the Calm Christmas stamp set and love how it matches the Bird Builder Punch (I used this punch to create the leafy branch in the birds mouth). The bird image was stamped in Versamark and heat embossed with silver powder. I love the intricate details on the bird and Stampin' Up!'s powder is so fine that all these details are kept when you heat emboss.

The image was then layered on to ovals cut with my Ovals Collections Framelits. I embossed the top layer with the Pretty Print Textured Impressions Embossing Folder and layered this over a Silver Foil Oval. The final detail is the greeting which is from the Stampin' Up! More Merry Messages stamp set and stamped using my Silver Metallic Encore Pad. To find out more about the More Merry Messages set and other carry over sets from last years Autumn Winter catalogue please see this post.

Thank you for joining me today and my apologies again for the lack of creativity recently. I have been snowed under at work and with growing another baby and looking after Summer. It has all got a bit too busy. But I will ensure I share some of my lovely festive projects and I also have some smashing cards to share from my team shoebox swap last night too.


And one quick reminder that if you are placing an online order through my online store during October, don't forget to add the hostess code below for your chance to win the combined hostess freebies for the month:

ZACT2S6B

Happy Tuesday Craftiness to you all and please get in touch with any questions or queries about the projects or about the products I have used. I'd love to help.

-X-

Friday, 4 October 2013

Postcard Scrapbooking


Good morning crafters. Hope you've all had a lovely week and only a few hours to the weekend now.

I thought I would share a recent scrapbook page I completed. The theme for last month's scrapbooking class was cruising. I am helping my class ladies get started with their cruise holiday album. I needed a page that would work as a general holiday page but suited a cruise theme too.

I decided that Stampin' Up!'s Postcard stamp made a perfect centre piece for a page. We used the postcard to both create a title focus and a pocket for mementos and hidden journalling.

The colour scheme for this page is Marina Mist and Summer Starfruit with accents in Midnight Muse. The 6x6 Designer Series Paper square is from the Epic Day This and That paper pack. The edging stamping uses the compass and globe from Stampin' Up!'s The Open Sea stamp set.

We used the Chevron Border Punch to create a mask and inked the Midnight Muse chevron accents. To finish we added Candy Dots to add a bit of dimension and colour.

And just a quick reminder, if you are placing an online order through my online store during October, don't forget to add the hostess code below for your chance to win the combined hostess freebies for the month:

ZACT2S6B

Thanks for popping by today, please get in touch with any questions about Stampin' Up! and their products or to find out about booking a party or joining my team: poulton_sarah@yahoo.co.uk or 01983 609249.

Happy Crafting
-X-

Thursday, 12 September 2013

Scrapbooking Made Easy with My Digital Studio


Here is another quick and easy scrapbook page I created with the fantastic new software from Stampin' Up!, My Digital Studio.

For this I used a template within the programme and simply dragged and dropped my photos in to the template. It is as simple as that. The software is so easy to use and creates beautiful pages, cards, mini books, albums, tags... you name it, you can create it within My Digital Studio. Using all Stampin' Up! colours, papers, stamps, shapes, punches and embellishments.

The software is available through my store and costs ONLY £13.95 for the download (directly downloaded to your computer) or you can take advantage of the 30 day FREE trial. Again this is available through my online store.


And it doesn't end there, there are lots of additional affordable downloads available through my store to add to your MDS collection (the downloadable version comes with lots of usable kits, layouts, papers, stamps and punches). So if there is a must have stamp you need for a digital creation you can purchase it online and download it straight to your computer.

If you'd like to find out any more about MDS or Stampin' Up!, please get in touch directly on poulton_sarah@yahoo.co.uk or visit my online store to see more of the products available.

Happy Crafting
-X-

Friday, 6 September 2013

My Digital Studio is here


Well it has certainly been an exciting week of updates from Stampin' Up! And they haven't finished just yet. One more announcement to go.... My Digital Studio is here!!!

My Digital Studio (MDS) is a fantastic and exciting new design software for all levels of crafty and computer skills. MDS is an easy to use design software that is compatible with PC and Mac operating systems. It allows designers and crafters of all skill levles to create their own digital projects or use hundreds of templates to make professionally designed cards, photobooks, calendars, and more.

I have been lucky enough to have downloaded the full version a few weeks ago and have loved playing with the software and creating lots of lovely scrapbook pages as well as postcards, cards, flyers and mini books. It really is a fantastic and diverse programme. And the best bit is, it uses all Stampin' Up! colours, stamps, papers and embellishments. So you can create digital art to match your Stampin' Up! crafty stash.

The software is available through my store and costs ONLY £13.95 for the download (directly downloaded to your computer) or you can take advantage of the 30 day FREE trial. Again this is available through my online store.


And it doesn't end there, there are lots of additional affordable downloads available through my store to add to your MDS collection (the downloadable version comes with lots of usable kits, layouts, papers, stamps and punches). So if there is a must have stamp you need for a digital creation you can purchase it online and download it straight to your computer.

If you'd like to find out any more about MDS or Stampin' Up!, please get in touch directly on poulton_sarah@yahoo.co.uk or visit my online store to see more of the products available.

Happy Crafting
-X-