Showing posts with label Stampin Up demonstrator. Show all posts

Wednesday, 7 January 2015

Perpetual Birthday Calendar Project Kit stamped by Stampin' Up! UK Demonstrator Sarah Poulton

Good morning crafters. Are you loving all the new loveliness of the Spring Summer catalogue and Sale-A-Bration? What is not to love?

As promised I am sharing with you today the first half of my Perpetual Birthday Calendar made with the amazing Project Kit from the Spring Summer catalogue.

Some days I crave crafting using a kit. Something ready prepared and waiting to be made in to something beautiful. And this kit is my all time favourite kit offered by Stampin' Up! It is just such a lovely little make and so much fun to put together.

During Demonstrator preorder this was the first thing I ordered along with the coordinating Perpetual Birthday Calendar Photopolymer stamp set (all the lovely background stamps along with the months).


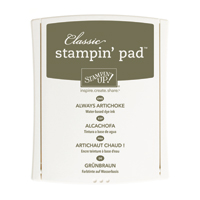
To keep it simple I used the suggested ink colours in the instructions: Hello Honey, Lost Lagoon, Baked Brown Sugar, Melon Mambo, Blushing Bride and Real Red. I simply picked out these ink pads and sat down at my desk to create with the ready made die cuts, embellishments and accessories.


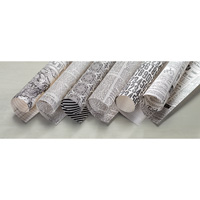
Each month has its own background embellishment stamp ranging from hearts and butterflies to splodges and leaves.


The kit also contains sequins, trim & confetti stickers to add extra texture and fun to your pages.


I especially love the little die cut feathers. I loved creating this Melon Mambo themed page for April.


Just a little tip if you purchase and create this little project kit. Each ready made calendar page is printed with a specific number of days. So be sure to make sure you pick the right number days for the month your are stamping. I am so glad I realised this before starting my calendar. I would not have been happy to have stamped January with 30 days or February with 31!!

And as well as the lovely stamped calendar pages you also get the hard board and clip to mount your pages on to. And they all come packaged in this lovely presentation box too (perfect for keeping your completed calendar in when not on display or for decorating if you are giving as a gift).


Pop back on Friday and I will have the final 6 months of the year to share with you.

Here is the full kit and all its components. If you click on the image it will connect you through my online store for more detail. The kit is £14.50. A really good value fun make.


Thank you so much for popping by today. Thank you for supporting my blog throughout the year. Please let me know if you have any questions about Stampin' Up! or our products. I would love to help. All items can be purchased online via my shop (you can click on the pictures below) or get in touch direct and I'll order them for you. You can get in touch on poulton_sarah@yahoo.co.uk or 01983 609249.

-XXX-

Wednesday, 31 December 2014

A Lotus Blossom Sale-A-Bration 2015 sneak peek from Stampin' Up! UK Demonstrator, Sarah Poulton


Hello crafters and a very happy last day of 2014 to you all.

I have another quick crafty share for you today. This was the make and take project from the Basingstoke Stampin' Up! Regional Event earlier in the month showcasing the gorgeous Lotus Blossom triple stamping photopolymer stamp set exclusively available through Sale-a-Bration.

I love this single colour layering of the Lotus image. To get the base image we stamped off onto scrap paper once and then used the less inked stamp to create the lightest layer. We then used the layering images in the same tone to give this dimensional finished flower in Calypso Coral and Crushed Curry.


I love how simple and effective this image is and how easy it is to line up (each stamp has an arrow marked on the stamp to making aligning the images super simple).

Only a few days left to wait now, Sale-a-Bration kicks off on Tuesday 6th January. If you'd like a copy of the brochure, drop me a line on poulton_sarah@yahoo.co.uk and I'll pop one in the post to you.

Thank you so much for popping by today. Thank you for supporting my blog throughout the year and I wish you a very Happy New Year for this evening. Please let me know if you have any questions about Stampin' Up! or our products. I would love to help. All items can be purchased online via my shop (you can click here and then click shop in the top right corner) or get in touch directly and I'll order them for you. You can get in touch on poulton_sarah@yahoo.co.uk or 01983 609249.

Happy Crafting 

-XXX-

Thursday, 18 December 2014

Festival of Trees Christmas Card Fun from Stampin' Up! UK Demonstrator Sarah Poulton


Good morning lovelies.

Here is the card I tried to share with you last week but somehow got lost in the publishing ether when I tried to schedule it.

This is a gorgeous card inspired by the very talented (and very lovely) Vicky over at Crafting Clare. I loved her clean and simple use of the Festival of Trees stamp set combined with the Typeset Speciality Papers and wanted to give it my own Stampin' Sarah spin.

I used Naturals Ivory card stock layered over a Very Vanilla cardbase. I used my acrylic block to stamp a rectangular background in Whisper White Craft Ink (I loved this naturals layering tone on tone).


For the tree I stamped the Festival of Trees image on to a scrap of Typeset DSP in Mossy Meadow Ink. I then hand cut as the paper is too thin and lovely to be used with the coordinating punch. I then glued to my card and embellished with Brights Candy Dots (I love how these look like bright twinkly tree lights). I then finished by stamping the tree pot in Daffodil Delight and the greeting in Real Red (which I coloured with my Stampin' Write marker so as to only use a section of the sentiment).

Thank you for popping by today. I'll have another festive creation for you tomorrow. If you have any questions about today's project or the products I have used, please get in touch on poulton_sarah@yahoo.co.uk or 01983 609249. You can order online direct through my store by clicking the product links below. I also have availability in the next few months for your very own crafty party so drop me a line to find out more and get your date in the diary.

Happy Crafting
-X-

Tuesday, 16 December 2014

A quartet of button bauble cards from Stampin' Up! UK Demonstrator Sarah Poulton


Good morning and a very happy December 16th to you lovely crafty friends.

I had a moment of panic this morning when I realised how many festive projects I still have to share with you in just over a week. I want all my festive projects posted before Christmas so that from Boxing Day onwards I can start giving you lots of lovely sneak peeks of all the loveliness to come in the Spring Summer catalogue and Sale-A-Bration (both kicking off January 6th!).

So this week pop back every day for lots of lovely Christmas-y projects. Remember both the Autumn Winter Catalogue and Supplement are only available to order from until January 5th. So while it may be a little late for your Christmas crafting this year, if there is that must have stamp or accessory, order now and tuck away for next years crafty preparations. All items can be ordered via my online store:


Just click Shop in the top right corner.


So today's festive projects are these quick and simple button bauble cards. I am a total button-aholic. I adore using brightly coloured buttons in all my crafting. So when I saw a similar card on Pinterest using just buttons and a pen for doodling the string I had to give it a go.

I used a pot of Brights Designer Series Buttons secured with Glue Dots to create the baubles at different heights. I tried all sorts of colour combinations including multi-coloured and single tone. I loved them all. I needed to make a quick batch of 10 for all the lovely ladies in my Hostess Club (click on the Virtual Club tab above to find out more. I have a new club starting in January and I would love to welcome you to the Club! Drop me a line on poulton_sarah@yahoo.co.uk to book a spot now and make the most of Sale-A-Bration!).


I doodled the ribbon using my Basic Black Stampin' Write Marker. The greeting is from the Good Greetings stamp set which is currently available to purchase through the Online Clearance Rack for the bargain price of £8.99!

I also tried making a couple with the gorgeous Nordic Designer Buttons from the Autumn Winter catalogue.


Such an effective but quick card to make. We all have buttons lying around our stash. And to make life even simpler I used the Stampin' Up! prescored notecards (with envelopes) to speed up the process.

If you have any questions about today's project or the products I have used, please get in touch on poulton_sarah@yahoo.co.uk or 01983 609249. You can order online direct through my store by clicking the product links below. I also have availability in the next few months for your very own crafty party so drop me a line to find out more and get your date in the diary.

Happy Crafting
-X-

Monday, 8 December 2014

A quick Candy Cane December Wonder Tag Swap from Stampin' Up! UK Demonstrator Sarah Poulton

 Good morning from a sunny and crisp Isle of Wight. How was your crafty weekend?

We've returned from a lovely festive weekend away enjoying the Christmas festivities (such as the gorgeous Winchester Christmas Market) and meeting with old and new friends. And of course, the Sale-A-Bration sneak peek event on Thursday. I had a fab time chatting to fellow Demonstrators and looking at the inspiring projects on display. And I was lucky enough to win a prize patrol (a lovely Sale-A-Bration stamp set which you can exclusively add to your orders for free in January, February and March). Add to that the excitement of the Demonstrator pre-order sneak peek of the new Spring Summer catalogue and you have a perfectly crafty and super exciting Stampin' Up! weekend.


Today I wanted to share with you the swaps I made to share with my fellow Stampin' Up! Demonstrators. Swapping is one of the best parts of Stampin' Up! events. I love the inspiration that can be gained from swapping as you see products used in new and exciting ways. I wanted to create something fun and festive so came up with these candy cane tags.


I used my Scallop Tag Topper Punch to create the basic tag (2" wide x length of your candy cane) from Crumb Cake cardstock. I then cut two slots (2cm between the two slits) to slip the Candy Cane through. To embellish I stamped the 'Hello December' from the December Wonder stamp set in Cherry Cobbler ink. I stamped the tree from the same set and doodled stitching with my Cherry Cobbler Stampin' Write marker around the edge.


To finish I tied the Candy Cane to the tag with 1/8" Real Red Taffeta Ribbon. Oh and I added a Champagne Glimmer Paper star to the top of the tree (any sparkly star embellishment or coloured glitter glue would look fab).

And now to share a few of my favourite swaps I received in return (apologies to my fellow Demonstrators as I don't have the swaps with me as I type so cannot give credit. Credit to follow).

I loved this neat little Merry Christmas wall hanging. Complete with curled wire to hang it up with:


I love the colours of this Wondrous Wreath swap:


And I was a bit conflicted by the Visions of Santa stamp set when I first saw it and it is not one I own. But I absolutely loved receiving this swap using the set.


Thanks for stopping by today and for sharing in my December crafty festivities.

Be sure not to miss the Year End Closeout bargains on the Clearance Rack. Some fantastic bargains to be had. But stock only available while supplies last so get your order in quick so as not to miss out! Click the image below to link straight through to the products available at great prices.


If you have any questions about today's project or the products I have used, please get in touch on poulton_sarah@yahoo.co.uk or 01983 609249. You can order online direct through my store by clicking the product links above or the pictures below. I also have availability in the next few months for your very own crafty party so drop me a line to find out more and get your date in the diary.

Happy Crafting
-X-

Tuesday, 18 November 2014

A very Cheerful Christmas card from Stampin' Up! UK Demonstrator Sarah Poulton

Good morning and welcome to a new crafty week here at Stampin' Sarah! HQ. It has been a very wet and grey weekend here on the Isle of Wight but that didn't stop all the lovely early Christmas shoppers from turning out at another fabulous Christmas Fair in Cowes on Saturday. I love this annual event at the Yacht Haven. So many lovely stalls and customers. My felt and ribbon wreaths proved super popular and I'm glad I decided to have a go at making them. I'll share a few pics of my favourites later in the week (also show you some new ways to use Stampin' Up! dies).


Today's crafty project was designed by my downline Lorraine for our team get together last week. I had forgotten how much I love the Cheerful Christmas stamp set. It works so beautifully with the Filigree Frame Textured Impressions Embossing Folder.  Such a classic and simple card to recreate.

We used a Very Vanilla cardbase embossed with the Filgree Frame. We then stamped the 'Christmas Cheer' sentiment in Always Artichoke. Then to finish we coloured Basic Rhinestones with Cherry Cobbler Blendabilities pens and embellished the swirly stamped image. Et voila! A perfectly festive (and easy to mass produce) Christmas card.


Thanks for stopping by today. If you have any questions about today's project or the products I have used, please get in touch on poulton_sarah@yahoo.co.uk or 01983 609249. You can order online direct through my store by clicking the product links above or the pictures below. I also have availability in the next few months for your very own crafty party so drop me a line to find out more and get your date in the diary.

Happy Crafting
-X-

Wednesday, 10 September 2014

Crafty Party Thank You Gift: Stampin' Up! Gift Box Punch Board Make

Happy Wednesday Crafters.

How is your week going so far? It is a downward slide to the weekend now. Which can only mean more time for craftiness ;0)

As I mentioned on Monday, I have gone a bit Gift Box crazy. I recently purchased the fantabulous Stampin' Up! Gift Box Punch Board. I needed to make a thank you gift for a recent party hostess and thought this would be a perfect demonstration and gift all in one.


If you have already purchased the Envelope Punch Board then you will know just how simple these boards are to use. All the measurements and instructions are listed right on the Board and you just decide which size box you'd like to make, cut your paper/card to size and follow the instructions (all measurements are also listed on the board for your reference too).


The box above was the largest listed on the Board, It is made from a 12"x12" piece of cardstock (the Gift Box Board usefully has a score extending arm to make 12"x12" easier to score!). The finished box is 4" square. And the best thing about these boxes is that they are held together with little tabs punched by the board. There is no glue used to hold my large 4" box together (the ribbon is simply for decoration too!).

I created the box using the gorgeous new Under the Tree Speciality Designer Series Paper. I love these thick cardstock- weight Kraft sheets. Perfect for box making. It is Kraft/Gold Tone on one side with  Whisper White printed patterns and the other side of each 12"x12" is a Christmas themed design in Cherry Cobbler, Garden Green or Early Espresso.


I wrapped my box with Gold Satin Ribbon and a length of Cherry Cobbler ribbon (sadly now retired by the beautiful Cherry Cobbler 1" Sheer Linen Ribbon would be perfect too). I love the effect of tying two bows on top of one another. 

I created the tag using the Seasonally Scattered stamp set. I heat embossed the 'Thanks' stamp with Gold Embossing Powder on to Cherry Cobbler card stock and then cut with my Magnetic Platform and my Apothecary Accents Framelits. I punched a small hole in to the tag and attached with a third tiny bow using Cherry Cobbler Seam Binding Ribbon.

And while I was in a Gift Box making mood I made a mini gift box as the Door Prize for my recent party. This example is the smallest box on the Gift Box Punch Board- 1-3/4" square made from a 5" x 5" square of DSP.


I wrapped this box with a length of Blackberry Bliss Satin Stitched Ribbon and tied with a Autumn Wooden Element Leaf tied with Baker's Twine.

Don't forget to check out this week's new Weekly Deals by clicking on the picture below.


Thank you for popping by today and for sharing in my Gift Box creativity excitement. If you have any questions about today's project or the products I have used, please get in touch on poulton_sarah@yahoo.co.uk or 01983 609249. You can order online direct through my store by clicking the product links above or the pictures below. I also have availability in the next few months for your very own crafty party. Click on the Promotions tab above to see the exclusive hostess promotion running until October 31st.

Happy Crafting
-X-