Showing posts with label gift box. Show all posts

Wednesday, 6 April 2016

A Love Blossoms Mini Gift Box from Stampin' Up! UK Demonstrator Sarah Poulton

Good morning lovelies.

Well what a week it has been. I have launched my new Jamberry Nail Wraps venture. I am super excited about a whole lot of prettiness headed my way in the post. I have been trialling the wraps and they are fab. They are long lasting and durable. They are easy to apply and to remove when you fancy a change. I am just in love with pretty nails without having to wait for them to dry. If you click on the link above you can find out more. Now back to normal crafty service.....

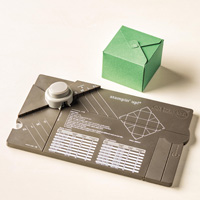
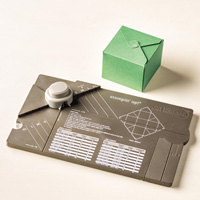
I have this lovely little Love Blossoms Gift Box to share today. I made the basic box using the Gift Box Punch Board and a 6" square piece of Love Blossoms DSP.


Once the basic box was put together I created a wrap around tag with a piece of Vellum and the Scallop Tag Topper Punch. I stamped my Decorative Label with the sentiment from Cottage Greetings in Rose Red. I added the Blushing Bride Glimmer Paper flower and tied the vellum closed with a piece of embroidery thread.


This was a project we made in a pre-Easter class and we all added mini Lindt bunnies to our boxes as a little Easter gift. These would be perfect place settings or favours for a birthday dinner or special event.

Thank you for popping by today. Please let me know if you have any questions about Stampin' Up!, Sale-A-Bration or any of our new products. I would love to help. All items can be purchased online via my shop or get in touch directly and I can order them for you to be delivered direct to your door. I'd also love to Demo for you and your friends at a crafty party. As the hostess you earn lots of lovely freebies and you all get to make a fun crafty project too (no crafting experience necessary!).

-XXX-

Product List

Monday, 31 August 2015

Frosty The Snowman Hat from Stampin' Up! UK Demonstrator Sarah Poulton

Good morning crafters and a happy wet and grey Bank Holiday Monday to you from a very rainy Isle of Wight. What better excuse to stay in and craft than wet weather? I am in the middle of a series of cross stitch Christmas gifts so might put on a good film with the girls and have a bit of a stitchy day.

I have another festive project to share with you today. This was inspired by a Connie Stewart video I happened upon on Youtube. I love the simplicity of creating the hat simply with strips of card and the Circles Collection Framelits.

A couple of tips for you if you want to have a go. It is definitely worth having a tin of beans or bottle of water to hand to help loosen the fibres in the main body of the hat as you curl it round. And also, I found that if you don't have the spiral border punch (now discontinued) you can simply cut little notches up to your score line to make little tabs to glue to the circular base.


To create this hat gift box you simply need Basic Black and a contrasting strip in either silver or grey (or any colour/pattern of your fancy). 

For decoration I used the Flower Shop Bundle to create this layered flower. I stamped and punched two main red flowers and then punched the centre from Hello Honey to create a contrasting middle. I curled the petals to give a little dimension and secured it all to the hat with several glue dots.


I filled my gift box hat with a sachet of festive mocha and a little packet of mini marshmallows. A perfect little place setting or neighbour gift.

Thank you for popping by today. Please let me know if you have any questions about Stampin' Up! or our products. I would love to help. All items can be purchased online via my shop or get in touch directly and I can order them for you to be delivered direct to your door. I'd also love to Demo for you and your friends at a crafty party. As the hostess you earn lots of lovely freebies and you all get to make a fun crafty project too (no crafting experience necessary!)

 -XXX-
Built for Free Using: My Stampin Blog

Friday, 10 July 2015

A Garden in Bloom Gift Box from Stampin' Up! UK Demonstrator Sarah Poulton

Happy Friday Crafters. What a week it has been! Thank goodness for weekends and crafting with friends.

This gorgeous sunshine we have here on the Isle of Wight inspired me to create this little Garden in Bloom gift box. A perfect little box for anyone celebrating a sunshiny summer birthday.

This is one of my favourite stamping techniques- creating my own stamped Designer Series Paper. I have often had people ask me if Stampin' Up! now sell cardstock thickness DSP. When in actuality it is a design I have stamped myself. It is such a simple effect.

For this stamped box I used the Garden in Bloom stamp set with the following pairs of colours: Rose Red and Blushing Bride, Old Olive and Mint Macaron, Daffodil Delight and So Saffron, Pacific Point and Soft Sky.


For the Pear Pizzazz Base:

  • Piece of cardstock measuring 6-1/8" x 8-1/8"
  • Score around all edges at 1-1/16"
  • Cut the corners and fold up in to a box

For the stamped Whisper White lid:

  • Piece of cardstock measuring 6-1/8" x 8-1/8"
  • Score around all edges at 1" (this makes the box slightly bigger so it fits nicely over your base)
  • Trim 1/4" from each edge to make the lid slightly shorter (this will show your Pear Pizzazz base)
  • Stamp your chosen design
  • Fold up in to the lid shape.
I created the matching tag with the Note Tag Punch. I created the little banner using the Endless Thanks photopolymer stamp set. I cut the banner and layered over my stamped tag.

I finished the box with a length of Soft Sky ribbon and a couple of Basic Pearls.


I hope you have lots of crafty loveliness planned for the weekend ahead. I have made a little time to catch up with my Project Life album. I am hoping to continue that and bring it a little more up to date (it is currently floundering around Easter).

Thank you for popping by today. Please let me know if you have any questions about Stampin' Up! or our products. I would love to help. All items can be purchased online via my shop or get in touch directly and I can order them for you to be delivered direct to your door. I'd also love to Demo for you and your friends at a crafty party. As the hostess you earn lots of lovely freebies and you all get to make a fun crafty project too (no crafting experience necessary!)

 -XXX-

Built for Free Using: My Stampin Blog

Wednesday, 24 June 2015

A Folding Awesomely Artistic Gift Box from Stampin' Up! UK Demonstrator Sarah Poulton


Today's project is this fab little folded gift box decorated with the Awesomely Artistic stamp set from the fab new 2015-2016 catalogue.

To create this gift box you need a piece of cardstock measuring 15 x 22.5cm. To work out the score marks and cutting measurements I used this template. This gift box can so easily be personalised or themed by occasion by using Designer Series Paper or differing stamps.

My favourite detail of this box is the dragonfly on top which I heat embossed in Gold and Clear (over Soft Suede ink) on to Vellum Cardstock. I created two dragonflies which I then fussy cut and mounted one on top of the other (I only cut the body and wings of the second dragonfly). I created the body with Basic Pearls.


My colour scheme for this box: Soft Suede, Crumb Cake, Soft Sky, Pear Pizzazz and Encore Gold (I daubered gold around every edge for a vintage aged look).


Here is how the box opens with a folded ribbon tab.


This is such a perfect little gift box for all occasions. It would make a great teacher gift or table piece.

As it is Wednesday don't forget to check out the new Weekly Deals by clicking below.


Thank you for popping by today. Don't forget to check out this week's Weekly DealsPlease let me know if you have any questions about Stampin' Up! or our products. I would love to help. All items can be purchased online via my shop or get in touch directly and I can order them for you to be delivered direct to your door. I'd also love to Demo for you and your friends at a crafty party. As the hostess you earn lots of lovely freebies and you all get to make a fun crafty project too (no crafting experience necessary!)

 -XXX-
Built for Free Using: My Stampin Blog

Friday, 29 May 2015

Painted Petals Tealight Gift Box Thank You from Stampin' Up! UK Demonstrator Sarah Poulton


Painted Petals has been by far my favourite of all the Spring Summer catalogue products and I will be sad to see it go on June 2nd. I love the effect  of the two step stamping (and how much easier it is now you can line up the photopolymer stamps through your acrylic block).

This project is inspired by the amazing Bronwyn Eastley. I absolutely loved the simplicity of this little tealight gift box. A perfect little thank you for a teacher or loved one. 

The inside of the gift box with the little scented tealight:


I do enjoy a bit of fussy cutting from time to time. I loved raising this little rose to add dimension to the front of the gift box.


Thank you for popping by today. Don't forget to check out this week's Weekly DealsPlease let me know if you have any questions about Stampin' Up! or our products. I would love to help. All items can be purchased online via my shop or get in touch directly and I can order them for you to be delivered direct to your door. I'd also love to Demo for you and your friends at a crafty party. As the hostess you earn lots of lovely freebies and you all get to make a fun crafty project too (no crafting experience necessary!)

 -XXX-
Built for Free Using: My Stampin Blog

Wednesday, 25 March 2015

Easter Bunny Chocolate Treat Box from Stampin' Up! UK Demonstrator Sarah Poulton

Good morning and a happy (if not a little chilly) Wednesday to you today.

So Wednesday brings new Weekly Deals. And what a fantastic week of specials we have this week. My favourite crafty tool, the Envelope Punch Board, is a bargain this week at just £13.46 and the Regals Paper Stack is £14.63. Combine these with some cardstock and you'll have reached your £45 spend for an extra Sale-A-Bration freebie. This is why I LOVE Stampin' Up! Not only are the products high quality and great value but you earn freebies for using and buying the products.

So on to today's crafty share. This is a project inspired by my upline Michelle who provides a great tutorial on her blog. I loved the simplicity of using the Scallop Tag Topper Punch to create the little bunny face.


I used scraps of patterned papers to punch the nose and the middle of the ears. I stamped the daffodil in Daffodil Delight using my Petite Petals stamp set and punched with the coordinating punch. This is a lovely sized little box for filling with Easter chocolate-y treats.


Thank you for popping by today. You can find out more about the new Spring Summer Catalogue and Sale-A-Bration promotion by clicking here or by using the navigation menu on the left. This really is the most exciting time of the year to shop. New products and fantastic freebie rewards too. 

Please let me know if you have any questions about Stampin' Up! or our products. I would love to help. All items can be purchased online via my shop (or click on the links above to find out more about specific products) or get in touch directly and I  can order them for you to be delivered direct to your door. 

-XXX-

Built for Free Using: My Stampin Blog

Wednesday, 10 September 2014

Crafty Party Thank You Gift: Stampin' Up! Gift Box Punch Board Make

Happy Wednesday Crafters.

How is your week going so far? It is a downward slide to the weekend now. Which can only mean more time for craftiness ;0)

As I mentioned on Monday, I have gone a bit Gift Box crazy. I recently purchased the fantabulous Stampin' Up! Gift Box Punch Board. I needed to make a thank you gift for a recent party hostess and thought this would be a perfect demonstration and gift all in one.


If you have already purchased the Envelope Punch Board then you will know just how simple these boards are to use. All the measurements and instructions are listed right on the Board and you just decide which size box you'd like to make, cut your paper/card to size and follow the instructions (all measurements are also listed on the board for your reference too).


The box above was the largest listed on the Board, It is made from a 12"x12" piece of cardstock (the Gift Box Board usefully has a score extending arm to make 12"x12" easier to score!). The finished box is 4" square. And the best thing about these boxes is that they are held together with little tabs punched by the board. There is no glue used to hold my large 4" box together (the ribbon is simply for decoration too!).

I created the box using the gorgeous new Under the Tree Speciality Designer Series Paper. I love these thick cardstock- weight Kraft sheets. Perfect for box making. It is Kraft/Gold Tone on one side with  Whisper White printed patterns and the other side of each 12"x12" is a Christmas themed design in Cherry Cobbler, Garden Green or Early Espresso.


I wrapped my box with Gold Satin Ribbon and a length of Cherry Cobbler ribbon (sadly now retired by the beautiful Cherry Cobbler 1" Sheer Linen Ribbon would be perfect too). I love the effect of tying two bows on top of one another. 

I created the tag using the Seasonally Scattered stamp set. I heat embossed the 'Thanks' stamp with Gold Embossing Powder on to Cherry Cobbler card stock and then cut with my Magnetic Platform and my Apothecary Accents Framelits. I punched a small hole in to the tag and attached with a third tiny bow using Cherry Cobbler Seam Binding Ribbon.

And while I was in a Gift Box making mood I made a mini gift box as the Door Prize for my recent party. This example is the smallest box on the Gift Box Punch Board- 1-3/4" square made from a 5" x 5" square of DSP.


I wrapped this box with a length of Blackberry Bliss Satin Stitched Ribbon and tied with a Autumn Wooden Element Leaf tied with Baker's Twine.

Don't forget to check out this week's new Weekly Deals by clicking on the picture below.


Thank you for popping by today and for sharing in my Gift Box creativity excitement. If you have any questions about today's project or the products I have used, please get in touch on poulton_sarah@yahoo.co.uk or 01983 609249. You can order online direct through my store by clicking the product links above or the pictures below. I also have availability in the next few months for your very own crafty party. Click on the Promotions tab above to see the exclusive hostess promotion running until October 31st.

Happy Crafting
-X-

Monday, 23 June 2014

Cardmaking and Craft Classes on the Isle of Wight: Scallop Tag Punch Gift Box

Hello all! Hope you've had a creative and sunshine filled weekend. Saturday was my monthly card class here in Newport on the Isle of Wight. We had a lovely class full of chat and cheeriness and creativity.

If you'd like to find out more about my upcoming classes check out my sidebar or the class tab at the top.
My upcoming classes will be held at my home in Newport on:
  • Saturday July 19th 1-4pm
  • Saturday August 23rd 1-4pm

Classes cost £8.00 for 3 cards and a 3D item (gift box or gift bag)

I also have two special events coming up in August. My annual Christmas Crafting Days will be held on:
  • Friday August 8th 10am-4pm
  • Saturday August 16th 10am-4pm

This is a special event I hold every year to get you in the festive spirit ready for the festive crafting season (which we all know starts in the summer!). We make a wide range of projects. In previous years we have made a Christmas planner, stamped tealights and a matching votive holder, a papercrafted Christmas tree for a table centrepiece, a mini album and a huge variety of cards and gift bags. The day costs £20 which includes the kits to make all projects. I ask all attendees to bring along their own selection of glue and a packed lunch too. 

Get in touch on poulton_sarah@yahoo.co.uk or 01983 609249 to book your place or to find out more.


Today's crafty make was a box we made at the class on Saturday. I found this tutorial online for creating the basic design of the box which uses the FAB Scallop Tag Topper Punch as a closure for the gift box.

Once the basic box was cut and scored from Daffodil Delight cardstock we decorated with the soon to retire 2012-2014 In Color Cardstock (Midnight Muse and Gumball Green)  layered with the Watercolor Wonder Designer Series Paper. I love this paper and will be so sad to see it retire (but equally as excited about all the new lovely paper collections to arrive in the new catalogue).

To finish we created these little floral features using a fab sneak peek product from the new annual catalogue, the Itty Bitty Punch Accents punch pack. We embellished with Brights Candy Dots.


Check out all the products that are retiring by clicking the image below. All the retiring products are only available for another week. June 30th is your last opportunity to purchase these before the arrival of the new catalogue on July 1st. 


Please get in touch with any questions or queries or please pop over to my Online Store for more information on all our products. Get in touch on poulton_sarah@yahoo.co.uk or 01983 609249.

Happy Crafting
-X-

Monday, 24 March 2014

Easter Basket Surprise Gift Box


Good morning and a very Happy Monday to you all. How is the weather in your part of the world? We have lovely bright sunshine here on the Isle of Wight (interspersed over the weekend with some serious hail stones!) so have made the most of it by taking the girls out to the park and to the beach. Sylvie doesn't seem to appreciate it quite as much as Summer does just yet as she continues to mainly sleep her days away (but I am not taking this for granted! Sam and I are both enjoying this quiet phase before we have two loud littlies running around the house).

Today's crafty project is a lovely little surprise Easter Basket. The surprise comes when you take the lid off and open the basket to reveal the contents. I found the template for this basket over on Tanya Bell's blog, a very talented Australian Demo. I recommend checking out some of her fantastic tutorials as she has some great 3D item ideas.


Here is the lid off. The lid is decorated using the Floral Fusion Sizzlits Die which is one of my current favourites for Easter. I love how all the flowers fit together in lovely layers. I secured the handle with a Candy Dot Brad Base and a Subtles Candy Dot.


Here is the basket completely opened out. See what I mean by an Easter surprise? I absolutely love this project and the simplicity of creating a little garden within to hold a mini Lindt gold rabbit. I made this one and have tucked it away as an Easter gift for Summer.

To create the grass around the rabbit I used my fantastic new Fringe Scissors. I was a bit hesitant to invest in them to begin with but now I am hooked on using them to create grass borders, perfect for Easter and Spring projects.


A close up on my favourite detail, the choccie rabbit surrounded by daisies created using the Itty Bitty Punch Pack and the Heart/Beak from the Owl Punch. The stamping around the edges uses the Heart and Flower stamps within the Banner Blast stamp set (for 7 more days you can get this stamp set for FREE with an order of £45 or more as part of Sale-A-Bration!! Click here for more info).


The colours I have used for this project are:

Chocolate Chip
Crisp Cantaloupe
Crumb Cake
Melon Mambo
Pink Pirouette
Pistachio Pudding
So Saffron
Whisper White

Embellishments:

Subtles & Brights Candy Dots
Subtles & Brights Designer Buttons
Crisp Cantaloupe Ruffle Stretch Trim

Punches:

Itty Bitty Punch Pack
Scallop Ribbon Border Punch
Owl Builder Punch

Other:

Floral Fusions Sizzlits Die
Fringe Scissors
Perfect Polka Dots Embossing Folder
Banner Blast Stamp Set (free with an order of £45 placed before March 31st)


You can find all the products you need for this project through my online store.

If you click here or on the picture above you will be connected straight through to my store where you can browse all Stampin' Up!'s current products. It will take you to the Sale-A-Bration page for details of our current promotion (only one week left to take advantage!!!)

If you'd like to find out more about Sale-A-Bration, please pop by my 'Promotions' tab at the top or drop me a line on poulton_sarah@yahoo.co.uk or 01983 609249. Sale-A-Bration is the best time of the year for ordering Stampin' Up! products. Who doesn't love a good freebie? 

Happy Crafting
-X-

Wednesday, 12 March 2014

Wild Wasabi Crocodile Gift Box


Hello and welcome to another crafty day at Stampin' Sarah. This is a scheduled post so no exciting news to share with you just yet. But rest assured I will be posting photos of our new little girl just as soon as I am home.

Today, as promised, I am sharing these fab little crocodile gift boxes. I'd seen this box on Nadine Weiner's blog (a German Demonstrator). However, I think the translation went slightly awry as I made some mistakes on putting the larger croc box together (it should have had slightly smaller front and edges to allow for the teeth when closing the box). So I decided to have a go at making a smaller baby croc box and correct the mistakes I'd made with my first attempt.

I also thought this little set would make a perfect gift for my cousin's little boy who has just welcomed a new baby brother to the world.


These boxes are incredibly simple to create as they are based on a simple mini pizza box design. 

To make the mini baby croc I started with a 10 x 16.5cm rectangle of Wild Wasabi cardstock. I scored along the 16.5cm side at 1.5cm, 6.5cm, 9cm and 14cm. I scored along the 10cm side at 1cm, 2.5cm, 7.5cm and 9cm. You then need to cut your score lines as below (the bold black lines) and also cut a 1cm strip off your two edge panels which will form the top lid of your box (shown below as the two stepped pieces cut on the left hand top and bottom edges). This 1cm strip cut out allows you to comfortably add teeth to your box and close it securely.


To finish the croc face I used a panel of Pistachio Pudding Coredinations cardstock which I ran through the Big Shot using my Decorative Dots Embossing Folders (yours free for a few more weeks with an order of £45 during Sale-A-Bration! Get your order to me before the end of March to qualify for the extra lovely freebies!). I sanded the panel with my Stampin' Sanding Block and then inked the edges with Old Olive ink using a sponge dauber. I layered this on to a panel of Old Olive Ink. I create the eyes with punched circles of Wild Wasabi which I cut a small slit in to which I shaped round to give the 3D effect. For the larger box I finished the eyes with smaller circles punched in Whisper White and Basic Black. For the baby box I used googly eyes from my retired Stampin' Up! stash.

The final detail to give the croc definition is to stamp a border using your Scallop Edge Border Punch and a 2cm strip of Whisper White. Once you have your scalloped strip using sticky strip or Tombow you can secure the right lengths to the top inside of your box to create the crocodile teeth.

If you'd like to have a go at the larger box also you can follow the translated instructions on Nadine's blog. She uses a 16cm x 29cm rectangle to begin with which then creates a 10cm square croc box.

If you'd like to find out more about Sale-A-Bration, please pop by my 'Promotions' tab at the top or drop me a line on poulton_sarah@yahoo.co.uk or 01983 609249. Sale-A-Bration is the best time of the year for ordering Stampin' Up! products. Who doesn't love a good freebie? 


Happy Crafting

-X-