Showing posts with label Awesomely Artistic. Show all posts

Wednesday, 13 April 2016

Garden In Bloom Card from Stampin' Up! UK Demonstrator Sarah Poulton

Morning lovelies. How goes your week? I am super excited about Stampin' Up!'s onstage event this weekend.  We will be getting a little sneak peek of the new catalogue. I cannot wait. I was packing up my swaps for the event and came across all my gorgeous swaps from the last event in November. It was one of those swaps that inspired today's crafty make. I used the original swap to create my card. I must apologise to the Demo who made this card though as I don't have your name. Please let me know if you come across this and I will give full credit.

This is a beautiful card themed around Lost Lagoon and Blackberry Bliss. The base card is embossed with the Elegant Dots Embossing Folder. The stamping is from the Garden in Blooms stamp set layered with the Hello from the Greetings Thinlits Dies.


The stamping is layered over Silver Glimmer Paper and a flower punched with the Itty Bitty Accent Punches was added to finish.


Thank you for popping by today. Please let me know if you have any questions about Stampin' Up!, or any of our products. I would love to help. All items can be purchased online via my shop or get in touch directly and I can order them for you to be delivered direct to your door. I'd also love to Demo for you and your friends at a crafty party. As the hostess you earn lots of lovely freebies and you all get to make a fun crafty project too (no crafting experience necessary!).

-XXX-
Product List

Friday, 25 March 2016

A Floral Masked Wreath Card from Stampin' Up! UK Demonstrator Sarah Poulton

Good morning lovelies and a very happy Good Friday to you all.  I hope you have lots of fun craftiness planned for your day. We are off to the RSPCA Easter Fayre later so the girls can take part in the Easter Egg Hunt. We have had an unusually early start to the day due to raised excitement levels.

I have a stamped floral wreath card to share today. This uses a whole selection of floral stamp sets and a 2" punched post-it note mask.

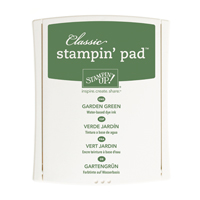
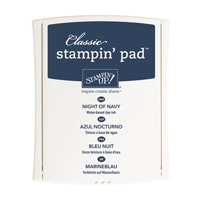
Once I positioned the punched circle I layered my floral images around the edges using Garden Green, Crushed Curry and Night of Navy.


Once my wreath was stamped I removed the mask to stamp my Watercolor Words sentiment and I then finished with a Botanicals Jewel for a bit of sparkle.


As I was up so early this morning with my over excited girlies I had a bit of time to finish my 6th cross stitch owl. This one was designed in blackwork. I chose to add colour to my design so stitched in lovely Spring colours (which I only just realised match my needle minder Joy). 


Wishing you all a lovely Easter weekend. Thank you for popping by today. Please let me know if you have any questions about Stampin' Up!, Sale-A-Bration or any of our new products. I would love to help. All items can be purchased online via my shop or get in touch directly and I can order them for you to be delivered direct to your door. I'd also love to Demo for you and your friends at a crafty party. As the hostess you earn lots of lovely freebies and you all get to make a fun crafty project too (no crafting experience necessary!).

-XXX-
Product List

Tuesday, 24 November 2015

Downline 5 Year Celebration Gift from Stampin' Up! UK Demonstrator Sarah Poulton

A very big Happy 5 Year Stampin' Up!-versary to my good friend and longest downline member Sandy. She joined this fab company a few months after I did back in 2010 and she has become a great friend during that time.

To celebrate I wanted to hand make her a little gift and, of course, a card too.

I came up with this Soft Suede and Marina Mist combo card with a little extra sparkle with my Champagne Glimmer Paper 5.


I used the Awesomely Artistic ink splatter stamp for the background and added the beautiful handwriting style sentiment from Cottage Greetings.

Detail and layering was added with the Chevron Ribbon, bakers twine, a punched Elegant Butterfly and bitty flowers with rhinestones.


And here is the gift I made for her. I bought this wooden drawer set from The Works with a view to either inking or wood burning. When I came to decorate I decided to cover with papers and add embellishments from my stash. I thought this little set of drawers would be perfect for storing embellishments or little crafting bits and bobs.


Thank you for popping by today. Please let me know if you have any questions about Stampin' Up! or our products. I would love to help. All items can be purchased online via my shop or get in touch directly and I can order them for you to be delivered direct to your door. I'd also love to Demo for you and your friends at a crafty party. As the hostess you earn lots of lovely freebies and you all get to make a fun crafty project too (no crafting experience necessary!)

 -XXX-

Built for Free Using: My Stampin Blog

Monday, 10 August 2015

An Awesomely Artistic Scrapbook Page from Stampin' Up! UK Demonstrator Sarah Poulton

Good morning crafters.

Welcome to a new crafty week here at Stampin' Sarah HQ. It has been another busy weekend here on the Isle of Wight. I've been working hard getting the final projects prepped for next week's Christmas Craft Days as well as taking a break from cutting and sticking and sneaking off to Cowes yesterday for a few hours of Cowes Week boating fun (we indulged in a CBeebies show and an ice cream!).

I thought I would kick off a week of scrapbooking today. I have a whole series of Stampin' Up! inspired pages that I have been saving to share with you all.

Today's project is a great page to use with any size of photo. I know we all have oversized pictures lurking in our crafting stash. Whether it is professional pics from events or school pictures or just those oddly sized pictures we don't quite know what to do with. This sort of page is perfect as you can adapt the stamped frame to any size. Just stick your picture first and stamp second.


For this page I used a Very Vanilla card base. I layered my photo with Brushed Gold and Cherry Cobbler cardstock and glued this centrally.

I then used the Awesomely Artistic stamp set with Garden Green, Cherry Cobber, Crumb Cake and Encore Gold ink. I created these corner frames by layering the images over one another. I love the ink splat stamp as when I try to create actual splats I always get in a mess.

To finish I stamped flowers from the Petite Petals stamp set and punched with the matching punch. I stamped a gold dragonfly on to Vellum and embellished with Basic Pearls. I then added a bit of glitz and sparkle with Brights Sequins and Basic Pearls.


I have loved getting my scrapbooking head back on. I forget how much I enjoy traditional 12"x12" scrapping. Pop back on Wednesday for another scrappy share.

Thank you for popping by today. Please let me know if you have any questions about Stampin' Up! or our products. I would love to help. All items can be purchased online via my shop or get in touch directly and I can order them for you to be delivered direct to your door. I'd also love to Demo for you and your friends at a crafty party. As the hostess you earn lots of lovely freebies and you all get to make a fun crafty project too (no crafting experience necessary!)

 -XXX-
Built for Free Using: My Stampin Blog

Friday, 31 July 2015

An Awesomely Artistic Dragonfly Flight from Stampin' Up! UK Demonstrator Sarah Poulton

How are you enjoying the new Stampin' Up! catalogue? It has been live for 2 months and the firm favourite product amongst my customers so far has to be Awesomely Artistic. This stamp set has flown off the shelves and I have loved seeing what my customers have been coming up with. It is such a versatile set and the beautiful dragonfly is so detailed.

So in honour of the fantastic layering stamp set I have CASED this card from the wonderfully creative Michelle Zindorf over in the USA. She uses amazing layering, inking and blending techniques with Stampin' Up! stamps to create incredible effects and cards. Her blog really is worth a look.

For this card I masked the edges with a piece of scrap paper and washi tape. I used the lines of my grid paper to mark precisely where I wanted the lines to be. I then used a Stampin' Sponge and inked Pool Party for the sky and Pear Pizzazz for the grass. I tried to get an ombre style effect by sponging darker towards the outside and lighter towards the middle.


I stamped the floral image across the bottom in Memento Black and coloured with my Blender Pens using Rose Red and Mossy Meadow.

I finished by stamping the dragonflies again in Memento Black. I then added White Gel Pen to the wings to give that extra bit of definition (I then used a non-SU silver sparkle pen over the top for a little glitter).


I am off work now for a week so hoping for lots of crafting and creating. And also lots of fun and games with the girls (*fingers crossed* for some lovely weather so we can get to the beach and splash park). I look forward to sharing my makes with you next week. I hope you all have a great weekend and enjoy whatever you have planned.

Thank you for popping by today. Please let me know if you have any questions about Stampin' Up! or our products. I would love to help. All items can be purchased online via my shop or get in touch directly and I can order them for you to be delivered direct to your door. I'd also love to Demo for you and your friends at a crafty party. As the hostess you earn lots of lovely freebies and you all get to make a fun crafty project too (no crafting experience necessary!)

 -XXX-

Built for Free Using: My Stampin Blog

Monday, 29 June 2015

An Awesomely Artistic layered Thank You Card from Stampin' Up! UK Demonstrator Sarah Poulton

Happy Monday. What a beautiful weekend and what a lovely day ahead. I am loving this weather. We made the most of it by heading to the Isle of Wight County Show for a day out followed by a night camping in the motorhome. Not much time for crafting. But lots of fun all the same. Sam and I even snuck in enough time to see the new Jurassic Park which was corny but super fun.

Today I have another Awesomely Artistic inspired creation. I really cannot make enough with this stamp set. I love the layering potential and all the beautifully detailed images.


I used the fab Whisper White Note Cards as my card base and then layered Crumb Cake and Memento Tuxedo Black inked images. I added a piece of striped DSP from the Neutrals Designer Series Paper Stack plus a think piece of Silver Glimmer Paper.

The 'thanks' sentiment is from the Cottage Greetings stamp set.

I added the final detail using punched flowers (punched with the Itty Bitty Accents Punch Pack) and Basic Pearls.


Thank you for popping by today. Don't forget to check out this week's Weekly DealsPlease let me know if you have any questions about Stampin' Up! or our products. I would love to help. All items can be purchased online via my shop or get in touch directly and I can order them for you to be delivered direct to your door. I'd also love to Demo for you and your friends at a crafty party. As the hostess you earn lots of lovely freebies and you all get to make a fun crafty project too (no crafting experience necessary!)

 -XXX-

Built for Free Using: My Stampin Blog

Wednesday, 24 June 2015

A Folding Awesomely Artistic Gift Box from Stampin' Up! UK Demonstrator Sarah Poulton


Today's project is this fab little folded gift box decorated with the Awesomely Artistic stamp set from the fab new 2015-2016 catalogue.

To create this gift box you need a piece of cardstock measuring 15 x 22.5cm. To work out the score marks and cutting measurements I used this template. This gift box can so easily be personalised or themed by occasion by using Designer Series Paper or differing stamps.

My favourite detail of this box is the dragonfly on top which I heat embossed in Gold and Clear (over Soft Suede ink) on to Vellum Cardstock. I created two dragonflies which I then fussy cut and mounted one on top of the other (I only cut the body and wings of the second dragonfly). I created the body with Basic Pearls.


My colour scheme for this box: Soft Suede, Crumb Cake, Soft Sky, Pear Pizzazz and Encore Gold (I daubered gold around every edge for a vintage aged look).


Here is how the box opens with a folded ribbon tab.


This is such a perfect little gift box for all occasions. It would make a great teacher gift or table piece.

As it is Wednesday don't forget to check out the new Weekly Deals by clicking below.


Thank you for popping by today. Don't forget to check out this week's Weekly DealsPlease let me know if you have any questions about Stampin' Up! or our products. I would love to help. All items can be purchased online via my shop or get in touch directly and I can order them for you to be delivered direct to your door. I'd also love to Demo for you and your friends at a crafty party. As the hostess you earn lots of lovely freebies and you all get to make a fun crafty project too (no crafting experience necessary!)

 -XXX-
Built for Free Using: My Stampin Blog

Wednesday, 20 May 2015

An Awesomely Artistic Sneak Peek from Stampin' Up! Demonstrator Sarah Poulton

Good morning crafters. 

Yes, its that time again. Weekly Deals are here. Pop over to my online store by clicking here to check out this weeks fab deals. I love this time of the week as there are always interesting combos to be had.

I have a few sneak peeks to share with you today from Saturday's Telford Regional.

This first card project is our Make and Take project. At every Stampin' Up! event there are always crafty projects to complete. We are given a pack with all the components and then a big box of all the stamps, inks and glues to make our kits in to cards, bags or boxes. Stampin' Up! really do think of everything and I'd love to welcome you to join my team and come along to see for yourself. Convention is our next big event in November. Drop me a line on poulton_sarah@yahoo.co.uk or 01983 609249 to find out more about joining the Stampin' Up! family. Not only a great deal on the Starter Kit but fun with new friends as well.


The card above uses a brand new set called Awesomely Artistic which is perfect for inking and layering. The colours are three of the fantastic new In Colors- Tip Top Taupe, Mint Macaron & Delightful Dijon.

I just love this set, especially that gorgeous dragonfly. For this card we inked and then water spritzed the stamp to get a watercolour effect. The actual dragonfly stamp is beautiful and detailed.

I thought I would show you a couple of the gorgeous display samples too. The new catalogue features a fantastic new Thinlit called Cutie Pie for creating cake boxes like the sample on the left. There is also is amazing new kit called the Sweet Stack Project Kit which makes the complete project on the right below. They really are incredible in real life.


 And one last Telford picture to share. Me in the back with some great Pinkies Leadership teamies. We had a fun afternoon tea get together on Friday where we talked business and planning for the months ahead.


Thank you for popping by today. Don't forget to check out this week's Weekly DealsPlease let me know if you have any questions about Stampin' Up! or our products. I would love to help. All items can be purchased online via my shop or get in touch directly and I can order them for you to be delivered direct to your door. I'd also love to Demo for you and your friends at a crafty party. As the hostess you earn lots of lovely freebies and you all get to make a fun crafty project too (no crafting experience necessary!)

 -XXX-