Showing posts with label Petite Petals. Show all posts

Friday, 25 March 2016

A Floral Masked Wreath Card from Stampin' Up! UK Demonstrator Sarah Poulton

Good morning lovelies and a very happy Good Friday to you all.  I hope you have lots of fun craftiness planned for your day. We are off to the RSPCA Easter Fayre later so the girls can take part in the Easter Egg Hunt. We have had an unusually early start to the day due to raised excitement levels.

I have a stamped floral wreath card to share today. This uses a whole selection of floral stamp sets and a 2" punched post-it note mask.

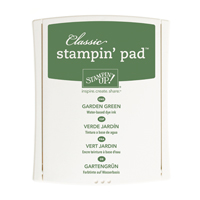
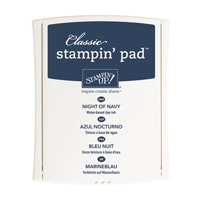
Once I positioned the punched circle I layered my floral images around the edges using Garden Green, Crushed Curry and Night of Navy.


Once my wreath was stamped I removed the mask to stamp my Watercolor Words sentiment and I then finished with a Botanicals Jewel for a bit of sparkle.


As I was up so early this morning with my over excited girlies I had a bit of time to finish my 6th cross stitch owl. This one was designed in blackwork. I chose to add colour to my design so stitched in lovely Spring colours (which I only just realised match my needle minder Joy). 


Wishing you all a lovely Easter weekend. Thank you for popping by today. Please let me know if you have any questions about Stampin' Up!, Sale-A-Bration or any of our new products. I would love to help. All items can be purchased online via my shop or get in touch directly and I can order them for you to be delivered direct to your door. I'd also love to Demo for you and your friends at a crafty party. As the hostess you earn lots of lovely freebies and you all get to make a fun crafty project too (no crafting experience necessary!).

-XXX-
Product List

Monday, 10 August 2015

An Awesomely Artistic Scrapbook Page from Stampin' Up! UK Demonstrator Sarah Poulton

Good morning crafters.

Welcome to a new crafty week here at Stampin' Sarah HQ. It has been another busy weekend here on the Isle of Wight. I've been working hard getting the final projects prepped for next week's Christmas Craft Days as well as taking a break from cutting and sticking and sneaking off to Cowes yesterday for a few hours of Cowes Week boating fun (we indulged in a CBeebies show and an ice cream!).

I thought I would kick off a week of scrapbooking today. I have a whole series of Stampin' Up! inspired pages that I have been saving to share with you all.

Today's project is a great page to use with any size of photo. I know we all have oversized pictures lurking in our crafting stash. Whether it is professional pics from events or school pictures or just those oddly sized pictures we don't quite know what to do with. This sort of page is perfect as you can adapt the stamped frame to any size. Just stick your picture first and stamp second.


For this page I used a Very Vanilla card base. I layered my photo with Brushed Gold and Cherry Cobbler cardstock and glued this centrally.

I then used the Awesomely Artistic stamp set with Garden Green, Cherry Cobber, Crumb Cake and Encore Gold ink. I created these corner frames by layering the images over one another. I love the ink splat stamp as when I try to create actual splats I always get in a mess.

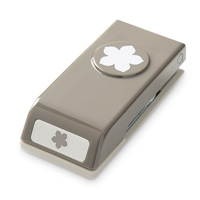
To finish I stamped flowers from the Petite Petals stamp set and punched with the matching punch. I stamped a gold dragonfly on to Vellum and embellished with Basic Pearls. I then added a bit of glitz and sparkle with Brights Sequins and Basic Pearls.


I have loved getting my scrapbooking head back on. I forget how much I enjoy traditional 12"x12" scrapping. Pop back on Wednesday for another scrappy share.

Thank you for popping by today. Please let me know if you have any questions about Stampin' Up! or our products. I would love to help. All items can be purchased online via my shop or get in touch directly and I can order them for you to be delivered direct to your door. I'd also love to Demo for you and your friends at a crafty party. As the hostess you earn lots of lovely freebies and you all get to make a fun crafty project too (no crafting experience necessary!)

 -XXX-
Built for Free Using: My Stampin Blog

Wednesday, 25 March 2015

Easter Bunny Chocolate Treat Box from Stampin' Up! UK Demonstrator Sarah Poulton

Good morning and a happy (if not a little chilly) Wednesday to you today.

So Wednesday brings new Weekly Deals. And what a fantastic week of specials we have this week. My favourite crafty tool, the Envelope Punch Board, is a bargain this week at just £13.46 and the Regals Paper Stack is £14.63. Combine these with some cardstock and you'll have reached your £45 spend for an extra Sale-A-Bration freebie. This is why I LOVE Stampin' Up! Not only are the products high quality and great value but you earn freebies for using and buying the products.

So on to today's crafty share. This is a project inspired by my upline Michelle who provides a great tutorial on her blog. I loved the simplicity of using the Scallop Tag Topper Punch to create the little bunny face.


I used scraps of patterned papers to punch the nose and the middle of the ears. I stamped the daffodil in Daffodil Delight using my Petite Petals stamp set and punched with the coordinating punch. This is a lovely sized little box for filling with Easter chocolate-y treats.


Thank you for popping by today. You can find out more about the new Spring Summer Catalogue and Sale-A-Bration promotion by clicking here or by using the navigation menu on the left. This really is the most exciting time of the year to shop. New products and fantastic freebie rewards too. 

Please let me know if you have any questions about Stampin' Up! or our products. I would love to help. All items can be purchased online via my shop (or click on the links above to find out more about specific products) or get in touch directly and I  can order them for you to be delivered direct to your door. 

-XXX-

Built for Free Using: My Stampin Blog

Monday, 1 December 2014

Virtual Hostess Club Mini Easel Gift from Stampin' Up! UK Demonstrator Sarah Poulton


Good morning and very warm welcome from the Isle of Wight on this fine and mild December 1st morning. Today signals the official start to the festive countdown. Already today I have hung my 12 Days of Christmas cross stitch and both the girls are in the first of several (many!) Christmas outfits. I'm also going to be starting my Project Life December album today (pictures to come- woohoo!)

I have a special project to share with you today. This was a bit of a labour of love as I made 10 of these little mini easels for my virtal hostess club ladies to go with their November orders. I wanted a little decorative gift (this was my inspiration). Something a bit different to contribute to their festive preparations. I picked up the mini easels from my local The Works store.

Then came the fun bit, decorating and designing. I used the Typeset Designer Series Speciality Paper as my base. I gave it this antique aged effect with Soft Suede ink and a Stamping Sponge. 


I then stamped the flourishes and leaves (both from retired Christmas stamp sets). 

To create my Punch Art Poinsettia I punched lots of Cherry Cobbler wings from the Bird Punch and glued together in a circle layering on top of one another using Glue Dots (I also lightly daubered the edges with Cherry Cobbler ink). I then punched a Cherry Cobbler flower using the Petite Petals Punch which I curved with my Bone Folder for the top layer. For the flower centre I used three tiny Basic Pearls which I coloured with my Daffodil Delight Blendabilities Markers.


The final detail was the 'Joy' which I punched in Cherry Cobbler on to Old Olive cardstock using my Epic Alphabet stamp set. I then cut this and glued to my canvas. I finished with a bit of doodling with my Basic Black Stampin' Write marker and a mini star punched from Champagne Glimmer Paper.

I sprayed the whole canvas with Smooch Spritz to give it a sparkly festive sheen. However, this has not come out in the photographs. You'll just have to take my word for it that these canvases are lovely and sparkly.

I hope you've enjoyed my festive share today. I am so excited to start my December album with you more in the week. Keep your fingers crossed I can get the girls to sleep early enough to crack on with Day 1.

If you have any questions about today's project or the products I have used, please get in touch on poulton_sarah@yahoo.co.uk or 01983 609249. You can order online direct through my store by clicking the product links above or the pictures below. I also have availability in the next few months for your very own crafty party so drop me a line to find out more and get your date in the diary.

Happy Crafting
-X-

Friday, 11 July 2014

Watercolor Wonder meets Petite Petals Hostess Gift


Happy Friday! I hope you have a lovely weekend planned. I'm keeping my fingers crossed for some lovely weather so the girls and I can get out and about. We've been enjoying long walks and feeding the ducks this week. But should the weather take a turn as predicted I have lots of crafty projects on the go at home planning for my Christmas Craft Days next month.

Today's crafty make is another gift set for one of my recent party hostesses. I always like to give a handmade crafty gift to my hostesses to say thank you on top of the lovely product freebies they receive from Stampin' Up! I created another of these super simple handbags that we were shown at our Telford Regional. I shared a similar one here. This is made from one sheet of standard UK A4 card (in this case I used Strawberry Slush with Blushing Bride and Rich Razzleberry accents).  

Here is the picture on our instruction sheet from the Stampin' Up! event. This was designed by Julie Kettlewell and shows exactly how you need to divide up your base sheet of cardstock.


Once you have cut and scored your A4 sheet you then just layer your cardstock for the decorative outside panels. I used the Petite Petals stamp set to stamp a layer of Whisper White and mounted on to Rich Razzleberry. 


For this card I used the new Work of Art stamp set. This is such a versatile set with brush stroke stamps, mixed sentiments and the chevron design used above too. For this card I used my Apothecary Accents Framelits Dies to create the window. On the base Whisper White layer I stamped the Chevrons in Rose Red, Melon Mambo and Blushing Bride to create the layered pink look. I then used my Blushing Bride and Rose Red markers to doodle an edging to my window. 


I finished by stamping the sentiment and highlighting with 3 shades of pink Candy Dots.


Thank you for stopping by today. I hope you all have a lovely crafty weekend. I would love to hear what you are up to or see your crafty projects. Please pop over to my Facebook page and share your weekends crafty plans:


Please get in touch with any questions or queries or please pop over to my Online Store for more information on all our products. Get in touch on poulton_sarah@yahoo.co.uk or 01983 609249.

Happy Crafting
-X-

Friday, 4 July 2014

Craft Party Hostess GIfts made with new 2014-2015 Stampin' Up! products


Good morning all and a very Happy Friday to you. I hope you have a fantastic weekend lined up. I am hoping for some lovely weather to take the girls to the splash park and to get out for some walks too.

I demonstrated for some lovely friends last night and introduced them to the fabulous new Stampin' Up! In Colors (card to be shared next week). And we managed to get my lovely hostess some fabulous freebies too.

I was sat in my craft room looking for ideas for something to make as my Hostess Gift as a thank you for hosting a party. Then I remembered the lovely make and take kit I had received at our recent Stampin' Up! Regional in Telford. This made a perfect note card and matching gift bag.

The colour scheme is Strawberry Slush, Sahara Sand and Soft Sky. 

The card was made using the beautiful Lovely Lace Textured Impressions Embossing Folder matched with the Label Love Bundle (stamp set and Artisan Label Punch). The card was embellished with flowers created with the Petite Petals and punched with matching punch.


Here is a close up of the hanging gift tag label:


The gift bag was created with one sheet of A4. I decorated the front and back of the gift bag with a Strawberry Slush layer and a Whisper White layer stamped with Petite Petals flowers in Pool Party, Strawberry Slush and Pool Party. I had forgotten how effective creating your own Designer Papers can be by using inks and stamps to cover a piece of cardstock. 


Thanks for popping by today. I hope you have a great weekend and look forward to sharing lots of new catalogue inspiration with you next week.

Please get in touch with any questions or queries or please pop over to my Online Store for more information on all our products. Get in touch on poulton_sarah@yahoo.co.uk or 01983 609249.

Happy Crafting
-X-

Wednesday, 26 February 2014

Gingham Garden Washi Wednesday

Hello lovely crafty readers.

How is your week going? Can you believe there are only a few days left of February left? Where is 2014 disappearing too? Not that I'll be sad to see Spring and Summer and an improvement in our weather.

And speaking of better weather and Spring around the corner, today's washi tape creation was inspired by a sunny day over the weekend. Seeing the sunshine breaking through the clouds made me want to create something bold and bright to match the sky.


For this card I used Melon Mambo and Whisper White layered and punched with the Blossom Punch, Pansy Punch & Petite Petals Punch. I picked these three punches as I loved the decreasing sizes and how well they all worked together.

To create the background I stuck strips of Gingham Garden Washi Tape (a bargain at £4.50 for the three colour designs) randomly so they would show through the floral windows. To finish the card I picked three fab Brights Designer Buttons from my pack and tied with Bakers Twine. The sentiment from Itty Bitty Banners was stamped in Melon Mambo, hand cut and then blinged a little bit with Basic Rhinestones.

I love the simple effect of washi tape through punched windows. You could easily customise this with any punch shape or washi design for any occasion. I don't really need any excuse to break open a pack of washi tape though. I just love it and use it most crafty sessions.


Thanks for stopping by today and please get in touch on poulton_sarah@yahoo.co.uk or 01983 609249 with any Stampin' Up! questions, to place an order, find out about joining my team or hosting a party. I'm only too happy to chat craftiness or stamping.

Happy Crafting
-X-

Thursday, 20 February 2014

Hardwood Background Petite Petals Birthday

Good morning crafty friends. How goes your week? It has been a busy one here preparing for our new little one. I sent Sam in to the loft to recover the moses basket and other baby essentials. So I have been busy washing and prepping things for our new arrival. It really does feel like everything is ready, I really just need the baby now ;0) Oh and a name might be helpful. Hopefully Sam and I will agree on something in the next two and a bit weeks.


On our recent Pinkies Blog Hop to celebrate the Spring Summer catalogue I fell in love with this card by a fellow Pinkie, Caro. I decided to create my own version of the card using Baked Brown Sugar textured Coredinations cardstock, Very Vanilla cardstock and Naturals Ivory cardstock.

I absolutely adore the Hardwood background stamp. It is just so perfect for masculine or nature themed cards and is just so effective. I think this might be a stamp easily overlooked in the catalogue but it stamps so beautifully. The Hardwood background worked so well with the Petite Petals stamp set and punch  (available as a bundle here) to create this wreath window effect.

The colour scheme used for this card: Coastal Cabana, Pool Party, Very Vanilla, Baked Brown Sugar and Naturals Ivory (for the stamped background). I also used Soft Suede ink for the sponge daubering of the edges.

I hope you enjoyed my crafty make for today. I'd be happy to help with any questions or queries about Stampin' Up! so please get in touch on poulton_sarah@yahoo.co.uk or 01983 609249. And don't forget I also have an online store that is open 24/7:


Happy Crafting
-X-

Friday, 24 January 2014

Stampin' Up! UK Happy Watercolor In Colour Crafting

Good morning crafters.

A very happy Friday to you. It is so nearly the weekend. I hope wherever you are you have lots of lovely crafty plans for the days ahead. We are celebrating my Mum's birthday this weekend so taking a trip to the 'big island' tomorrow for a Starbucks and a bit of crafty shopping. Might even sneak a quick trip to some baby shops to start preparing for my imminent arrival.

I have another sneak peak project card to share with you today. Only 4 days to wait till the launch of the new catalogue and Sale-A-Bration. I cannot wait! So many lovely new products to create with.


This project is a card we made in my class last weekend and uses the Happy Watercolour stamp set from the new Spring Summer catalogue. This is a super clever stamp set as it contains this background stamp set that is designed to give this graduated watercolour effect. I love the simplicity of this layered brushstroke effect and it creates such a striking background.

After creating the background watercolour effect using Pool Party, Strawberry Slush and Pistachio Pudding, we then stamped the two floral images using the Flower Shop stamps (and matching Pansy Punch) from the main 2013-2014 catalogue and the new Petite Petals stamps (and matching punch) from the Spring Summer catalogue. We layered these floral stamped images and finished with a large basic pearl.

And a quick reminder, you only have 3 days left to order any of the exclusive Valentines stamps and products in the 'Whole Lot of Love' promotion. Please see my 'Promotions' tab above or click on the picture below to be linked to my online store. I have stocked up on the gorgeous little Monster Hugs for crafting with Summer. I just adore their little chocolatey hugs (and cute little bottoms too. See this post for more info).


Thank you for stopping by this morning. Please pop back tomorrow to join me in a Pinkies team blog hop. It all starts at 8am so hop on over to see lots of lovely blog hop inspiration using upcoming Sale-A-Bration products.

If you have any Stampin' Up! questions or would like to find out more about hosting a party or placing an order please get in touch on poulton_sarah@yahoo.co.uk or 01983 609249. Or you can visit my online store using the following address:


Happy Crafting
-x-

Tuesday, 21 January 2014

Stampin' Up! UK Watercolor Wonder Sneak Peak


Good morning crafty friends.

Just a quick share with you this morning (as I write this before work at 6am!). Here is one of the cards we made at my monthly card class this weekend. This uses the colour scheme from the lovely new Watercolour Wonder Designer Series Papers which will be available to order from the new Spring Summer catalogue next week.

The colours are: Daffodil Delights, Island Indigo, Tangerine Tango and Gumball Green.

I've also used some other sneak peak products for the stamping. The little flowers are from a new set, Petite Petals, which also comes with a matching Petite Petals Punch. The main label stamp is an exclusive Sale-A-Bration set called, You're Lovely.


The other fab sneak peak is the Scalloped Tag Topper Punch which I have used to create the scalloped closure for this card. If you pop back next week once the catalogue is live, I will give you a quick tutorial to show you how to create this tag top closure for your cards.  It is really quick and simple and shows the versatility of the Tag Topper Punch too.

Thanks for popping by today. If you'd like a copy of the new Spring Summer catalogue to browse at your leisure, drop me a line on poulton_sarah@yahoo.co.uk or 01983 609249 and I'll happily pop one in the post for you.

Happy Crafting
-X-