Showing posts with label poinsettia. Show all posts

Monday, 9 November 2015

A Cozy Christmas Cottage Card from Stampin' Up! UK Demonstrator Sarah Poulton

Good morning crafty friends. Did you have a good weekend? I hosted my Cozy Christmas Class on Saturday. It was a rainy and miserable day so an afternoon with good company, crafting and a cuppa (and a few choccie biscuits too) was a perfect way to spend a Saturday.

This is one of the cards we made inspired by this card by a fab Dutch Demo Yvonne. I loved the idea of a window through to the inside of the card giving a bit of dimension to the card. I combined Cozy Christmas with Reason for the Season keeping the rest of the card simple and embellishment free.


I stamped the inside of the card with Memento Black ink and added snow with Encore Silver and coloured a little extra detail with my Crumb Cake Stampin' Write Marker.

To colour the poinsettia I used a Blender Pen and my Cherry Cobbler and Garden Green ink pads.


Thank you for popping by today. Please let me know if you have any questions about Stampin' Up! or our products. I would love to help. All items can be purchased online via my shop or get in touch directly and I can order them for you to be delivered direct to your door. I'd also love to Demo for you and your friends at your own crafty party. As the hostess you earn lots of lovely freebies and you all get to make a fun crafty project like this one too (no crafting experience necessary!)

 -XXX-
Built for Free Using: My Stampin Blog

Friday, 11 September 2015

Festive Flower Punch Christmas Card from Stampin' Up! UK Demonstrator Sarah Poulton

Good morning and a very Happy Friday. What are your plans for the weekend? I have a Tin of Cards Kit with my name on. I cannot wait to get started on the contents. I'm thinking it would make a perfect Christmas gift for someone. 

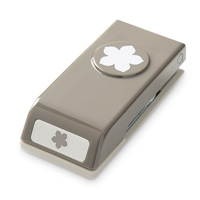
I have creation I came up with using the Festive Flower Builder Punch and matching Reason for the Season stamp set (available as a bundle together). I love the effect of the built up festive flower. I punched all the component parts in Cherry Cobbler and Wild Wasabi cardstock. I then used glue dots to layer my flower together. I love that the punch has different sized petals to give you this lovely layered effect. 

I also made sure to fold each petal slightly before adhering to give the flower added dimension.


I added the detailing to the leaves with the matching stamps (designed to fit each sized leaf/petal perfectly). The sentiment is also from the Reason for the Season stamp set.

The corner detailing was added using the Curvy Corner Trio Punch.


Thank you for popping by today. Please let me know if you have any questions about Stampin' Up! or our products. I would love to help. All items can be purchased online via my shop or get in touch directly and I can order them for you to be delivered direct to your door. I'd also love to Demo for you and your friends at a crafty party. As the hostess you earn lots of lovely freebies and you all get to make a fun crafty project too (no crafting experience necessary!)

 -XXX-


Built for Free Using: My Stampin Blog

Wednesday, 9 September 2015

A Reason for the Season Merry Christmas Card from Stampin' Up! UK Demonstrator Sarah Poulton

I just cannot stop Christmas crafting. I have a few non-festive makes to share with you but when it comes to choosing projects to share here I am definitely favouring all my lovely festive crafty projects.

This is the make and take I came up with for my Autumn Winter Open House event to celebrate all things Stampin' Up! and the upcoming festive season.

This card uses one of Stampin' Up!'s ready scored and cut Crumb Cake notelets. So they are super easy to mass produce and send for handmade Christmas greetings.


I used the Reason for the Season stamp set which comes in photopolymer to make lining up each layer so much easier. I chose to use only the coloured inside of the poinsettia to give more of a watercoloured softer feel to my card.

I stamped the flowers in Cherry Cobbler and the leaves in Garden Green.

I created a 1.5" banner using the Triple Banner Punch and then stamped the sentiment using Gold Encore ink.


It is Wednesday which can mean only one thing- new weekly deals. Click on the image below to check out what is on offer this week.


Thank you for popping by today. Please let me know if you have any questions about Stampin' Up! or our products. I would love to help. All items can be purchased online via my shop or get in touch directly and I can order them for you to be delivered direct to your door. I'd also love to Demo for you and your friends at a crafty party. As the hostess you earn lots of lovely freebies and you all get to make a fun crafty project too (no crafting experience necessary!)

 -XXX-

Built for Free Using: My Stampin Blog

Monday, 1 December 2014

Virtual Hostess Club Mini Easel Gift from Stampin' Up! UK Demonstrator Sarah Poulton


Good morning and very warm welcome from the Isle of Wight on this fine and mild December 1st morning. Today signals the official start to the festive countdown. Already today I have hung my 12 Days of Christmas cross stitch and both the girls are in the first of several (many!) Christmas outfits. I'm also going to be starting my Project Life December album today (pictures to come- woohoo!)

I have a special project to share with you today. This was a bit of a labour of love as I made 10 of these little mini easels for my virtal hostess club ladies to go with their November orders. I wanted a little decorative gift (this was my inspiration). Something a bit different to contribute to their festive preparations. I picked up the mini easels from my local The Works store.

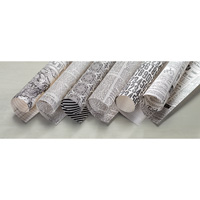
Then came the fun bit, decorating and designing. I used the Typeset Designer Series Speciality Paper as my base. I gave it this antique aged effect with Soft Suede ink and a Stamping Sponge. 


I then stamped the flourishes and leaves (both from retired Christmas stamp sets). 

To create my Punch Art Poinsettia I punched lots of Cherry Cobbler wings from the Bird Punch and glued together in a circle layering on top of one another using Glue Dots (I also lightly daubered the edges with Cherry Cobbler ink). I then punched a Cherry Cobbler flower using the Petite Petals Punch which I curved with my Bone Folder for the top layer. For the flower centre I used three tiny Basic Pearls which I coloured with my Daffodil Delight Blendabilities Markers.


The final detail was the 'Joy' which I punched in Cherry Cobbler on to Old Olive cardstock using my Epic Alphabet stamp set. I then cut this and glued to my canvas. I finished with a bit of doodling with my Basic Black Stampin' Write marker and a mini star punched from Champagne Glimmer Paper.

I sprayed the whole canvas with Smooch Spritz to give it a sparkly festive sheen. However, this has not come out in the photographs. You'll just have to take my word for it that these canvases are lovely and sparkly.

I hope you've enjoyed my festive share today. I am so excited to start my December album with you more in the week. Keep your fingers crossed I can get the girls to sleep early enough to crack on with Day 1.

If you have any questions about today's project or the products I have used, please get in touch on poulton_sarah@yahoo.co.uk or 01983 609249. You can order online direct through my store by clicking the product links above or the pictures below. I also have availability in the next few months for your very own crafty party so drop me a line to find out more and get your date in the diary.

Happy Crafting
-X-