
Good morning crafters. How is your December going so far? I am up super early this morning for a little bit of a crafty catch up. I have a weeks worth of December scrapbooking to catch up on and a small window of opportunity before Summer wakes up for the day.
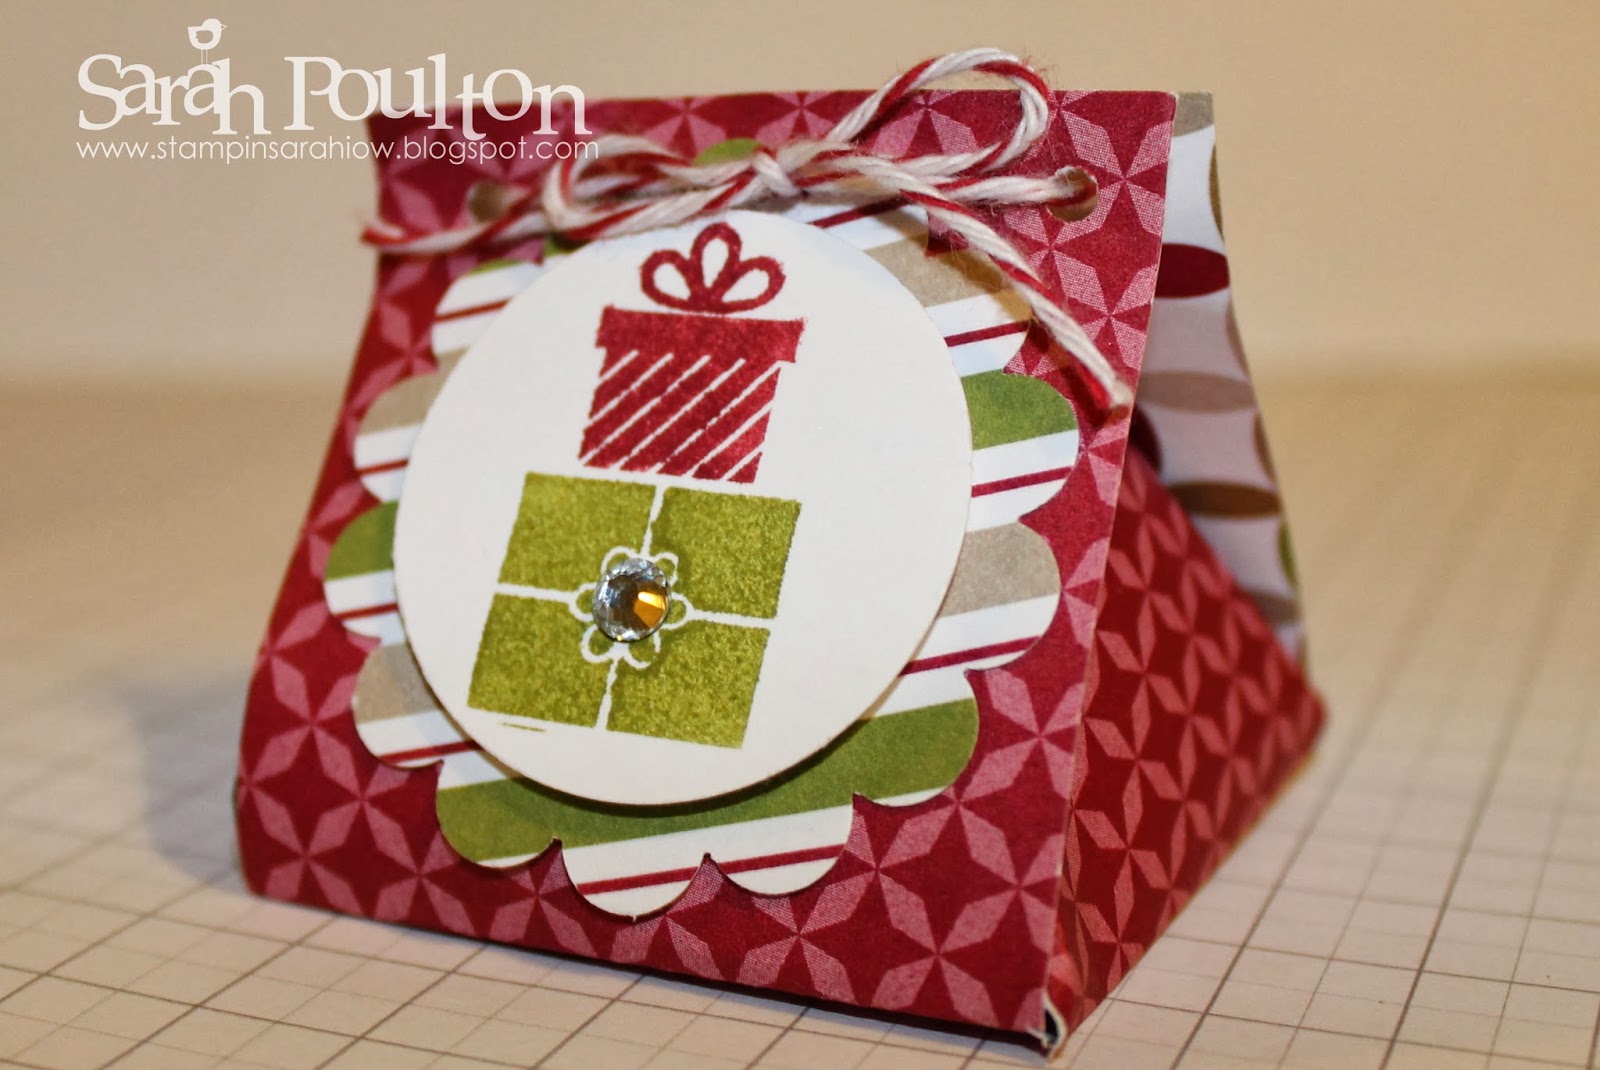
I thought I would share this little table favour treat bag today. I created this project for my November Hostess Club get together. I run a regular monthly crafty get together for all the ladies who have a place in my Hostess Club. We create a small crafty project as well as chat over a cuppa and cake.
I love the simplicity of this little 2"x2" favour bag created from a 6" square piece of Designer Series Paper (I used the Season of Style DSP from Stampin' Up!). This is the bag laid flat to show you the basic template (and show you how I have scored and folded the two edge pieces).

Here are the measurements for scoring the 6" square. It needs to be scored at 2" and 4" along both sides. You can then remove the 4 corner pieces. You then need to measure and mark 1" (the centre) on two opposite sides (these will form the triangle folded sides of your bag).

You can then score from the 1" mark to the opposite corner (I have marked in pen on the template below where to score if you look closely. It was very difficult to make the pen show against the patterned papers). The picture above shows on the left hand side the result you are looking to achieve with your scoring. Both sides of the bag will form this triangular shape.
To create the method for closing the bag you will need to punch 4 small holes (two on each opposite piece). You need to punch the holes in the two squares which haven't been scored. You can then fold the bag up and thread fine ribbon or bakers twine through the holes and tie shut. You can then decorate to fit your occasion (I have used the Stampin' Up! Wishing You stamp set for mine paired with my scallop circle and circle punches).

So that's really it. A 6" square scored at 2" and 4" on either side. Remove the 4 corners. Score two opposite sides from the 1" mark on the outside edge to the inner corner to create a triangle. Punch holes in the two remaining squares to form your closure. Fold up in to shape and decorate.
And just before I disappear for my scrapbooky catch up I thought I would share this amazing swap I received at Convention. Over upcoming posts I am going to share a few of the amazing creations I received from fellow Demonstrators. This just stood out for me as I love the Fishin' Around stamp. I have never been brave enough to try this hair gel pocket technique. But I just love the overall effect. This was made by a lovely German Demonstrator called Angela.

Thanks for popping by today. Please say hello and leave a comment. I have set myself a target to find new blogs to read throughout December, so leave me a comment and I'd love to stop by and say hello.
And if you'd like to find out more about any of the Stampin' Up! products used for today's creations please drop me a line on poulton_sarah@yahoo.co.uk or 01983 609249. Or alternatively pop by my online store which you can find here:
Happy Crafting ;0)
-X-
-X-
No comments:
Post a Comment