
To celebrate today's launch of Sale-A-Bration and the new Spring Summer catalogue I am sharing the instructions to create the little Top Note Owl I posted on Saturday for the Pinkies Blog Hop.
I had seen a few variations of this lovely little owl on Pinterest (this one is my favourite by Bronwyn Eastley) and on blogs so I decided to give him a go myself. By looking at various pictures I was able to break down the component parts. Sorry for the low-tech instructions, I haven't quite worked out how to do this next part using technology. But I thought my handwritten instructions might give you the idea. These are all the component parts you will need to create your owl.

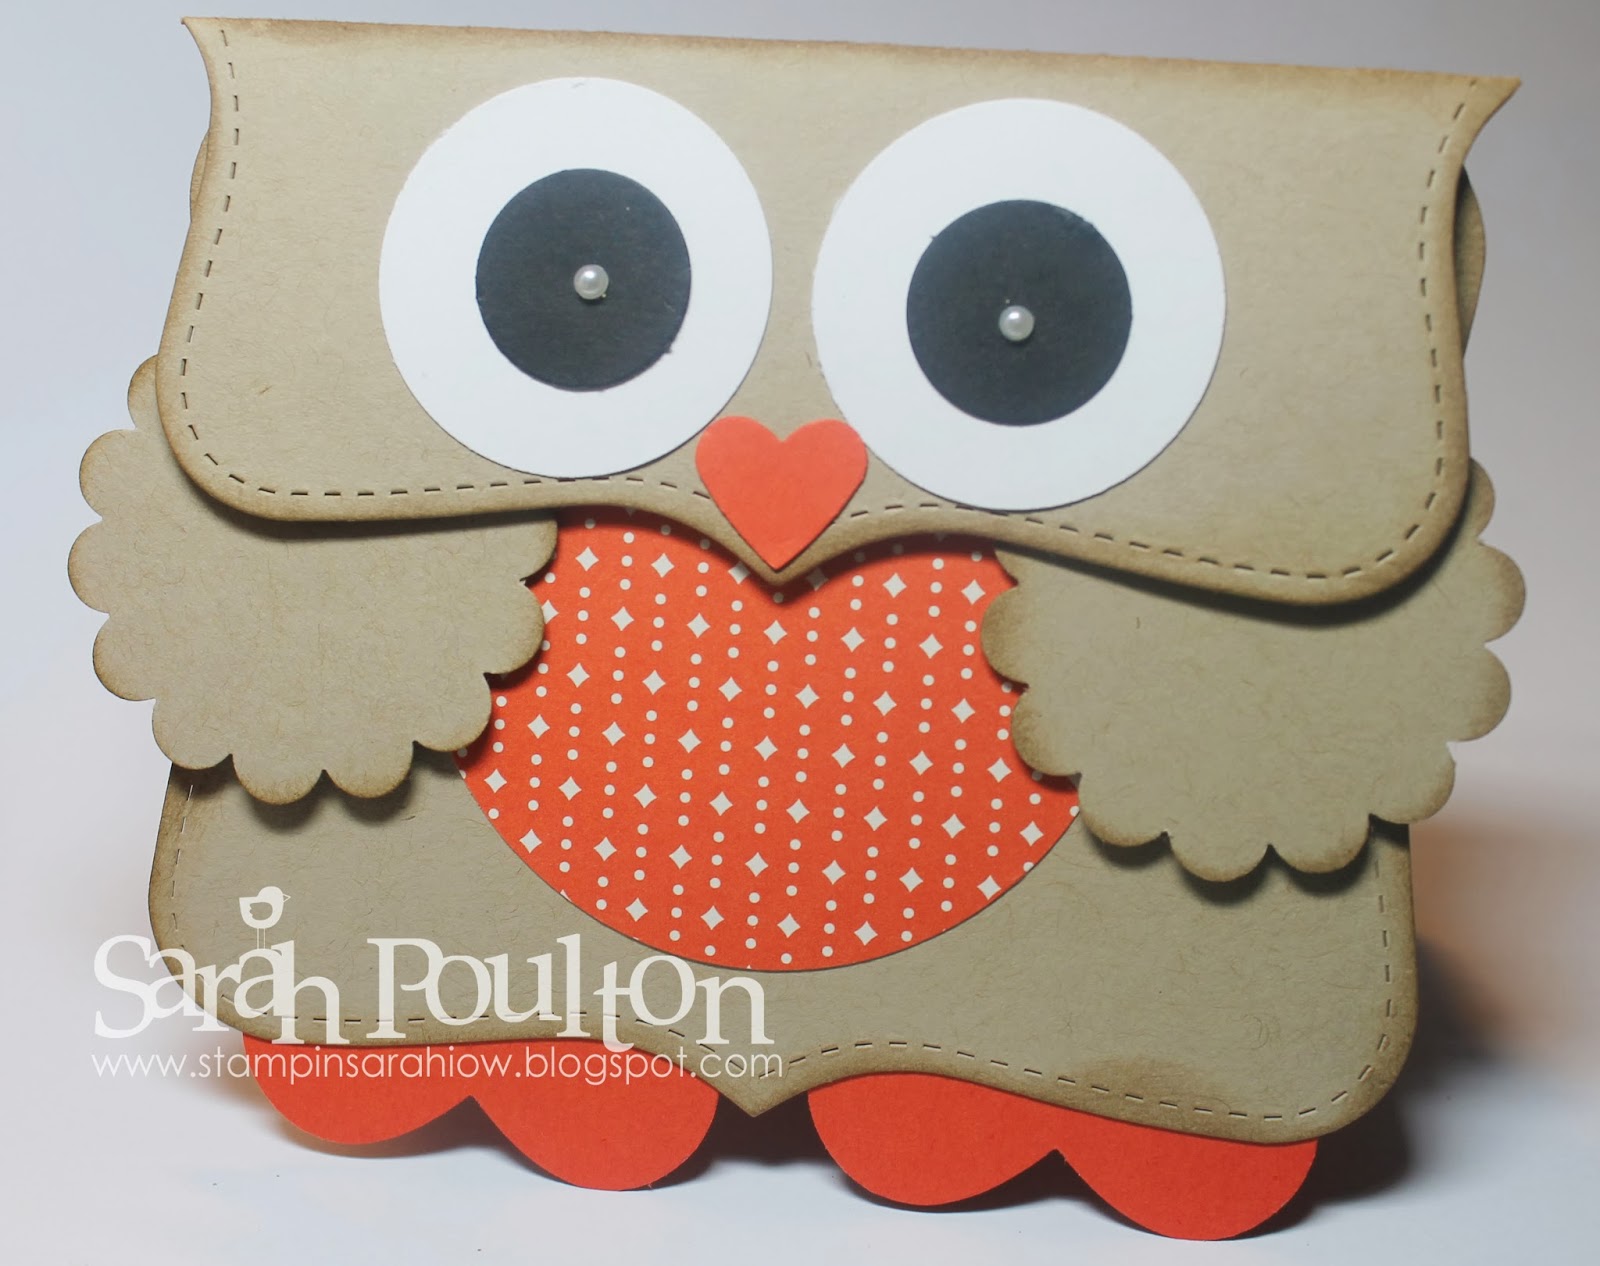
For Saturday's gift bag I used 2 1/2" Circle punched from Sweet Sorbet DSP (free with a qualifying Sale-A-Bration order) with matching Crisp Cantaloupe Full Hearts for the feet. Today's card above uses the gorgeous Retro Fresh Designer Series Paper with Tangerine Tango punched Full Hearts. You can change the colour scheme and DSP to fit your occasion.
I inked the edges of all Crumb Cake elements of the owl using Crumb Cake ink and a sponge dauber to give a bit of definition.
I then glued the elements together as below. The scored Top Note becomes the hinge to hold the card together. In the example above I used Dimensionals to secure the Top Note closed before I attached the face components. For Saturday's gift bag version I created one of these mini gift bags using the Envelope Punch Board (I had to slightly squish the gift bag to fit the inside of the Owl- I gently folded the edges inwards to give an inward V. See Saturday's post for reference). I then secured the Owl face hinge using a velcro dot to keep the bag closed.

Once you have assembled your component parts as above you can then either form in to a gift box, bag or card and then finalise with the eyes and small heart for the beak. To create the little whites of the eyes i have used a medium sizes Basic Pearl.
You will then have the main body of your Owl and you are free to embellish as fitting for your occasion. I have kept the card above plain and will embellish when I need the card. However, my example of Saturday I added a Valentines 'I Love U' banner using the fabulous Sale-A-Bration Banner Blast stamp set and matching Banner punch.

I hope that has made this project a little simpler for you to recreate. Please leave me a comment or drop me a line on poulton_sarah@yahoo.co.uk if you have any questions. I'd be only too happy to help.
Happy Owl-y Crafting
-X-
Very cute and aeasy to follow directions. Thanks for sharing.
ReplyDeleteThanks for the link to Monica's little gift bag. However, I can't open your link to where you got your inspiration from.
ReplyDeleteHello Bronwyn, Thank you for popping by my blog. I have come across your amazing creations on Pinterest. It is your Owl on Pinterest that I linked to in my post as I had seen several but loved yours the best. I have checked the link this morning and it is still posting to your lovely owl. I have added a name credit and a looked up a link to your blog to ensure this is correctly credited to you. I hope this is OK. Thank you again for stopping by and for leaving a comment. Sarah xx
Delete