Wednesday, 30 April 2014

Hardwood Garden Gate Card


Good morning and a very Happy Hump Day! I love Wednesdays as it means you are nearly at the weekend (and Grimm is on too which is always something worth looking forward to!).

Great news! Weekly Deals have been extended through May. Today's deals feature some great products. I especially love the Pop n' Cuts inserts (to be used with the Pop N' Cuts base). Pop over to my online store by clicking here or on the picture below to check this weeks deals.


So on to today's crafty project. I wanted to make a special 'Showstopper' special card for my first card class back after my maternity leave. I had seen a similar creation on Pinterest designed to showcase a packet of garden seeds as a gift style card. This type of card is one of my absolute favourites, one that incorporates a gift as an integral part of the card. And this card also gave me an excuse to break out the Bird Punch again. I haven't used this punch in an absolute age.

Here is the inside of the card:


The colour scheme for this card is Pear Pizzazz, Pool Party and Naturals Ivory (for the garden gate). The gate is stamped using the Hardwood background stamp in Chocolate Chip (and edges daubered with Crumb Cake). I secured the gate with Sticky Strip and then stuck Candy Dots to represent the gate hinges.


To embellish I created a robin with the Bird Punch. I punched the body from Crumb Cake, wing from Chocolate Chip and the breast was daubered with Cherry Cobbler. The flower was punched with the Boho Blossoms punch (and finished with a Bright Candy Dot).

Thank you for popping by today. You can order all Stampin' Up! products through my online store by click here or by clicking on any of the product links above. I will also happily order any products for you. Just drop me a line on poulton_sarah@yahoo.co.uk or 01983 609249 and I'll happily assist.

Happy Crafting
-XXX-

Monday, 28 April 2014

Team Shoebox Swap Makes


Happy Monday Crafty friends. Hoping you all had a lovely weekend. Shame about the weather. We had lots of rain here on the island. But as we were all tucked up inside (with cake and a cuppa) for my card class on Saturday the rain didn't worry us. We had a lovely afternoon with new and old friends alike. I'll be sharing some of our projects later in the week, including a tutorial for a fab little floral gift box. 

Today's crafty project share are the three cards my team ladies made for our shoebox swap last week. Unfortunately I had to ask my ladies to make mine for me as I had a very clingy Summer wanting my attention for most of the evening (she flaked out within minutes of the ladies leaving!).


The first of our projects was Hayley's fab make which uses the emboss resist technique. I absolutely love the sentiment taken from Perfect Pennants (a stamp set I seem to have overlooked from the catalogue. I can feel a sneaky order coming on....)


The next card was designed by Lorraine and I somehow managed to stamp it all wonky! Which goes to show even the most seasoned of stampers have wobbly stamping days too. The green gingham is stamped using the Gingham Standard Wheel. Creating this card reminded me how much I enjoy using the wheels. I really must dig through my wheel collection again. The flower is stamped using Flower Shop and punched using the matching Pansy Punch. And the lovely (wonky) sentiment is from the Six Sided Sampler stamp set.


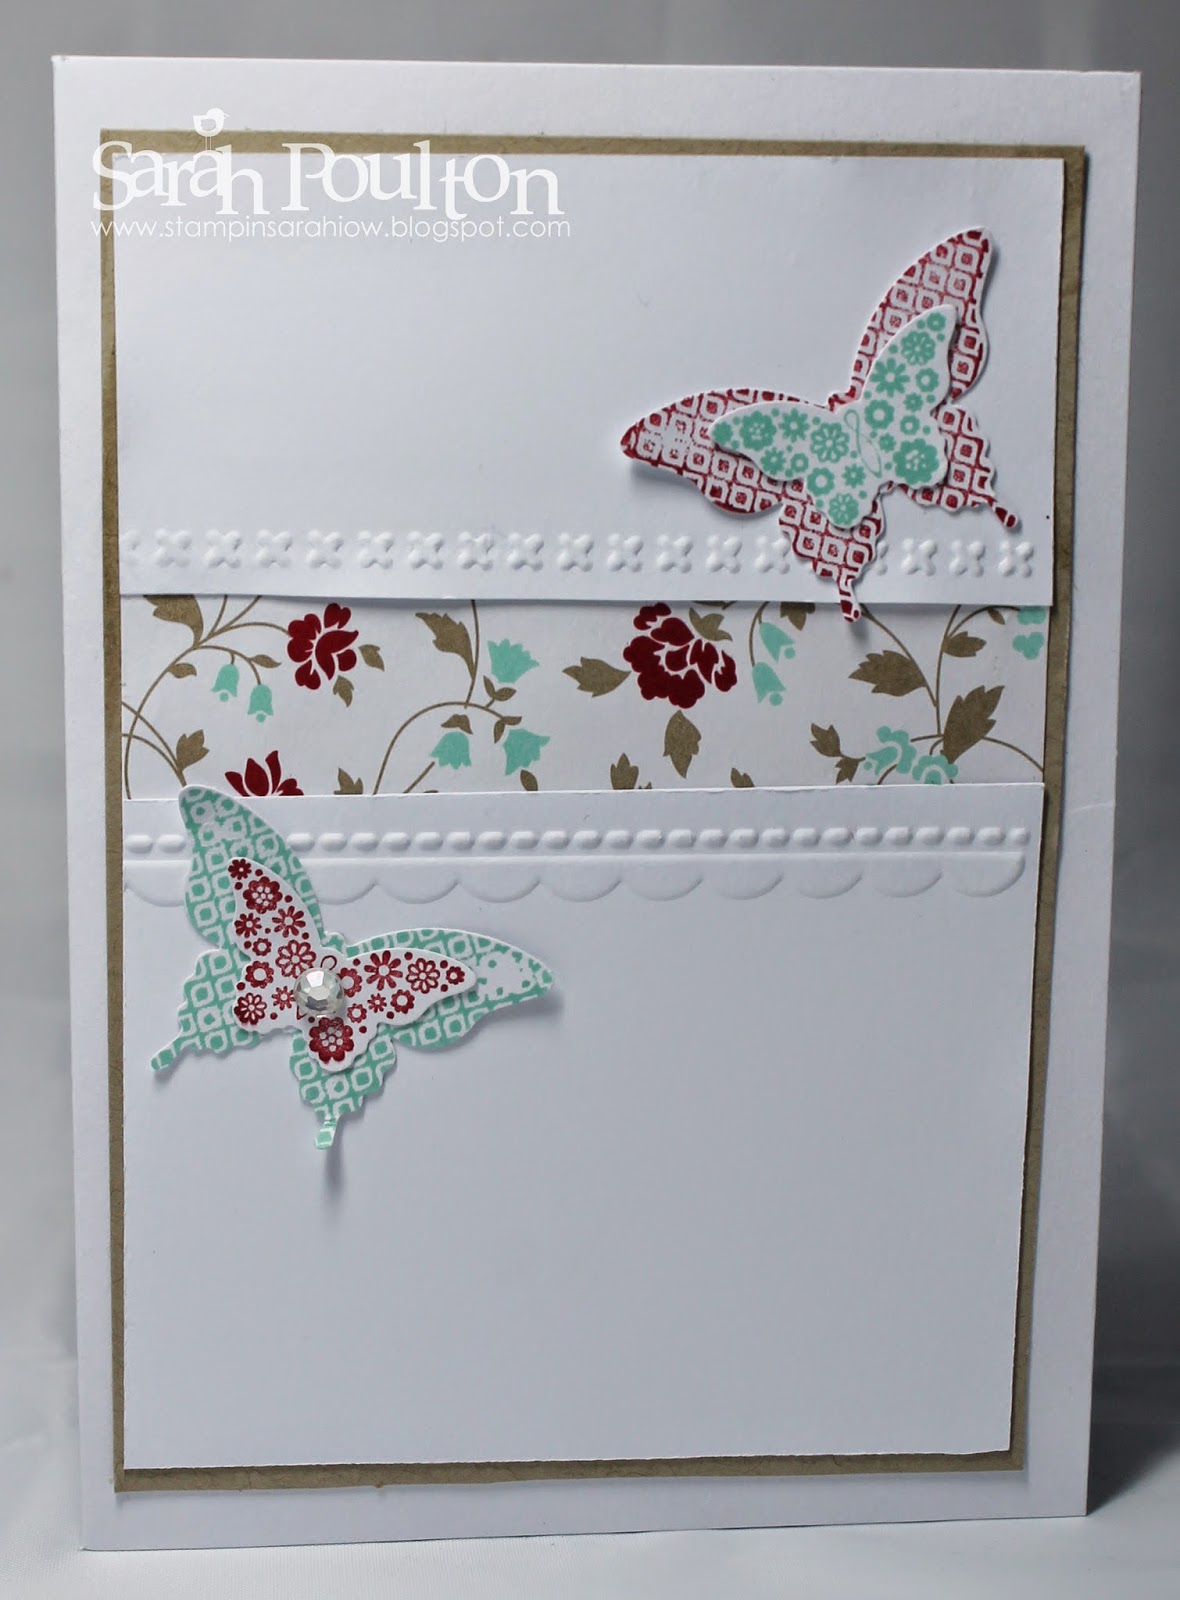
And last, but not least, is Sandy's lovely creation using Papillon Potpourri and the matching small and large butterfly punches. The embossing was created using the Needlepoint Border Embossing Folders

Thank you for popping by today. You can order all Stampin' Up! products through my online store by click here or by clicking on any of the product links above. I will also happily order any products for you. Just drop me a line on poulton_sarah@yahoo.co.uk or 01983 609249 and I'll happily assist.

Happy Crafting
-XXX-


Friday, 25 April 2014

Wetlands Birthday Greetings

Good morning all. Hooray for Friday (my favourite day of the week!). Have you got exciting plans for the weekend? I am looking forward to my monthly card class tomorrow. I've had a bit of a 'new baby break' and this is my first class post-Sylvie. Really looking forward to seeing all my crafty ladies again. I've got some lovely projects lined up for us all to make that I will be sharing with you all next week.

Today's crafty make is a project I cased from Dawn Griffiths for my Island Inkers team get together this week. I needed a quick and simple make that was easy to prep as I didn't have a great deal of time to get things ready (unfortunately kiddies don't sleep on demand!).


I love the simplicity of this card. Masking is one of my favourite stamping techniques. I find stamping on to a Post-It and creating my mask relaxing. And I love the effect of stamping over the mask to create a layered image with multiple stamps. Masking allows you to use multiple stamps/stamp sets to create lovely multi-coloured and multi-layered images.

The colour scheme for this card is Basic Black, Smoky Slate and Very Vanilla (with a touch of Old Olive for the stamped grass). The image and sentiment are from the Wetlands stamp set. The background is one of my new favourite stamps, Hardwood. The button is from the Neutrals Designer Buttons collection and I used a length of Linen Thread to tie the bow.

Have you noticed the crafty blooper? I accidentally coloured the goose legs green while I was using my Stampin' Write markers to colour the stamp. I had to colour over the legs once stamped with Basic Black (hence the slightly darker colour tone). 

And just a quick reminder to check out this week's Weekly Deals. I still have my eye on the Stampin' Write markers New Colour Kit. What a bargain! Click on the picture below to see what other items are reduced for a limited time only (you only have till Tuesday to take advantage of this FAB deal). 


You can order all Stampin' Up! products through my online store by click here or by clicking on any of the product links above. I will also happily order any products for you. Just drop me a line on poulton_sarah@yahoo.co.uk or 01983 609249 and I'll happily assist.

Happy Crafting
-XXX-

Wednesday, 23 April 2014

Sketched Birthday Gift Voucher and Weekly Deals


Good morning and welcome to another Wednesday Weekly Deals announcement. Click on the picture above to be linked straight through my online stores and all the products that are currently reduced as part of the Weekly Deals promotion. As you can see below we have some great bargains this week. I might have to snap up a set of those Stampin' Write markers for myself.....


Today's crafty share is one of my exclusive Stampin' Sarah gift vouchers in an envelope holder (made by folding one of our Medium Crumb Cake Envelopes in half and then decorating). This was created for a friend celebrating her birthday this week using the fabulous Birthday Basics Designer Series Paper and matching Sketched Birthday stamp set.


Here is the stamped inside using the balloon image from Sketched Birthday.


I finished the belly band with the birthday cake image from Sketched Birthday and embellished with a little Dazzling Details.


I can create a Gift Voucher for any amount for any occasion. So if you are stuck for a gift idea for a crafty friend just drop me a line on poulton_sarah@yahoo.co.uk or 01983 609249 and I'll be only too happy to help.

Thanks for popping by today and Happy Crafting

-XXX-

Tuesday, 22 April 2014

Zoo Babies Birthday Train Card


Good morning crafty friends. How was your Easter weekend? I hope you had a lovely one. Here on the Isle of Wight we had lovely weather for half the weekend so we were able to get out and about and enjoy an Easter Egg Hunt (as well as the odd ice cream too!). We even managed to get ourselves a new family friendly people carrier which will be perfect for our trip to Telford next month for Stampin' Up!'s Regional Training (and thankfully I am just a spectator this year and not a presenter so no terrible nerves for me this year *hooray*).

So today's crafty creation is a first birthday card I made for my lovely friend's little boy using the gorgeous Zoo Babies stamp set. I have seen lots of these little toy train card across the internet and blogs and just love the cute effect of using the Curly Label punch cut in half to create these little train carriages.

My colour scheme was taken from the Retro Fresh Designer Series Papers that I used for the background layer: So Saffron, Coastal Cabana, Very Vanilla, Soft Sky and Soft Suede.


I stamped 'Theo' using my Simply Serif Mini Alphabet stamps and used the circle from the Itty Bitty Shapes Punch Pack to punch the individual letters. I mounted these on to the bunting punched using the Pennant Punch (soon to be seen reappearing in the new 2014-2015 catalogue) and used a Dimensional to raise this from the main card.


The train was created using the Curly Label Punch cut in half and embossed with the Perfect Polka Dots Embossing Folder. The wheels were made using the 1/2" Circle and 3/4" Circle Punches and finished with a Candy Dot.

The sentiment was stamped using the Itty Bitty Banners stamp set.

You can order any products through my online store by clicking here or by clicking any of the product links above. I will also happily order any products for you. Just drop me a line on poulton_sarah@yahoo.co.uk or 01983 609249 and I'll happily assist.

Happy Crafting
-X-

Friday, 18 April 2014

Good Friday Easter Punch Art Treats


Just a quick and easy Good Friday Easter share with you today. I made these simple punch art Easter Treats as a little extra gift for Summer to go with the Easter Basket I previously made her.

I had seen similar projects made on Pinterest but came across this lovely blog by a US Demonstrator, Jill Franchett. I loved her little punch art creations so set about making my own little treat holders.


The base is a piece of Daffodil Delight measuring 4cm x 14.5cm. I scored it along the long side at 6cm and 8.5cm and punched each end using my Scallop Tag Topper Punch (which I closed with a short length of Daffodil Delight Ribbon). I then mounted my two punch art creations to the front (and also secured some Easter chocolate treats to the inside. I glued two small wrapped choccie rabbitswith a glue dot).

Both punch art animals were created with my 1 3/4" Scallop Circle Punch (Daffodil Delight and Whisper White Cardstock). For the sheep I punched a flower using a retired floral punch (which I didn't realise was retired till I just tried to find it to link here!! DOH!!!!). For the chick I cut a small square from Tangerine Tango and folded in half for the beak (does not need to be perfect). I used my Small Heart Punch for the wings and feet. And I used the 1/2" Circle for the white part of the eyes and the small circle from the Itty Bitty Punch Pack for the Basic Black eye centres. Both characters were finished with a small Daffodil Delight bow made from Daffodil Delight 1/4" Stitched Grosgrain Ribbon.

Wishing you all a very lovely long Easter weekend. I'm keeping my fingers crossed for beautiful weather for barbecues and car boot sales. And here is to hoping we all get a bit of crafting time too. If you have any crafty questions or need any further information about Stampin' Up! please get in touch on poulton_sarah@yahoo.co.uk or 01983 609249 and I'll be happy to help.

Happy Crafting ;0)
-X-

Wednesday, 16 April 2014

Easter Garden Chocolate Treat Holder


Good morning and welcome to another crafty Easter Treat morning here at Stampin' Sarah! How is your week going? Only 2 more work days and then a long weekend to look forward to. I have my fingers crossed for some lovely sunshine over the weekend so we can all make the most of the 4 days off.


So today's crafty make is a table decoration or Easter gift (this could easily be packaged in a cello bag with a label as a simple gift).  I created this little treat holder using a glass tealight holder from IKEA. I purchased a number of them for my all day Christmas Crafting Extravaganza. You'll find the stamping tutorial for my earlier project here. You could easily substitute the tealight holder for a plastic cup for the same effect.

I used my Stampin' Up! Fringe Scissors to create the grass effect. I cut a length of Pistachio Pudding cardstock and then after fringing I wrapped this around the glass (securing with Sticky Strip to make sure it didn't slip or fall off). I decorated with tiny flowers punched using my Itty Bitty Shapes Punches and embellished with Basic Pearls. I finished with a length of Whisper White Organza Ribbon and filled with chocolatey treats.


And don't forget today sees another set of products appear in the Stampin' Up! Weekly Wednesday Deals. Click the picture below to link straight through to my Online Store and this weeks promotional products.


You can order any products through my online store by clicking here or by clicking any of the product links above. I will also happily order any products for you. Just drop me a line on poulton_sarah@yahoo.co.uk or 01983 609249 and I'll happily assist.

Happy Crafting
-X-

Monday, 14 April 2014

Easter Bunny Punch Art Treats


Good morning all. And how was your weekend? What beautiful weather we had here on the Isle of WIght (and i hope wherever you are in the world too). We celebrated with our first barbecue of the year. I have been following the Slimming World diet and was amazed at how easy it was to eat at a barbecue within the plan. Lean meat and a big plate of salad. Perfect! And Summer enjoyed being outside too. She would much rather be in the sunshine than cooped up indoors.


So today's crafty Easter share is a punch art Easter Bunny using the Treat Cups. I had seen a few variations of this rabbit around the internet so set about creating my own happy little Easter treat bunny for a friend's little boy. I am packaging up his 1st birthday gifts today and wanted to include a little Easter-y treat for him too. I found these little Easter chocolate coins in Tesco and knew they would fit the Treat Cups perfectly ;0)

Here are all the components of the Easter Bunny:


For this Treat Bunny I used:


Embellishments: Treat Cups, googly eyes from my stash

After punching all the components of the Bunny I inked the edges of the main body with Blushing Bride ink and a sponge dauber (all parts but the 3/4" circle eyes). I then assembled the Bunny.

You can order any products through my online store by clicking here or by clicking any of the product links above. I will also happily order any products for you. Just drop me a line on poulton_sarah@yahoo.co.uk or 01983 609249 and I'll happily assist.

And don't forget Stampin' Up!'s Weekly Deals. This weeks FAB die cutting product deals are only available until tomorrow. So grab a bargain now by clicking the picture below.


Happy Crafting
-x-

Friday, 11 April 2014

In Color Treat Bag


Morning crafty lovely crafty friends. I hope this Friday post finds you well and looking forward to the weekend. Its a beautiful bright day here on the Isle of Wight and I am looking forward to taking the girls to the park later to have a bit of a kick-a-bout.

Today's crafty share was inspired by this project I found on Pinterest by Jane at the Petite Fleur Paperie. I found in my stash a pack of these Tag a Bag Chevron Gift Bags (what a bargain at £3.75 for a pack of 10 - 131370) and thought Jane's project was a beautiful project to CASE to display how lovely these bags are. 


I made this little treat bag (filled with choccie coins) for my Mum as an Easter gift. To create the decoration I used my Scallop Edge Border Punch to punch the edging of the folded over section of the bag (a quick tip is to layer your bag with a sheet of scrap cardstock to stop the thinner paper from tearing when punching).  The pennant was created using a base of Crisp Cantaloupe  layered with a stamped Vellum matching pennant (I stamped the flower from the Flower Shop stamp set using Crisp Cantaloupe ink). The top pennant is cut from sheet of Pistachio Pudding DSP from the In Color 2013-2015 DSP Stack.

I sealed the bag with a length of Pistachio Pudding 3/8" Ruffle Stretch Trim and then folded a Tea Lace Paper Doily over the top and layered the greeting stamped from Teeny Tiny Wishes and two flowers stamped and punched using the Flower Shop bundle (stamp set and punch). I used an In Color Boutique Detail to finish.


  I absolutely love these little bags now and might be using them for a lot of upcoming gifts and treats for my Hostess Club members. I love how effective they look with a simple bit of embellishment.

You can order any products through my online store by clicking here or by clicking any of the product links above. I will also happily order any products for you. Just drop me a line on poulton_sarah@yahoo.co.uk or 01983 609249 and I'll happily assist.

And don't forget Stampin' Up!'s Weekly Deals. This weeks FAB die cutting product deals are only available until Tuesday. So grab a bargain now by clicking the picture below.


Happy Crafting
-x-


Wednesday, 9 April 2014

Stampin' Up! Weekly Deals


Good morning all. You may have seen me hint yesterday that Stampin' Up! had some exciting news to share this morning. Well I am very pleased to be able to announce Stampin' Up!'s Weekly Deals. Every Wednesday through April Stampin' Up! will be launching  a new list of offers on reduced price items. But hurry, they will only be available for the week!!

Visit my Online Store to see this weeks deals, they are all items to be used with your Big Shot or Cuttlebug including some fab items like the Dress Up Framelits and Needlepoint Embossing Folders. Click on the link below and click 'Shop' in the top right corner.


Here is a little sneak peak at this weeks Weekly Deals:


Don't miss your opportunity to get your hands on some fantastic bargain priced crafty items, you can order direct by shopping through my online store or contact me on poulton_sarah@yahoo.co.uk or 01983 609249 to place your order with me.

Happy Crafting
-x-

Tuesday, 8 April 2014

Blessed Easter Paper Piecing

Good morning and a very Happy Tuesday to you all.

Sorry about the late posting this week. I flat out came to a creative standstill with projects to post to my blog over the weekend. I just haven't had a spare minute to create new projects. And time just ran away with me over the weekend. It was our last weekend with Sam home as he has returned to work today so we spent it doing fun family things. Oh and I did a spot of Ebaying on Sunday too to raise funds for our family holiday in the summer.

Yesterday I took charge of the situation and spent  a couple of hours in my craft room accompanied by Pinterest and BBC Iplayer and created some lovely projects to share with you over the next week.

Today's card was created for a friend as an Easter card. It is her little boy's first birthday in a few weeks so I am going to be posting a parcel with a birthday gift and a little Easter treat. I wanted a little note card to put in with the parcel too. I found this card on Pinterest and loved the paper piecing of the Blessed Easter stamp so decided to give it a go with a Stampin' Sarah spin.


This is my version of the paper pieced Easter Blessings. I love the simplicity and the white space focusing on the beautiful tulip image.

I used 4 designs from the Fresh Prints Designer Series Paper Stack to create this finished image. I stamped the tulips in Basic Black 5 times (once on the Whisper White card layer and then on to each of the 4 patterned papers). I then carefully cut each element from the patterned paper using my super sharp Paper Snips (perfect for fussy cutting and cutting detailed images) and glued with Tombow to the original image stamped on to the white card layer.

To finish I stamped the sentiment from the My Friend stamp set using Jet Black Stazon (quick drying and smudge resistant) on to a pennant I'd cut from Stampin'  Up! high quality thick Vellum. I secured with a glue dot under the button so the adhesive would not show through the vellum. I used a button in Real Red to highlight the colour in the Fresh Prints paper. 

Thank you for stopping by today. Don't forget all products can be purchased directly from my online store. You can click on each product link within the main text above and you'll be connected straight through to my store and each product used.

Please pop back again tomorrow for some exciting news from Stampin' Up! as well as another crafty project to share. In the mean time, please get in touch on poulton_sarah@yahoo.co.uk or 01983 609249 with any questions.

Happy Crafting
-X-

Friday, 4 April 2014

Creme Egg Flower Treats


Good morning all. How has your week been? A good one I hope. Time with a newborn just flies by. I cannot believe Sylvie is 3 and a half weeks already. And time is flying by and I don't seem to be getting anything massively productive done. But I don't mind as Sam goes back to work next week so we have just been enjoying family time and picnics in the campervan.

Today's crafty project is inspired by a fab project I saw on Sam Donald's blog. I love the simplicity of using the Daffodil Delight, Real Red and Elegant Eggplant cardstock and ribbon to compliment the colours of the Creme Egg wrapping. I created these little Creme Egg treats to include with my Hostess Club orders to wish my lovely ladies a very Happy Easter.

I love the use of the Spiral Flower Die to create this three layered flower base for a Cadbury's Creme Egg. I simply layered the three colours together and rolled the flower with all three spirals together at once. I secured the flower (leaving a wide enough centre space to glue dot the egg in place) with my hot glue gun to give a sturdy and solid base. I then placed each Creme Egg flower in to a Medium Cello Bag and tied with a length of Daffodil Delight 1/4" Stitched Grosgrain Ribbon (this Stitched Grosgrain is also available in Real Red. I didn't realise when I created this project that the red ribbon I had used is now retired!).


To finish I punched three miniature flower shapes using my Itty Bitty Punch Pack and embellished with a tiny Basic Pearl.

If you'd like to find out more about joining my Hostess Virtual Club please see the 'Virtual Club' tab at the top of the page. I have a new Club starting this month and I would love to welcome you with an extra special homemade welcome gift. If you'd like more info or to sign up, please get in touch on poulton_sarah@yahoo.co.uk or 01983 609249. 

Thanks for popping by today and hope you all have a lovely crafty weekend.

Happy Crafting
-X-

Wednesday, 2 April 2014

Happy Watercolor Happy Mother's Day Card


Hello crafters. What a rainy day here on the Isle of Wight. A perfect day for sticking on a film and tucking myself away in my craft room for a couple of hours. Once this is posted I might take advantage of the babies being asleep for a little while and see what I can create.

Today's share is the Mother's Day card I made for my Mum. It was inspired by this card I had seen on Pinterest. I decided to give it my own twist and use the tools and stamps I had within my crafty cupboards. I chose my colour scheme as a starting point: Crumb Cake, Very Vanilla, Strawberry Slush & Blushing Bride.

I stamped the background with the En Francais background stamp in Crumb Cake ink. The corner 'splodges' are from the Happy Watercolor stamp set. The small hearts are stamped in Strawberry Slush,  Blushing Bride & Crumb Cake using the multiple heart stamp from the Language of Love set and then punched with the Small Heart Punch.


The final detail on the card are the main hearts which were punched using the Full Heart Punch from Modern Medley Designer Series Paper. I inked the edges of each heart with Crumb Cake ink and then stamped each heart with the floral orchid stamp from the Happy Watercolor stamp set. I then repeat stamped this image on to Very Vanilla and coloured the flower heads with Blushing Bride and Strawberry Slush using a Blender Pen. Then using my lovely sharp Paper Snips I cut around the coloured flower heads and glued these on to my punched full hearts.  To finish I covered the coloured flower heads with Crystal Effects and left to dry to give a lovely textured sheen to my card.

Thanks for popping by today. Lovely to have you join me at Stampin' Sarah! If you'd like any further information about any Stampin' Up! products or find out more about hosting a party, placing an order or joining my team or hostess club, I'd love to chat to you. Please get in touch on poulton_sarah@yahoo.co.uk or 01983 609249.

Happy Crafting
-X-