Showing posts with label Lovely As A Tree. Show all posts

Friday, 18 December 2015

A Lovely As A Tree Christmas Card from Stampin' Up! UK Demonstrator Sarah Poulton

Happy Festive Friday.

I've been rushing round the shops this morning doing all my last minute finishing off bits and bobs. I am now fully stocked on wrapping paper and sellotape, stocking stuffer and treats. And this afternoon sees our big Christmas shop delivered with fun festive snacks for the next couple of weeks. I am now feeling more organised which is a relief. 

Today I have a cardmaking class make from last weekend to share. I love the simplicity of the gold tones in this card. It features a circle embellishment stamped with the tall tree from the Lovely As A Tree stamp set (a long stay stamp set from the catalogue and a firm favourite of mine). I layered my stamping with Memento Black ink and then highlights of gold embossing over the top.


I used Gold Foil to highlight the circle and a thin layer of foil around the Whisper White layer. The gold embossed sentiment is from the Reason for the Season stamp set.


Thank you for popping by today. Please let me know if you have any questions about Stampin' Up! or our products. I would love to help. All items can be purchased online via my shop or get in touch directly and I can order them for you to be delivered direct to your door. I'd also love to Demo for you and your friends at a crafty party. As the hostess you earn lots of lovely freebies and you all get to make a fun crafty project too (no crafting experience necessary!)
 -XXX-
Built for Free Using: My Stampin Blog

Monday, 13 October 2014

Lovely as a Tree meets Holiday Home Christmas Card using Stampin' Up! products

Good morning crafters.


Welcome to a new week (and another week closer to Christmas!). How was your weekend? I managed to get some craftiness in yesterday. I'm all prepped for upcoming crafty parties as well as getting some items made ready for a Christmas Fair I am doing next month. So all in all a very productive wet and rainy Isle of Wight weekend. 


While I was in my craft room I came across this card I made for last month's class but decided against using. With a bit of distance from the finished product it turns out I really like it.

Can you see the deliberate mistake with this card? I hadn't noticed the tree image inside until I photographed the card. Easy to rectify with a Stamp-A-Ma-Jig though.


I created the peep through with my Window Frames Collection of Framelits and then stamped the trees from Lovely as a Tree in Soft Suede ink. I then stamped one of the houses from the Holiday Home stamp set and coloured with my Blendabilities.

I finished with a touch of Gold Stampin' Glitter and the flying sleigh image from the Holiday Home stamp set. 


If you have any questions about today's project or the products I have used, please get in touch on poulton_sarah@yahoo.co.uk or 01983 609249. You can order online direct through my store by clicking the product links above or the pictures below. I also have availability in the next few months for your very own crafty party. Click on the Promotions tab above to see the exclusive hostess promotion running until October 31st.

Happy Crafting
-X

Friday, 11 November 2011

Pennant Punch Christmas Tree

The final project from October's Card Class is this masked Pennant Punch Christmas Tree card. This was inspired by this card over on Vicky's blog. As regular readers will have seen, I adore this masking and sponging technique and could make a million Christmas cards this way.

I created a mask using a post-it note and the scalloped pennant from the Pennant Punch. I then sponged over the mask with Pear Pizzazz. With the mask still in place I stamped part of the large tree from Lovely As A Tree in Old Olive and Garden Green to give the leaf texture. The trunk was stamped using a stamp from Trendy Trees (a bit wonky I'm afraid- must find where I hid my Stamp-A-Ma-Jig).

I created a second mask using a torn post it and sponged over more Pear Pizzazz to create the grass and then finished with Garden Green ink to stamp the Contempo Christmas sentiment.
Hooray for Friday ;0) I'm off to my monthly crop tomorrow and i haven't managed to go for several months. Will be lovely to catch up with the ladies (as well as get my Convention swaps finished once and for all!!!).

Happy  crafting ;0)
-X-

Thursday, 3 November 2011

Hostess Thank You

Thank you for all the lovely congratulatory messages. They are very much appreciated ;0)

Now on to some Christmas crafting. I must again apologise for the poor lighting of these two photos. I was taking these late last night so that I had something to post today and the result is slightly 'off colour'. Bring on the Spring and some nicer lighting conditions (although I must confess to actually really loving these damp days and dark nights- a good excuse to cosy up under the duvet with a good film or a book).

I demonstrated at my friend Hayley's annual birthday workshop last night. I designed two little make and takes for all the ladies to have a go at which didnt leave much time for a demonstration. So instead I made this little hostess thank you set in advance and just showed the ladies instead. I picked Pool Party & Night of Navy as my colour scheme to give an icy winter feel to the two projects.

The card was made using my favourite technique again. I created a Post It note mask with the Curly Label punch and then sponged Pool Party and Marina Mist onto Shimmery White cardstock (I love this C/S as it gives a nice icy feel to Christmas-y cards). I then stamped the largest snowflake from Serene Snowflakes in Night of Navy over the top. I then stamped the 3 smaller snowflakes as a background. The Thank You sentiment is taken from Curly Cute.
 The hostess gift element of the set was this luminaria. I followed an online template for the basic shape and then customised this to use my own colour scheme and stamps. I had previously bought two packs of the battery operated 'flickering candles' from Ebay but not gotten around to using them. Now I have seen the result I will most definitely be investing in some more I think.

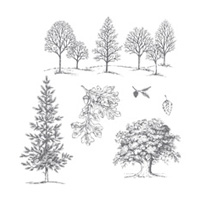
I did try and get the luminaria lit up but I just couldnt get the lighting and settings on the camera quite right. I created it using Night of Navy as the base. I punched the holes using my largest circle punch. I then cut 4 pieces of vellum to fit and stamped with Serene Snowflakes in Night of Navy. For the trees around the bottom I used Not Quite Navy as the base card stock then stamped the multiple tree stamp from Lovely As A Tree along a strip of card (using Versamark). I then covered this strip (on which I stamped the image three times) with silver heat embossing powder and embossed for the icy finish. The last touch was to sponge dauber white craft ink along the base of the trees to give it a snowy look.

And just one final quick bit of info. Stampin' Up! have launched a Hostess incentive which runs through till December 15th. If you host a qualifying workshop (£300+ sales) anytime within this period you will receive extra product for free. The product bonus is the lovely Paisley Petals stampset and coordinating Paisley Petals Designer Series Paper. What a great way to celebrate hosting your own Christmas workshop!
If you have any questions on Stampin' Up! please let me know and I'll try to help as best I can (poulton_sarah@yahoo.co.uk or 609249).

In the mean time, happy crafting ;0)
-X-

Friday, 14 October 2011

Lovely as a Tree stepped card

This card was inspired by a card I came across in the In Love With Stamping gallery. I love this stepped effect paired with Lovely as a Tree. It was quick and simple to make and so Christmas-y.

Again I used Stampin' Up!'s Shimmery White cardstock and Night of Navy. The background Night of Navy panel was heat embossed in white. I drew on the snowflakes with my white gel pen. The sentiment is from Contempo Christmas and sets off the colours of the card really well.

So that concludes my week of Christmas cards. But if you come back tomorrow I have one final Christmas project to share with you. Just a couple of quick and easy gift box ideas.

Happy Crafting (and a happy start to the weekend too).
-XX-

Saturday, 8 October 2011

Lovely as a Tree Thank You

Here are a series of customer Thank You cards I recently made all carefully drying (I'd only just glitter glued them).  This is my new favourite inking technique (one which may reappear this week)- to create a post it note punch mask and then sponge different shades over the mask. Then stamp your main image over the top.

I created these mini cards using the Decorative Label Punch as my mask and Baja Breeze and Marina Mist as the sponged background. I stamped the Lovely As A Tree stamp in Night of Navy (and the Thank You Kindly sentiment).

Unfortunately I used a generic (non SU) glitter glue to embellish the frosty trees which made the Night of Navy bleed a bit. They all still looked lovely though.

Right, I'm away on my holidays this week. But i am about to schedule a week of Christmas cards starting Monday. So please come back for some lovely Christmas inspiration.

Happy crafting ;0)
-XX-

Tuesday, 20 September 2011

Lovely as a Tree Thank You

I demonstrated for a lovely group of crafty ladies on Friday evening. I prepped in advance this Thank You card for the hostess using one of my favourite (and so effective) stamp sets, Lovely as a Tree. The theme of the workshop was Christmas crafting so I decided to design a card with a Christmas-y feel but not overtly red/green/Christmas.

I stamped the row of trees in Baja Breeze and Pool Party (one of the exclusive new In Colours launching October 1st) and then stamped the single tree in Night of Navy. I cut around the single tree and sponge daubered the edge in Baja Breeze. I raised this tree with dimensionals to give a bit of depth to the design. I then finished by using Dazzling Diamonds to embellish the trees and to give a snowy ice feel. I also used my Shimmer Paint to ice the base of each of the trees. The final detail is the Concord Crush Poly Ribbon around the top of the card.

The sentiment is from Thank You Kindly.

Happy Crafting
-x-

Wednesday, 23 March 2011

What's On Your Workdesk

I finally remembered to take a photo of my workdesk (read picnic table in my living room!) for WOYWW!! I've followed Julia's blog since meeting her at a retreat last year but not once have I remembered to take a photo. So here I am! I'm now a WOYWW-er ;0)

 Organised chaos as usual. And a few things on there I probably should have hidden (sneak peaks of lovely new things coming in the new Stampin' Up! Mini Catalogue- come back next Friday April 1st for more info on those!). The journal is my '2011 Tales' project. I am working on Week 11's summary at the moment (as you can see from the blank page I havent gotten very far yet!). And to the left are a pile of swaps I created for a Mini Catalogue postal swap with the lovely ladies over on In Love With Stamping. Must try and tidy up before next week ;0)

While I am blogging, here are a couple more projects we created at this months card class. The first is a drawer box in Rose Red and Pumpkin Pie. This highlights the lovely Fancy Flower Punch which is now officially back in production. I also love those chunky Filigree Brads for the drawer pull.
 The second project is a card inspired by an Australian Demo Teneale Willams. I've only recently purchased the Lovely As A Tree set and couldnt wait to have a go at making this card when I came across it online. The colour combo is Always Artichoke, Chocolate Chip & Old Olive. I've coloured the stamp with my marker pens and then lightly coloured over the image with my matching watercolour crayons. It gives such a lovely dimensional and textured effect to the leaves.

Right, hopefully i'll be back tomorrow with a completed Week 11 mini LO! in the meantime, happy crafting all ;0)

-XX-