Showing posts with label Season of Joy. Show all posts

Friday, 9 December 2011

JYC Days 7 and 8

I tell you what, it is a joy and a relief allowing myself a simpler and less involved JYC this year. By giving myself a little less pressure I am actually ending up a lot happier with my results and also I'm not falling behind which is a small miracle too ;0)

Here are my pages for Days 7 and 8. I'm not entirely enthralled with the first. I couldnt quite match my embellishments perfectly. I wanted to capture the lovely reaction I had from my online Secret Santa on Facebook. There were a lot of lovely comments made about the gift i had sent but i couldnt fit them all on the page. So instead I just screen captured an image of her thank you. It didnt fit with the theme of the day, but I wanted to capture this memory all the same. It is a part of my December journey 2011 ;0)

And the second page I was a lot happier with (hence I should stick with the 4 mini rectangle idea....). Due to the awful weather yesterday I wasnt overly keen on going out in the wind and rain to capture the sights of the season. I did, however, capture a few 'indoor' sights. I took loads of photos of our work grotto and Christmas trees and then used the star as a focal point for the page. I also captured my favourite Christmas traditions- the Radio Times and Christmas stamps ;0) Very simple but I'm happy with this all the same.
 Another project i have worked on this past couple of nights is this 60th birthday card for a work colleague. I cannot claim this all as my own as I used a swap I'd received at Convention as my base inspiration. I then personalised it for the occasion and mounted on a large enough piece of Rose Red for all the girls at work to sign. 
 And finally, here is a photo of some of the Gift Cards I have been working on recently. I am happy to personalise for any occasion (although Christmas is proving mightily popular at the moment!). Inside this little card is a pocket with the Stampin' Up! gift card within it. I can create a card for any denomination. Just get in touch on poulton_sarah@yahoo.co.uk or 609249 to place your order.
Happy Friday to you all and have a festive weekend ;0)

-XX-

Friday, 18 November 2011

Convention swaps

Oh to live in sunnier climes where there is sunshine all year round for better picture opportunities.  Instead we have to battle the early evening light and flash rebound..... But you'll get the idea with my swap photos.

The first project I have to share is my Button Buddies/Nursery Nest inspired Card Candy.  The idea is to create card toppers that use punches or a particular stamp set in a variety of ways and to showcase the images. I fell in love with Button Buddies the first time I saw it. I love how Stampin' Up! create products that link with other items (such as this use of buttons within the image). I stuck with the DSP colour scheme and used several pots of Subtles Buttons to create my 10 matching sets of Card Candy.

 My second project today is my general convention swap- a shrink plastic wine glass charm. My lovely Mum sat and made these all for me as I just havent had the energy to create 87 (thats how many my wonder Mum made!! Thats a whole lot of shrinky dink plastic and jewellery wire) swaps. She is truly fab as she created her own little links for the charms and also raided her bead stash (not sure how I ended up photographing identical swaps as she used lots of different beads for these wine glass charms).  So for this Mum stamped the flower from Season of Joy onto shrink plastic and sat with a heat tool shrinking them (after cutting them all out and creating the link by punching a hole with my Crop-a-Dile). After linking the charm and beads onto the wine glass loop we mounted the whole charm onto Old Olive cardstock and finished with a small cello bag.
So these are my swap projects for 2011. I'll be back at the weekend to share some of the lovely projects I receive in return and tell you all about the Convention experience.

Happy Crafting ;0)

Wednesday, 12 October 2011

An acetate Merry Christmas

So it turns out my acetate creation was incredibly difficult to photograph. I tried to take this photo against so many different colour backgrounds and it wouldn't show up properly against any.

I created this with a 12" x 4" piece of acetate Window Sheet which I scored at 6" to make the card shape. I stamped the acetate with White Stazon using my Season of Joy flourish and flower stamp. I embellished two of the Season of Joy snowflakes with Basic Pearls. I created the centre panel with Shimmery White and Cherry Cobbler cardstock. I stamped the panel with Cherry Cobbler ink and embellished with a string of Basic Pearls. I created a blank panel for the inside and back panel for writing on.

Tomorrows card is a new catalogue inspired creation.....

Happy crafting ;0)

Saturday, 17 September 2011

Good morning lovely crafters.

I'm posting my Saturday projects early today as I'm off to High Wycombe for a Stampin' Up! training afternoon. Hopefully we might get a few sneak peaks of some more lovely new products launching on October 1st. I'm so excited as I love meeting up with other Demonstrators and catching up with the Pink Ladies (the team of Demonstrators I am part of).

Now speaking of sneak peaks. Here are a two layouts I created for my Stampin' Scrappin evening. Those with eagle eyes might notice a new stamp used in this Christmas tree design (and a couple of the baubles are also stamped with the fab new In Colour Lucky Limeade). I cased this layout from the current Stampin' Up! catalogue (page 26). I've loved this tree made of baubles since the catalogue came out and thought it was time I had a go.

The base colours are Wild Wasabi and Crumb Cake. The baubles are stamped and punched with the Ornament Punch and Contempo Christmas (and sneak peak set Tags Til Christmas) in Pear Pizzazz, Wild Wasabi, Lucky Limeade, Old Olive. I also punched a few from scraps of Jolly Holiday Designer Series Paper which is now sadly sold out.
 The second layout is on a base of Cherry Cobbler with strips of Jolly Holiday DSP. The lovely scalloped dotty Chocolate Chip ribbon is another exclusive sneak peak from the catalogue launching October 1st. The flourish from Season of Joy was stamped as a border down the side. The embellishments were stamped in Old Olive and Cherry Cobbler (onto Very Vanilla) and raised with dimensionals (and accessorised with Pearls).
I will be holding a New Catalogue Launch Open House on:


Saturday October 1st.

10am-12pm or 1-3pm.

I will have two Christmas themed make and take projects as well as a complimentary copy of the Stampin’ Up! Catalogue for every attendee. The cost for the session is £4 to include refreshments, catalogue and project kits. It will be a great introduction to all the lovely new products in the new catalogue. Please get in touch on poulton_sarah@yahoo.co.uk or 07830 343830 / 01983 609249 to reserve your space.

Happy Saturday Crafting ;0)
-x-

Monday, 5 September 2011

Season Of Joy Christmas Card


I am a little bit obsessed with Christmas crafting at the moment. I cannot seem to switch back into "normal" crafting mode (although I have been working on a wedding card and some swaps for a Stampin'  Up! training day I am going to which are totally unrelated to Christmas- more on those later in the week....)

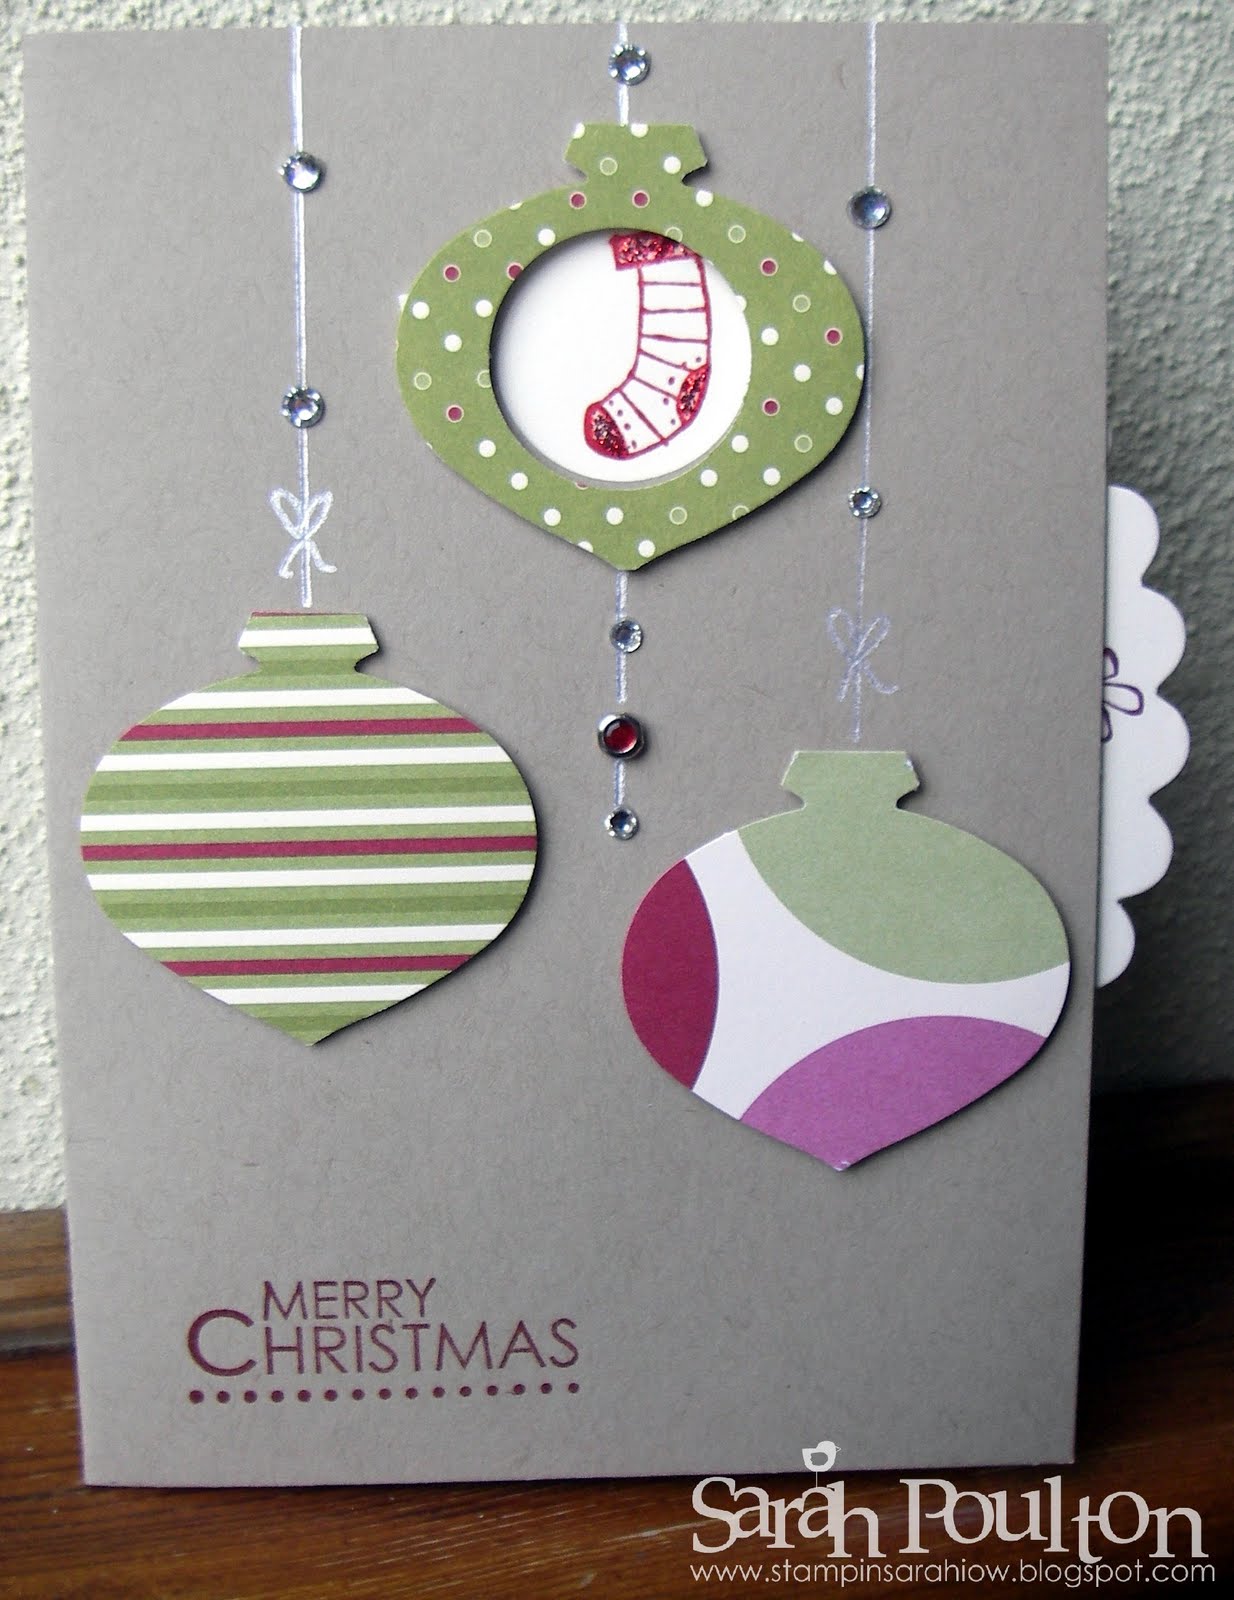
I was going through a pile of papers earlier and came across this card from my Christmas Craft Day from last month. I really enjoyed this colour combination (Cherry Cobbler and Chocolate Chip). Its not a traditional Christmas Combo but it reminded me of a hot chocolate on a cold winter day. Or more accurately it  reminded me of the Dark Cherry Mocha's that Starbucks sold a couple of Christmases back.

I've been trying to design simple and quick stamped Christmas cards to prove that handmade isn't necessarily a lot more work and time than shop bought cards. I've got so much lined up between now and Christmas that designing cards that can be created en masse is my new solution. Plus I am starting my planning super early too ;0)

So this is it. It uses the flower and flourish from Season of Joy. I have used my circle  and scallop circle punches to create the embellishment. The ribbon is a Chocolate Chip retired ribbon from last years Stampin' Up! catalogue.


I hope all is well wherever you are reading this from. I cannot believe the kids are back to school already and summer is officially over. Here on the Isle we had a big illuminated carnival on Saturday which always marks the end of the summer season of events here. Oh well, at least we can all legitimately start Christmas crafting without wishing our summers away ;0)
-XXX-

Friday, 29 July 2011

Christmas Spinning Card

I recently saw this card over on Peg's blog. I'd never seen this spinning style of card before so thought I would have a go for this months card class. Its never too early to think Christmas you know ;0)

I created this spinning wheel card using the Scallop Circle Die for the Big Shot, the Ornament and 1 Inch Circle Punches, Jolly Holiday Designer Series Paper and Every Little Bit Stamp Set. I embellished with Basic Rhinestones, a brad & a silver pen from my crafting stash.

I was surprised by how much everyone loved the effect of this card and it could easily be adapted for any occasion. I thought it would make a lovely new baby card with the little images.

The photos below show each of the images in the ornament window.

The mini Penguin:
 Snowflake:
 Stocking:
 Present:
 Gold Star:
Cardstock: Crumb Cake
Designer Series Paper: Jolly Holiday
Stamp Sets: Season of Joy (Sentiment) and Every Little Bit
Ink: Cherry Cobber, Daffodil Delight, Rich Razzleberry, Basic Black, Real Red, Night of Navy
Embellishments: Brad, Basic Rhinestones
Other: 1" Circle Punch, Ornament Punch, Dimensionals

Monday, 11 July 2011

Christmas Workshop Makes Mark 2

Better late than never. I finally had the time to post these pictures of our workshop makes from Friday. We had a fantastic Christmas crafting workshop with some lovely ladies. I themed the makes around 'Quick and Easy Christmas'. I wanted to show that stamping can take the fear out of making your own Christmas items and you can actually make things in a quick and easy way. So no need to worry about making 50 Christmas cards. With the right design you can make all your Christmas cards in one afternoon.

Here is the mini Christmas card we made using Every Little Bit (this design would also be workable with any of the 30 mini images in the set). I themed all our projects on colour schemes with Crumb Cake as the base colour. This was then embellished with Real Red and Pear Pizzazz and finished with two basic rhinestones.

 We also each made one of these mini nappy pouches using a 6"x6" square of Jolly Holiday Designer Series Paper. We also made a mini 2" square note card to fit inside (stamped in Whisper White onto Cherry Cobler using the background stamp from Season Of Joy).
 A quick and simple gift tag cut using the Top Note Die folded in half. The Dasher image was stamped in Cherry Cobler with a matching Merry Christmas sentiment stamped inside.
 Our final project was a mini window Pillow Box. I created two different versions to show how quick and easy these little treat boxes can be. The first has the oval punched and the Gifted image stamped inside. Then to embellish I wrapped a length of Jolly Holiday DSP around the Crumb Cake Pillow Box. I cut a window sheet into smaller sections which was used to create the acetate window into the box.
 The second version (and the one we all made) was stamped with images from the Season of Joy stamp set in Pear Pizzazz and Cherry Cobbler. This is a perfect little treat box. It could be filled with seasonal treats and then once the sweets have been eaten the greeting is revealed.
Stamp Sets Used: Every Little Bit, Season of Joy, Gifted, Dasher
Designer Series Paper: Jolly Holiday
Ink: Pear Pizzazz, Cherry Cobbler, Whisper White
Card stock: Crumb Cake, Real Red, Whisper White
Embellishments: Buttons, Basic Rhinestones

Any questions or to book your own Christmas workshop, please get in touch on poulton_sarah@yahoo.co.uk or 01983 609249.

Happy crafting ;0)
-XXXX-

Friday, 8 July 2011

Christmas in July Workshop

It is my first July in Christmas workshop tonight. I thought as my hostess gift I would create a lovely little card and gift box set that, while a little Christmasy, could also be used for other events through the year. I wanted to show that the stamps in the Stampin' Up! Christmas stamp sets are versatile and can be used for more than the festive season.

For this card (inspired by a Christmas card I recently saw on the lovely Bekka Prideaux's blog) and Gable box I used Season Of Joy stamped in Pear Pizzazz and Poppy Parade. I also used a bit of Champagne Mist Shimmer Paint to create the flourish on the red front panel of the box. I also used  a 'Thank You' sentiment from Thank You Kindly. I embellished the box with 3 brads and a small length of Poppy Parade Poly Ribbon.

I have 4 lovely little quick and easy Christmas projects for the Make and Takes for the workshop tonight. Check back tomorrow to see what we'll be making. And if you'd like to book your own early Christmas crafting workshop, just get in touch on poulton_sarah@yahoo.co.uk or 01983 609249.

Happy Friday Crafting ;0)
-XXX-


Wednesday, 6 July 2011

WOYWW- July 6th

Why is my desk always so messy on a Wednesday? I usually work in a much more organised state. But it must just be something about Wednesdays. If you'd like to see lots of other fab creative craft desks hop on over to Julia's blog.

So this week we're back to the craft room and I have a lot going on this week. Firstly you can see my new art print on the right. I love this artist. Her name is Marja Leena and she is based in Australia. Her prints are displayed in my local Doctors surgery and they are so bright and cheery that I almost look forward to a trip to the surgery ;0) I recently bought a print to hang in my craft room and here it is awaiting a frame.

Also on my desk is a little hostess set I have been working on for an upcoming Christmas themed workshop. I have used the Season Of Joy set to make this little thank you card and gable box for my hostess and I've filled the box with lots of crafty loveliness. The cardboard box contains all the make and take bags for my ladies to make a matching Christmas set of a card, gift tag (the sample is on my green craft mat), pouch and pillow box*.

Here is hoping it stops raining today so I can get out for a long walk with my dog (although my garden looks thoroughly refreshed for all the downpours we have been having). Hoping its a lovely day wherever you are.
Happy Wednesday Crafting all ;0)


*If you're reading this and you're based on the Isle of Wight, please get in touch (poulton_sarah@yahoo.co.uk or 609249) if you fancy booking a Christmas Stampin' Up! workshop. Always happy to meet new crafters ;0) And Christmas crafting is my favourite of all seasonal crafting (which explains why I am starting my card making in July!).

Tuesday, 7 December 2010

Journal Your Christmas Days 5 and 6

I got a day behind with my journalling as a result of spending Sunday evening with my family (I was very proud of my slow cooking effort- a lovely beef korma). Living Christmas was a little more important than journalling it ;0) So I spent hours last night catching up (who'd have thought 4 pages could take me all of Eclipse, Eastenders and Nigella's Christmas Bites!?).

The prompt for Day 5 was 'Counting Down' and how we mark each day to Christmas. This was an easy one for me as we've had the same Christmas Advent Calender since i was a child (and in recent years I have been refilling a lovely M&S tree with treat drawers for Sam and I). So with a little help from my sister I journalled a page of my own calender and our family calender too (Nat had to take the family pic for me).

I started with the title page for the day. I decided to incorporate this with a Wight Craft Circle challenge, Patchwork. I'd had this idea in mind for a while and was looking for the right time to use it. It was a great excuse to get out my stack of old alphas and use up all my odd numbers too. Sorry for the darkness of the photos. No natural light available before I come to work in the mornings.

 Here is my Advent Calender page. The photo is on hinges to reveal my second calender photo.
 I've tucked another photo and a decorative tree behind the first main photo. I wanted to go into more depth with the journalling. So I might go back and add some more tonight. The family advent calender was handmade by my Mum when I was younger and has seen us through every Christmas since (we've had all manner of treats and lovelies hanging from each day over the years).
 Day 6's prompt was 'A Tale of Two Christmases' and we were challenged to split our page/s in half somehow. Well I thought long and hard about Shimelle's prompt and about reflecting on stories from two Christmases past. However, I couldnt really think of a negative Christmas memory. And in reality, I wanted to focus on happy memories and make my journal joyous. So instead I have simply made todays journalling about stand out Christmas memories.

My title page was inspired by this LO I saw on Ali Edward's December Daily page. I think she used pre-printed acetate where as I chose to break out my Stamp-a-ma-Jig and circle stamp from the Something Sweet stamp set and hand stamp my circles in Cherry Cobler and Old Olive. The photos reflect on handmade Christmas treats. The upper right is a decorated Christmas Cake I made for my Mum and the lower photo is a handmade gingerbread house Sam and I created for his nieces and nephews a couple of years ago.
 My final page for Day 6 was inspired by Shimelle's idea of breaking up the page into two. I used a lovely piece of stripey ribbon to define the split. However, it got covered by the photos! I called the page' Ghost of Christmas Past' and my journalling reflects on two Christmas photos. One of my sisters when they were tiny and one of Sam and I visiting the German Christmas markets a couple of years back.
Still loving Journal Your Christmas. And hoping to catch up with some other people's blogs today to see how everyone else is getting on.

Happy Festive Crafting ;0)

-XXX-

Sunday, 21 November 2010

Charity Craft Day for the Hospice

Well firstly, I just have to say a big thank you to all the lovely ladies who came along to my Christmas Craft Day yesterday. It was lovely to see familiar faces as well as welcome new crafters along too. It was a great day and I am glad all the projects were a success. I've got a couple of donations to add to the pot before I can give a proper tally of how much we raised. But its looking very good so far ;0)

I've got some photos from Mum's camera to get hold of from yesterday. But for today I'll post some photos of the projects we made.

Project One: Folded Diaper Pouch with matching notecard and sneaky Quality Street half inched from my Dads tin ;0)

I used Elegant Eggplant and Rose Red as my colour scheme (and yes I pinched matching Pink Quality Streets ;0) Season of Joy Stampset was used for the notelet.

 Project Two: Gift Card Pouch

This gift card was demo'd by the fabulous Julie Kettlewell at Convention. I was so enamoured with the colour scheme (Crumb Cake and Cherrry Cobbler) that I had to give it a go and then demo it myself at my event. This uses Contempo Christmas and the Ornament Punch with matching Very Vanilla Ribbon.

 Project 3: Sour Cream Container

I've demo'd Sour Cream Containers before. But for this we had a lovely little twist. My Mum had handmade earrings to donate for the Craft Day. They were beautiful (and I wanted to keep about 10 pairs but since I havent been able to wear earrings for years they wouldnt have been much use to me!) and we sealed them as an early Christmas gift within the container ;0) As the demo was more about the Sour Cream Container I prestamped and mounted the gift tags using the Gifted Stamp Set (Real Red and Old Olive).
 Project 4: Bird House Gift Box

This was based on a swap I received from the very talented Jo Dumbleton at the last Stampin' Up! training I attended. I'd had so many comments about it that I decided to give demo-ing it a bash. Its such a lovely idea and I give full credit to Jo for coming up with such a lovely Christmas demo. It uses: Garden Green, Crumb Cake, Real Red & Soft Suede. Along with the Serene Snowflakes stamp set and Bird Punch. The window is filled with a small piece of acetate and the project was finished off with silver elastic cord and a tiny amount of red glitter on the holly berries.
 Project 5: Christmas Gift Box
 I spent a fair few days perfecting the measurements for this box (hence so many demonstration versions for photographing). I'm really pleased with the final version and the beautiful scallop circle flower on top.
 Project 6: Dasher Embossed Jolly Holiday Card

We didn't get time to finish this card. So I each of the ladies took it home to complete from a kit version. Its a lovely quick but effective Dasher card. You'll notice that Cherry Cobbler is my favourite colour at the moment. I seem to be using it in most of my festive projects this year.
 And the final project of the day....

Project 7: Crimped Envelope Card
This used Serene Snowflakes and Dasher coupled with Tempting Turquoise and Pacific Point. This was a simple but effective card. You seal the envelope and then slice off the top. You then stamp the main envelope and run it through the crimper. The top of the envelope then forms a lid over the crimped section ;0)

As you can see from the photos, it was a very busy day! We also missed out Sandy's Cracker Dasher card which she did a quick run through of so the ladies could take it home to finish there. For future events I'll definitely be scaling back the number of projects we complete so that its a bit more relaxed. Still, we live and learn don't we? ;0)

For all those that asked about the DSP Christmas Tree I posted earlier in the week. I have another cone here that I will use to create a tutorial for you this afternoon. Check back later to see that.....

Thanks for stopping by.

-XXX-

Sunday, 24 October 2010

Yesterdays Christmas Card Class

Yesterday afternoon I had another lovely monthly card class. We were a bit thin on the ground numbers wise but it meant we got to do a lot more chatting as we crafted. And I forced myself to slow down and not get over stressed by rushing through everything (especially with what feels like the startings of flu this weekend).


We made three cards and a gable box using Dasher and Season of Joy. The projects we made today:

 Gable Box made with Season of Joy stampset. Ink colour: Poppy Parade & Pear Pizzazz (yes more shameless use of the In Colours!). Flourish was stamped with Champagne Shimmer Paint and a sponge dauber. Ribbon: Poppy Parade Poly Stitched.
 I cannot help but absolutely love the Paisley Prints stampset. This was the first on my shopping list when the new IB&C launched. I stamped the Christmas Tree image in Early Espresso. The greeting is stamped with the Curly Cute sentiment set. We used the Paper Piercer and piercing mats for the corner of the white panel.
I dedided to try out a new card style for this card so I looked at some online tutorials. I found this triangle folded crossover card with a tagged insert for writing your message on. Again, we used Season Of Joy to make the poinsettia flower on the front (Real Red with red brads for the berry centre). The DSP is the now retired SU Christmas papers. The insert was stamped with the Season of Joy flourish and sentiment, I hand drew on the stitching and finished with a Chocolate Chip Tag and stamped snowflake.
And finally I've been dying to a tri shutter card for a while. For this we used little bits of leftover DSP, Dasher and Season of Joy. I tried to show that this card is very adaptable and can be decorated in any way you like (made easier by double sided DSP which meant each of our cards was completely different). Each end was highlighted with gold embossed images. We also created the stand out flowers with scalloped circles and a button.

So that was my crafty Card Class afternoon. Now onward to planning for the Hospice Craft Day next month. Places are booking up fast, so if you would like to come along and spend the day crafting all in aid if a very good cause, get in touch to book now: 609249 or poulton_sarah@yahoo.co.uk

-XXXX-

Sunday, 17 October 2010

A big thank you....

Firstly can I just thank all the lovely ladies that came along to my Open House yesterday. I had a really fantastic day and I really enjoyed chatting and crafting with both new and familiar faces ;0) It was a great opportunity to introduce Stampin' Up! to crafters who'd not used the products before and I'm looking forward to demo-ing at workshops next month for all the lovely ladies I met yesterday. And another thank you to Sandy for helping out and getting in some Demonstrator practice for her new Stampin' Up! business (now if we could just hurry that Starter Kit order up.....).

Lastly, a huge thank you to my Mum for all her help with my swaps and for the fantastic Pumpkin Cake she baked for the day.

Here are the projects we worked on yesterday using products from the new catalogue:

Dasher Christmas card: Night of Navy card & ink, Oval Punch, greeting from Season of Joy stampset and my new favourite punch- the Scallop Trim detail punch. We then accessorised the antlers with glitter.
 The decorated envelope using Season of Joy.
 Contempo Christmas Card:
For any other demos you'll recognise this card from the recent High Wycombe training. I loved the effectiveness of the 3D bauble so adapted the card slightly to demo yesterday. The card was created using the Ornament Punch, Contempo Christmas Stampset, new organza white ribbon, White Craft Ink, Wild Wasabi or Cherry Cobbler ink/cardstock.


For any questions about Stampin' Up! or any of the products featured above please do not hesitate to contact me: 01983 609249 or poulton_sarah@yahoo.co.uk.

Monday, 23 August 2010

Crafty Catch Up

After a very busy weekend of crafting and classes. I've finally managed to catch up enough to take photos to upload here. Saturday was my first class at Norton Grange in Yarmouth. It was an enjoyable session on a very rainy day ;0) The cards seemed to go down a treat and I look forward to demo-ing there again next Saturday.

Then Saturday afternoon was my normal monthly card class. At the request of my lovely card ladies I did a Christmas themed class. Here are the projects I put together for the session.
The first card was inspired by a similar card I saw the lovely Marguerite demo at a recent Pink Ladies training session. This uses the flourish from the Baroque Motifs stamp set along with small flower and greeting from the Season Of Joy set. DSP is from the Merry Moments set. Colours: Old Olive and Real Red. The finishing touch was a bit of Old Olive Grosgrain Ribbon, Linen Thread and a button.

Our second card of the afternoon was this lovely trifold/twister card using the Dasher stamp from the mini catalogue. We gold heat embossed Dasher onto Real Red cardstock (layered over Very Vanilla). The main card was real red with DSP from Merry Moments. Real Red Satin Ribbon to finish. I'm in the process of putting together a little tutorial for the trifold card as this is my new favourite card to make ;0)
I was attempting to demo different types of card as well as techniques. This was our final project for the afternoon, a lovely easel card using the greeting from Season of Joy. We heat embossed this in gold, outlined the Real Red with a gold pen and layered it onto Very Vanilla again. This was mounted onto a Chocolate Chip easel (also used another small piece of Merry Moments DSP again). The greeting was embossed and cut using the oval punch on Real Red and mounted with a Very Vanilla Scallop oval. I hadnt realised this card was stuck slightly wonky till I took a photo of it. It doesnt look so wonky up close ;0)I couldnt remember if I had uploaded a photo from my workshop demo last week. I demo-d a variation on my Loads of Love truck and Neighbourhood wheel card. I chose to keep it within the Soft Subtles colour family as it is works beautifully with these stamps. I mounted the picture onto Barely Banana cardstock and finished with Certainly Celery Grosgrain Ribbon and greeting punched using the scallop circle punch.
And one final photo for the day. As Mum and I were driving towards Yarmouth on Saturday for my first card class we were held up going through Carisbrooke. There was a long tail back and the traffic was barely moving. I was getting increasingly stressed about it until the source of the traffic jam turned out to be a swan with her babies walking down the middle of the road. I managed to get a photo of them once they'd waddled on up to the pavement and we drove past ;0) Right, off to get ready for another demo tonight. I'm going to be demo-ing the swirly Christmas card from Saturdays card class for some friends of my Mums.

Any questions about Stampin Up or to order products, please do not hesitate to get in touch: poulton_sarah@yahoo.co.uk or 07830 343830.