
Happy Wednesday Crafters.
How is your week going so far? It is a downward slide to the weekend now. Which can only mean more time for craftiness ;0)
As I mentioned on Monday, I have gone a bit Gift Box crazy. I recently purchased the fantabulous Stampin' Up! Gift Box Punch Board. I needed to make a thank you gift for a recent party hostess and thought this would be a perfect demonstration and gift all in one.

If you have already purchased the Envelope Punch Board then you will know just how simple these boards are to use. All the measurements and instructions are listed right on the Board and you just decide which size box you'd like to make, cut your paper/card to size and follow the instructions (all measurements are also listed on the board for your reference too).

The box above was the largest listed on the Board, It is made from a 12"x12" piece of cardstock (the Gift Box Board usefully has a score extending arm to make 12"x12" easier to score!). The finished box is 4" square. And the best thing about these boxes is that they are held together with little tabs punched by the board. There is no glue used to hold my large 4" box together (the ribbon is simply for decoration too!).
I created the box using the gorgeous new Under the Tree Speciality Designer Series Paper. I love these thick cardstock- weight Kraft sheets. Perfect for box making. It is Kraft/Gold Tone on one side with Whisper White printed patterns and the other side of each 12"x12" is a Christmas themed design in Cherry Cobbler, Garden Green or Early Espresso.

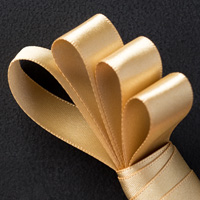
I wrapped my box with Gold Satin Ribbon and a length of Cherry Cobbler ribbon (sadly now retired by the beautiful Cherry Cobbler 1" Sheer Linen Ribbon would be perfect too). I love the effect of tying two bows on top of one another.
I created the tag using the Seasonally Scattered stamp set. I heat embossed the 'Thanks' stamp with Gold Embossing Powder on to Cherry Cobbler card stock and then cut with my Magnetic Platform and my Apothecary Accents Framelits. I punched a small hole in to the tag and attached with a third tiny bow using Cherry Cobbler Seam Binding Ribbon.
And while I was in a Gift Box making mood I made a mini gift box as the Door Prize for my recent party. This example is the smallest box on the Gift Box Punch Board- 1-3/4" square made from a 5" x 5" square of DSP.

I wrapped this box with a length of Blackberry Bliss Satin Stitched Ribbon and tied with a Autumn Wooden Element Leaf tied with Baker's Twine.
Don't forget to check out this week's new Weekly Deals by clicking on the picture below.

Thank you for popping by today and for sharing in my Gift Box creativity excitement. If you have any questions about today's project or the products I have used, please get in touch on poulton_sarah@yahoo.co.uk or 01983 609249. You can order online direct through my store by clicking the product links above or the pictures below. I also have availability in the next few months for your very own crafty party. Click on the Promotions tab above to see the exclusive hostess promotion running until October 31st.
Happy Crafting
-X-


How do you find the box punch board? I have to be honest, I haven't ordered it as yet as I am still trying to love my EPB lol
ReplyDeleteI love the EPB and the gift box one too ;0) So quick and easy. I always mess up the first couple of tries but once I get the gist I love using these boards. The gift box one works really well with the thicker Kraft card. But then I love all things SU so don't need much persuading to order anything *lol*
ReplyDelete