Showing posts with label White Christmas. Show all posts

Friday, 13 November 2015

OnStage Event Swaps from Stampin' Up! UK Demonstrator Sarah Poulton

Happy Friday crafters.

Today I wanted to share the swaps I created for this years Stampin' Up! Convention called On Stage. I adapted one of the projects from my August Christmas Craft Day to create these altered stamped dominoes. I've hung them using Silver Corded trim so that they can be adapted for either a Christmas tree decoration or a necklace.


I used the White Christmas stamp set to create my embellished dominoes (matching the tree stamped label background).

I stamped my images in StazOn and coloured with alcohol permanent markers. Once I added Dazzling Details and embellishment I glazed with Crystal Effects.


Here are my swap instructions on the reverse.


Thank you for popping by today. Please let me know if you have any questions about Stampin' Up! or our products. I would love to help. All items can be purchased online via my shop or get in touch directly and I can order them for you to be delivered direct to your door. I'd also love to Demo for you and your friends at a crafty party. As the hostess you earn lots of lovely freebies and you all get to make a fun crafty project too (no crafting experience necessary!)

 -XXX-


Built for Free Using: My Stampin Blog

Friday, 4 September 2015

A White Christmas Star Album Card from Stampin' Up! UK Demonstrator Sarah Poulton

Happy Friday! Do you have anything exciting (and crafty) lined up for your weekend? I have my Autumn Winter catalogue Open House tomorrow between 10.30am and 2.30pm. If you would are on the Isle of Wight and would like to find out more about Stampin' Up! and have a go at a lovely festive make and take, please pop along. I'd love to see you.

Today I have another of my Christmas Craft Day makes to share with you. We all created one of these star album/cards. To create my sample I used this tutorial I found via Pinterest. The tutorial shows how to make a star shaped mini album. However, by adapting the tutorial and by cutting a rectangular window in the smallest layer, I was able to create a multi-scene card instead.


This project would have to be for extra special recipients though as it is fairly cardstock/DSP heavy. To create the whole star I needed 6 sheets of A4 coloured cardstock (I used Whisper White and Garden Green) and 2 complete sheets of Designer Series Paper (I used Merry Moments).


Within each section of the star I created a little Christmasy scene. I used the White Christmas stamp set for ease. I stamped each piece of Whisper White with the trees and then used different elements for each window scene.


I used my ink pads and blender pens to colour each scene. I love the subtle, almost watercoloured, effect of colouring with the blenders. It isn't as bold as colouring directly with markers. I embellished various scenes with glitter and/or sequins depending on the picture I was creating. 

Each star section frame was embellished with Metallics Sequins and other stickers from my retired Stampin' Up! stash.


The whole project folds flat and can be decorated as a traditional card. The reindeer clip is to hold the star open when fully folded for decorative purposes. I love that is a special card or gift that can also become a festive decoration too.


Thank you for popping by today. Please let me know if you have any questions about Stampin' Up! or our products. I would love to help. All items can be purchased online via my shop or get in touch directly and I can order them for you to be delivered direct to your door. I'd also love to Demo for you and your friends at a crafty party. As the hostess you earn lots of lovely freebies and you all get to make a fun crafty project too (no crafting experience necessary!)

 -XXX-
Built for Free Using: My Stampin Blog

Thursday, 20 August 2015

Altered Christmas Domino Decorations from Stampin' Up! UK Demonstrator Sarah Poulton

Today I am sharing my favourite project from my Christmas Craft Days this year, altered stamped dominoes.  I love the simplicity of stamping on to dominoes to create either a personalised piece of jewellery or a hanging Christmas decoration.

I searched Amazon for the ideal dominoes. I searched all the local shops and Charity shops and only found black dominoes. So I used these white dominoes. They worked well although I bought several packets and some were more yellow than white. But I discovered you could whiten them with White Staz On and then stamp over the top once dried (as with the middle domino below).


I covered the reverse of each domino in a small section of patterned paper (for these I used Merry Moment DSP) and then adhered a flat back jewellery bail (I used these from Ebay) so that my class attendees could either thread a ribbon or chain to make it in to a decoration or necklace.

My ladies were then free to stamp their domino with whichever stamps they wanted. Most ladies chose to use the three above as their inspiration. I created this trio of festive animals using the White Christmas stamp set. I stamped the images in Black Staz On. Once dried you can use a permanent marker such as a Sharpie to colour the image (I used a Stampin' Up! Chalk Marker for the polar bear). It has to be colour fast as once you glaze the domino any non permanent colours will run.

Once coloured I covered the dominoes with Crystal Effects glaze and sprinkled a little Dazzling Diamonds in to the glaze to give a little festive sparkle.

I have to share a few more of the samples I made (I got a bit carried away and made about 20 sample dominoes). The 'fa la la' one was my absolute favourite and it uses a sadly retired stamp set from many years ago. To this day Season of Joy is still my favourite Stampin' Up! set and I was super happy to give it another outing. I don't think I could ever be parted with my Season of Joy.


To finish each domino I coated the edges with gold foiling pen (non SU) and left to dry. This gives it a nice festive finish. So simple and so fun to make. My ladies came up with so many different variations. It was lovely to see so much creativity.

Thank you for popping by today. I'll have another new Christmasy project for you tomorrow. Please let me know if you have any questions about Stampin' Up! or our products. I would love to help. All items can be purchased online via my shop or get in touch directly and I can order them for you to be delivered direct to your door. I'd also love to Demo for you and your friends at a crafty party. As the hostess you earn lots of lovely freebies and you all get to make a fun crafty project too (no crafting experience necessary!)

 -XXX-
Built for Free Using: My Stampin Blog

Monday, 22 September 2014

3D Night of Navy, Dazzling Diamonds and Silver 'White Christmas' Decorative Card using Stampin' Up! products


Well it is official. I am addicted to crafting!!! (like this is news!) This weekend my crafty Mum, sister and I popped up to Hampton Court Palace for Kirstie Allsop's Handmade Fair. It was fantastic!! So inspiring and hands on with opportunities to try lots of different crafts with classes and make and take sessions. I said before I went that I must NOT pick up any new crafts while I was there. I was only to enjoy the inspiration and not fall in love with anything new. Well do you think I stuck to that? No I did not!! I came home with two quilting kits, a pom pom maker and a new addiction to paper cutting having done an introductory class. On top of that I tried these artisan marshmallows and fell in love with the Rose and Cardamon flavour. This could prove pretty deadly for my Slimming World diet *lol*

So amid my pile of wool and pom poms I also managed to teach my monthly card class on Saturday too. It was a small but fun class this month. As I knew we were a smaller group I made this quite detailed card for us all to complete. I don't really know what to call it- a 3D window card is the best I could come up with. But the beauty of it is that it folds flat to fit in to a standard envelope.


I started with a half of A4 Whisper White card base. I then cut a piece of All is Calm DSP (10cm by 14.8cm) for the snowy background and a piece of Whisper White (10cm x 7cm). We stamped the tree image from the White Christmas stamp set on to the background piece, and then just the bottom of the image on to the white piece. I then cut around the hill contour of the image on the white piece and matched it to the base image and glued. I then stamped the bird and coloured the image. On a separate scrap of Whisper White I stamped the polar bear and then cut him out and added him to the main image. I used Dazzling Details to add glittery snow detail to the image (I set this aside to dry while I finished the rest of the card).

I used another half sheet of A4 cardstock, this time in Night of Navy, to create the top layer of the card.  I scored the card at 5.25cm, 10.5cm and 15.75cm. I then used my Circle Collection Framelits to cut the circle window centrally in the middle panel (with the score line through the centre). I decorated this panel with stamped silver snowflakes and a greeting taken from the Endless Wishes stamp set.  I embellished with Frosted Sequins.


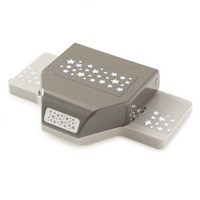
The final detail were the sparkly star strips down each side of the card. I used my gorgeous new Confetti Stars Punch to create the border which I then layered over a 3cm strip of Dazzling Diamonds Glimmer Paper.

So all in all it has been a very busy (and super crafty!) weekend- just the way I like it. I will definitely keep you up to date on the progress of my new crafty efforts. But quite where I'll find the time remains to be seen.

Thank you for popping by today and for sharing in my Autumn creating excitement. If you have any questions about today's project or the products I have used, please get in touch on poulton_sarah@yahoo.co.uk or 01983 609249. You can order online direct through my store by clicking the product links above or the pictures below. I also have availability in the next few months for your very own crafty party. Click on the Promotions tab above to see the exclusive hostess promotion running until October 31st.

And don't forget to check out this weeks Weekly Deals by clicking on the image below.


Happy Crafting
-X-

Saturday, 6 September 2014

Pinkies Autumn Winter Blog Hop: A Stampin' Up! White Christmas Countdown

Thank you for joining us on another Pinkies Blog Hop! We're showcasing lots of gorgeous projects using products from the new Stampin' Up!® Autumn/Winter Seasonal Catalogue. Simply use the buttons at the end of each post to keep hopping!

Welcome to my little Isle of Wight piece of the hop today. Thank you for joining me from Nina's blog. I hope you enjoyed the creative inspiration she shared.

My project was something I came up with for my August Christmas Craft Days. I wanted an extra little something special for my ladies to take away so came up with this Christmas Advent/Countdown Calendar.


The colour scheme is taken directly from the Nordic Noel Designer Series Paper which I used to cover the date blocks. I used Garden Green and Real Red cardstock for the holder and mini boxes.


The numbers were stamped using the Memorable Moments stamp set and punched using the Bracket Label Punch. I stamped the 'December' using the Skinny Mini Alphabet (my ladies chose to stamp this to say 'Days to Go' to make the holder in to an Advent Calendar counting down the days).


And finally I created this focal image using the fabulous new stamp set, White Christmas. I love the simplicity of lining everything up with the photopolymer stamps. No worrying about lining up the Merry Christmas banner between the trees and adding in the snowman and polar bear. It was such a fun image to create and cannot wait to have this out on display throughout December.


Thank you for joining me today. Please hop on over to Christa's to continue the blog hop inspiration.


Please let me know if you have any questions about this project. You can get in touch via email: poulton_sarah@yahoo.co.uk or 01983 609249. I'm more than happy to help. All Stampin' Up! products can be ordered through my online store by clicking the product links above or the pictures below. Or get in touch direct and I'll happily place an order for you.

Happy Crafting
-X-