Friday 31 October 2014

Halloween Chocolate filled Witch's Hat Treat Triangle Box from Stampin' Up! UK Demonstrator Sarah Poulton


Good morning and a very Happy Halloween to you. 

Here is the last of my Halloween projects for this year. I saw a similar project over on Julie Davison's blog. I loved the simplicity of creating a triangle box and then embellishing to create the witch's hat.

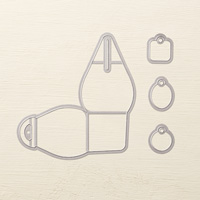
I used a Basic Black card base to create the hat and add on rim (following the pdf instructions on Julie's blog). I then used a scrap of Flower Pot Designer Series Paper left on my desk from  my Curvy Keepsake Pumpkins to create the band. The buckle was created with a scrap of Under the Tree Speciality DSP punched with my Curly Label Punch (any contrasting Halloweeny coloured card or paper would work for the band and buckle).

I did add a little extra embellishment with the little Itty Bitty Accent flower. I wanted my witch to be a friendly one so thought she'd wear flowers in her hat for some reason. I guess when you are making for a 2 year old who suffers with nightmares you don't want to create anything with too scary connotations ;0)

The hat is filled with these little chocolate pumpkins. That'll be Summer's special Friday night treat later.


Don't forget to check out this weeks Weekly Deals. Some great deals to be had.


Thanks for stopping by today. If you have any questions about today's project or the products I have used, please get in touch on poulton_sarah@yahoo.co.uk or 01983 609249. You can order online direct through my store by clicking the product links above or the pictures below. I also have availability in the next few months for your very own crafty party. 

Happy Crafting
-X-

Wednesday 29 October 2014

Halloween Witch Boot Treat Holder from Stampin' Up! UK Demonstrator Sarah Poulton


Good morning crafters.

As promised I am back with my second of this weeks Halloween inspired creations. I was looking for simple little treat holders to give to my 2 year old on Friday. Both she and my 7 month old have super cute monster costumes (matching of course) and I wanted something not too scary for her Trick or Treating basket.

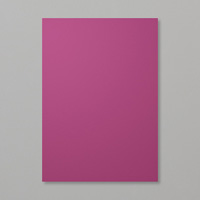
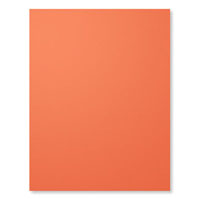
I found a similar Witch Boot designed by Karen Fontinelle and thought this would make a perfect holder for the chocolate brains I'd found in the supermarket. I used a cut down kitchen roll inner tube to create this. I cut 1/2" strips of Rich Razzleberry and Tangerine Tango cardstock and glued to the roll.

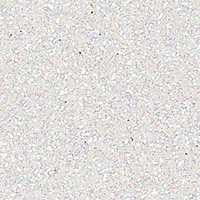
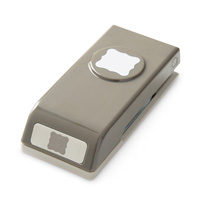
I wrapped a 1" strip of Basic Black cardstock around the base and folded back the corners to create the boot opening. The buckle was punched using my Petite Curly Label Punch from Dazzling Diamonds Glimmer Paper (I cut a small rectangle of Basic Black to create the buckle effect).


I used a bone folder to soften the fibres and roll the shaped boot base to give the pointy effect.

Thanks for stopping by today. Please come back on Friday for my final Halloween project (a hat to match our Witch's boot). If you have any questions about today's project or the products I have used, please get in touch on poulton_sarah@yahoo.co.uk or 01983 609249. You can order online direct through my store by clicking the product links above or the pictures below. I also have availability in the next few months for your very own crafty party. 

Happy Crafting
-X

Monday 27 October 2014

Holiday Home Halloween Greetings from Stampin' Up! UK Demonstrator Sarah Poulton


Good morning and welcome to a Stampin' Sarah! week of Halloween creativity and inspiration to celebrate the festivities. My girls are a bit young still for Trick or Treating, but we will be indulging in a little dressing up and popping around to visit family for a few little treats on Friday.

I spent a very lazy Sunday morning yesterday with a cuppa and a browse of Pinterest. It was while perusing my feed that I came across this card by Melissa Davies. I just fell in love with it so gave it my own Stampin' Sarah spin. And so was born my week of Halloween projects as I loved creating this so much. I will  be back on Wednesday and Friday to share some great Halloween treat ideas and fun gifts.

For this card I used a Pumpkin Pie card base (would you believe this colour is the reason I fell in love with Stampin' Up!? My very first order included a Pumpkin Pie ink pad and pack of card!). I then embossed a second Pumpkin Pie layer with the Filigree Frame Embossing Folder and mounted on to a layer of Rich Razzleberry.


To create the main focal image I started by sponging a 7.5cm square of Whisper White cardstock with Tangerine Tango and Rich Razzleberry ink. I then stamped the spider, bats and trees in Basic Black. I stamped the tall house from the Holiday Home stamp set on to Old Olive card and cut the image out. I stamped the ghost and pumpkin on to a Whisper White scrap and hand cut the little images.

Once all elements were stamped and cut I simply glued and mounted with dimensionals. The final touch was a quick hand cut banner and the Happy Halloween greeting stamped in Tangerine Tango.

Thanks for stopping by today. Please come back later in the week for more Halloween ideas. If you have any questions about today's project or the products I have used, please get in touch on poulton_sarah@yahoo.co.uk or 01983 609249. You can order online direct through my store by clicking the product links above or the pictures below. I also have availability in the next few months for your very own crafty party. Click on the Promotions tab above to see the exclusive hostess promotion running until October 31st.

Happy Crafting
-X

Thursday 23 October 2014

A very happy Holiday Home village using Stampin' Up! supplies


Good morning crafty friends.

Today's crafty share is a card we made at my October Card Class at the weekend. I always like to try and include a fancy fold card or a card of a different shape or style. I had seen several of these side step cards on Pinterest and loved the idea of creating a little Holiday Home village to celebrate the season.

For the Side Step card base I used this fab tutorial over on Splitcoast Stampers.

I used a Cherry Cobbler card base and then stamped my houses on Garden Green, Cherry Cobbler and Crumb Cake using White Craft Ink. I let the ink dry and then used the Homemade Holiday Framelits (included in the Holiday Home Bundle) to cut all my little houses.

I used strips of Dazzling Diamonds Glimmer Paper to create a snowy base to sandwich my houses to the card base. For the left hand panel I chose a snowy design from the All is Calm Speciality Papers and stamped the Santa Sleigh from the Holiday Home stamp set in Night of Navy. To finish the card I tied a length of Wild Wasabi Seam Binding Ribbon around the snowy bottom of card base.


If you have any questions about today's project or the products I have used, please get in touch on poulton_sarah@yahoo.co.uk or 01983 609249. You can order online direct through my store by clicking the product links above or the pictures below. I also have availability in the next few months for your very own crafty party. Click on the Promotions tab above to see the exclusive hostess promotion running until October 31st.

Happy Crafting
-X

Monday 20 October 2014

The Stampin' Up! UK Autumn Winter Supplement is here!


Good morning and welcome to a very exciting morning at Stampin' Sarah HQ. I am super excited to announce the launch of the Stampin' Up! Autumn Winter Supplement. This is the first time Stampin' Up! have launched an extra range of lovely festive products to compliment the fantastic Autumn Winter catalogue.

To see the full range of products click the picture above or click here for the online version of the supplement.

Now to introduce you to some of my favourite extras in the supplement.

The absolute star of the supplement is this Many Merry Stars Simply Created Kit. It is a ready made kit full of stars to create home decor, decorations, boxes, place settings. It includes all the die cut components to make lovely decorations such as this star and many more. My kit is currently winging its way to me from the SU warehouse in Germany. Fingers crossed it arrives today. I cannot wait to make all the lovely bits inside.


And my next product range to introduce you to is everything you need to create a perfect Christmas photo album/scrapbook. The Hello December Project Life range is perfect for all your Christmas memory keeping.

If you've been a follower of my blog for a while you will know I complete a daily album throughout December. I am going to mix it up a bit this year and do a fully Project Life album for my Journal Your Christmas album. So I have already stocked up on all the Hello December products and look forward to sharing all my creations with you throughout December.

I cannot wait to sit down and stamp and embellish the front cover of my album. That Crumb Cake cover is just crying out for some stampiness.


And here are the Hello December cards and accessory pack.


There are so many other lovely things in the supplement. I couldn't possibly squeeze them all in to this post. I cannot wait to receive all my bits to take some photos of the finished products for you. If you'd like a paper copy of the Supplement mailing to you, just drop me a line on poulton_sarah@yahoo.co.uk with your address details and I'll get one in the post to you asap.

If you have any questions about today's products, please get in touch on poulton_sarah@yahoo.co.uk or 01983 609249. You can order online direct through my store by clicking the product links above or the pictures below. I also have availability in the next few months for your very own crafty party. Click on the Promotions tab above to see the exclusive hostess promotion running until October 31st.

Happy Crafting
-X-
Friday 17 October 2014

Curvy Keepsake Die Halloween Pumpkins using Stampin' Up! Products


I have a super quick and easy seasonal share for you today. I made these little Curvy Keepsake Box Pumpkins for my team get together last week. I thought they were perfectly Autumnal and Halloweeny (and they came with a lovely little chocolatey pumpkin treat too!).

I have seen so many different creations with the Curvy Keepsake Die (just type Stampin' Up! Curvy Keepsake in to Pinterest for so many different ideas from animals to patterns to zombies!) and I wanted to have a go at one myself. I found this tutorial that showed me how to cut the box most economically. I used a card base of Tangerine Tango with the sides cut from a Tangerine Tango patterned paper from the Flower Pot Designer Series Paper pack. I added the label cut from Old Olive (this is part of the Curvy Keepsake Die set of framelit dies) and stamped the 'For You' from a sentiment in the For All Things stamp set.

I tied the label with Linen Thread and finished with three Candy Dots (I lost one along the way somewhere!).


I hope you have lots of lovely crafty plans for the weekend. I have my monthly card class tomorrow. I had a bit of a cake baking disaster trying to prep for tomorrow. It looked so lovely when I found the recipe online. Sadly I changed one element of the Cherry and White Chocolate Loaf and it appears to have been quite vital as the final result was lovely tasting but certainly not something I could present to my lovely crafty ladies tomorrow looks wise (and I have somehow managed to cover my computer in cake mixture too!). Thankfully my Mum has come to the rescue with some homemade mince pies instead *hooray*

If you have any questions about today's project or the products I have used, please get in touch on poulton_sarah@yahoo.co.uk or 01983 609249. You can order online direct through my store by clicking the product links above or the pictures below. I also have availability in the next few months for your very own crafty party. Click on the Promotions tab above to see the exclusive hostess promotion running until October 31st.

Happy Crafting
-X-
Wednesday 15 October 2014

It's Wednesday- Weekly Deals from Stampin' Up!


Happy Wednesday.

One of the most popular projects on my blog of recent times has been the Floral Frame Treat Flower above. I have had numerous emails and comments about the tutorial which you can find here. And the good news is that for one week only you can take advantage of our Weekly Deals and purchase the Floral Frames Framelit Dies for just £17.21. What a bargain! And if you made these in festive Cherry Cobbler and Old Olive with a spritz of Vanilla Shimmer they would make perfect little Christmas gifts or table decorations.


Please hop on over to my Online Store to see all our Weekly Deals or click on the picture below to find out more. The Thinlit Flip Card dies are a real bargain too for making quick and easy fancy fold cards. 


If you have any questions about today's project or the products I have used, please get in touch on poulton_sarah@yahoo.co.uk or 01983 609249. You can order online direct through my store by clicking the product links above or the pictures below. I also have availability in the next few months for your very own crafty party. Click on the Promotions tab above to see the exclusive hostess promotion running until October 31st.

Happy Crafting
-X-

Monday 13 October 2014

Lovely as a Tree meets Holiday Home Christmas Card using Stampin' Up! products

Good morning crafters.


Welcome to a new week (and another week closer to Christmas!). How was your weekend? I managed to get some craftiness in yesterday. I'm all prepped for upcoming crafty parties as well as getting some items made ready for a Christmas Fair I am doing next month. So all in all a very productive wet and rainy Isle of Wight weekend. 


While I was in my craft room I came across this card I made for last month's class but decided against using. With a bit of distance from the finished product it turns out I really like it.

Can you see the deliberate mistake with this card? I hadn't noticed the tree image inside until I photographed the card. Easy to rectify with a Stamp-A-Ma-Jig though.


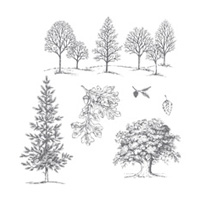
I created the peep through with my Window Frames Collection of Framelits and then stamped the trees from Lovely as a Tree in Soft Suede ink. I then stamped one of the houses from the Holiday Home stamp set and coloured with my Blendabilities.

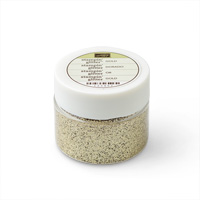
I finished with a touch of Gold Stampin' Glitter and the flying sleigh image from the Holiday Home stamp set. 


If you have any questions about today's project or the products I have used, please get in touch on poulton_sarah@yahoo.co.uk or 01983 609249. You can order online direct through my store by clicking the product links above or the pictures below. I also have availability in the next few months for your very own crafty party. Click on the Promotions tab above to see the exclusive hostess promotion running until October 31st.

Happy Crafting
-X